The Parcel Extraction—USA pretrained model can be used through the Classify Pixels Using Deep Learning tool available in the Image Analyst toolbox for inference or the Extract Features Using AI Models tool available in the GeoAI toolbox in ArcGIS Pro for inference and postprocessing of the inferred results. This model can also be fine-tuned using Train Deep Learning Model tool. See Fine-tune the model page for details on how to fine-tune this model.
Supported imagery
Orthorectified imagery (on-the-fly or persisted ortho products) with the following characteristics:
- Resolution—High-resolution (40-50 centimeters)
- Bands—Three bands (for example, red, green, and blue)
Note:
Off-nadir imagery or imagery with a high obliquity angle will not produce suitable results.
Extract parcels
To extract parcels from the imagery, complete the following steps:
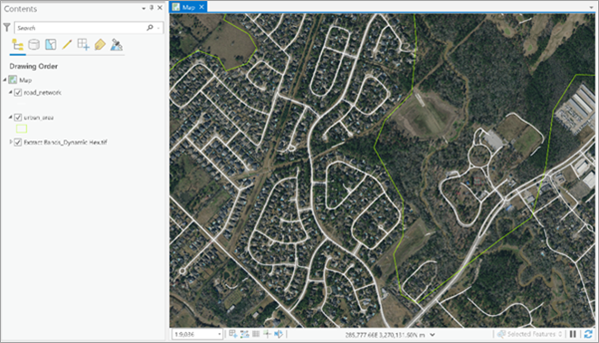
- Download the Parcel Extraction - USA model and add the imagery layer in ArcGIS Pro.
- Zoom to an area of interest.

- Click Tools on the Analysis tab.

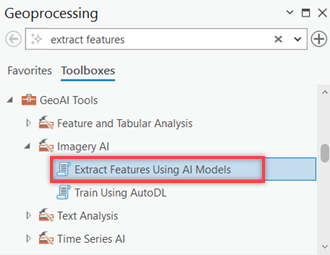
- Click the Toolboxes tab in the Geoprocessing pane, expand GeoAI Tools, and select the Extract Features Using AI Models tool under Imagery AI.

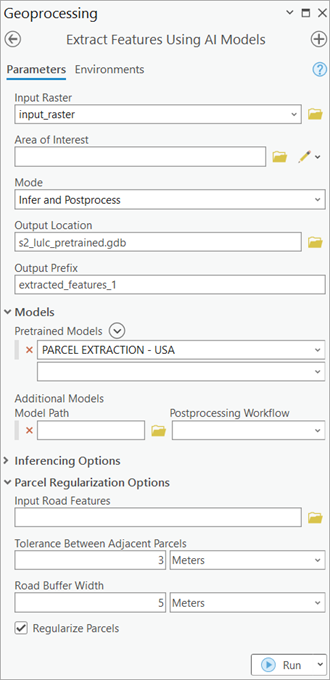
- On the Parameters tab, set the parameters as follows:
- For Input Raster, choose the input raster on which processing will be performed.
- Optionally, for Area of Interest, set the geographical extent that will be used to extract features.
Only features within the area of interest will be extracted.
- For Mode, select Infer and Postprocess.
- Optionally, for Output Location, select the file geodatabase where the outputs will be stored.
- For Output Prefix, set a prefix that will be added to the name of outputs and the name of the group layer.
- Set the Pretrained Models drop-down list to the PARCEL EXTRACTION - USA pretrained model.
- Set Parcel Regularization Options.
Parcel postprocessing is the default postprocessing option for this model. The options are as follows:
- Input Road Features—Select the roads polyline feature class.
- Tolerance Between Adjacent Parcels—Set the tolerance value. The default value is 3 meters.
- Road Buffer Width—Set the road width parameter. The default value is 5 meters.
- Regularize Parcels—Check the box to get regularized parcels.

- On the Environments tab, for Processor Type, set GPU ID to the GPU to be used.

- Click Run.
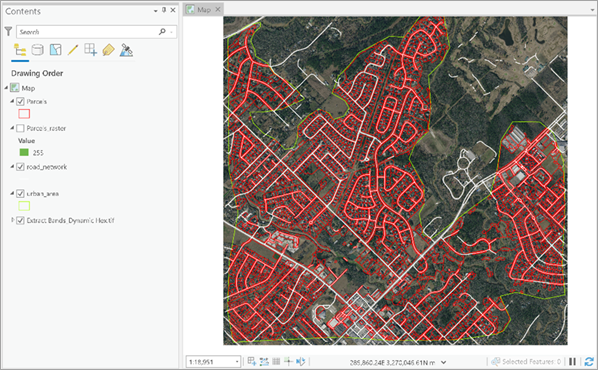
The output group layer with postprocessed parcels is added to the map.
