CityEngine offers the Measure Distance (M + D) tool  for measuring distances and the Measure Area and Path (M + A) tool
  for measuring areas and paths. You can activate the tools in the main toolbar or under Edit in the main menu.
A measurement is taken by clicking on a geometry in the scene to place the starting point. A second click places the end point. In case of the area measurement tool, multiple measurement points can be placed.
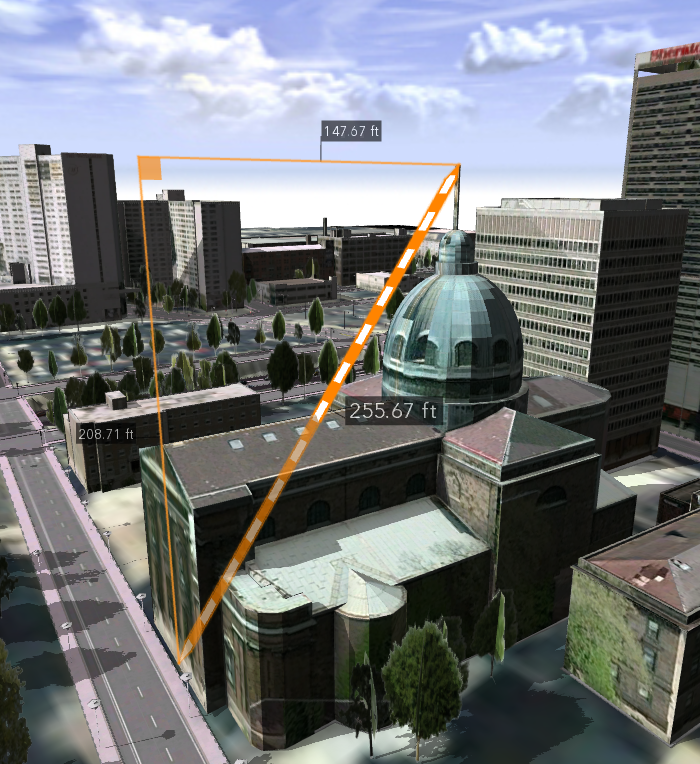
Measure distance
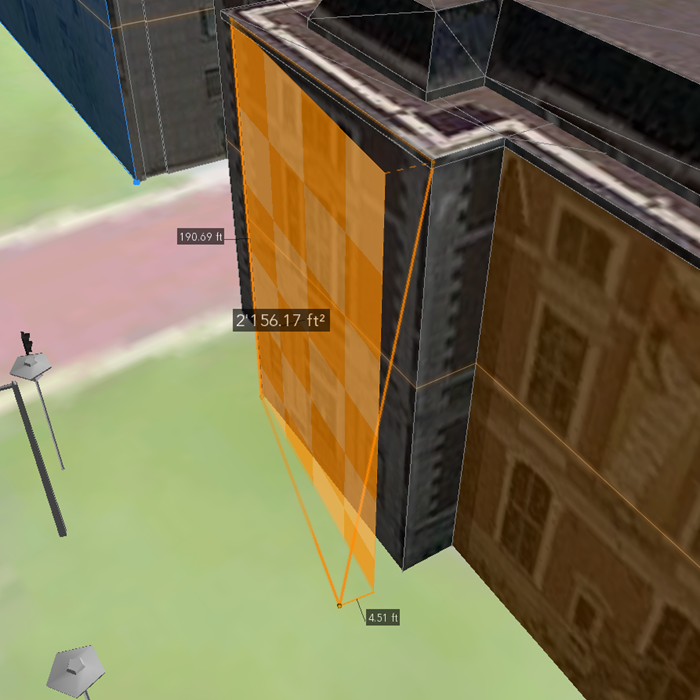
Measure area and path
With the Measure Area and Path (M + A) tool the measurement points are not
required to be part of the same plane. If this is the case the
points are projected onto a horizontal or vertical plane at an
average height or depth automatically.
Note:
- In this case, the displayed surface measure relates to the projected area, while the displayed distance always refers to the perimeter defined by the measurement points.
- The projected plane is positioned so that the distances to the measurement points is minimized. The measurement point with the largest distance to the plane is marked with a label displaying the distance.
Measure tool considerations
The following list describes the measure tool behavior:
- When placing measurement points the cursor snaps to vertices, edges and faces of all scene objects.
- Laser lines are displayed to project the current height on to the surrounding geometry.
- Only one measurement can be displayed in a scene at a time. When starting a new measurement, the current one disappears.
- Measurements disappear after switching to a different tool. This applies also for the navigation tools in the toolbar. Nevertheless the navigation shortcuts can be used between placing measurement points and after finishing a measurement.
- To reset the tool, press ESC
- To change the units go to Viewport > View Settings > View Coordinate System. The change takes effect with the next measurement you start.
- To adjust a completed measurement hover over the measurement points. Use the arrows to move the measurement point along the axis or use the yellow ball to move freely and use snapping.
- To copy-paste measurement results go to Window > Show Log. Double click the entry of your measurement to display the Detail View.
Specific for the Measure area and path tool:
- You can undo measurement points using Ctrl+Z.
Press Enter to immediately close the path.