To access the tutorials in CityEngine, click Help > Download Tutorials and Examples.... After choosing a tutorial or example, the project is automatically downloaded and added to your workspace.
Overview
The reporting feature augments CityEngine beyond the generation of geometry; it permits rule-based calculation and accumulation of a model's parameters. This means that you can not only visualize your urban master plans but also augment them by generating numerical reports (for example, Excel tables via .csv). As with 3D models, the reports can be generated with the CGA shape grammar. Either the report operations can be included in the corresponding rules that generate the geometry, or CGA shape grammar rule sets only for reporting can be created.
The report operation allows for the reporting of arbitrary properties of the building design or master plan.Consequently, the reporting is completely generic and customizable. For example, it can include numbers, such as gross floor areas (GFA), number of units, or land use mixes. In addition, by changing the urban design (that is, regenerating the models), the reports are updated automatically and instantaneously. This tutorial shows an example scenario where a master plan is built from scratch, and the reporting functionalities are used to analyze existing geospatial data.
Area reports
This section of the tutorial shows how to embed reporting actions in your CGA files and how resulting reports are generated.
Tutorial setup
Open the Tutorial_11_Reporting/scenes/reporting_01.cej scene.
The scene is based on the following street network, which was generated with CityEngine's street grow feature using a spiral pattern: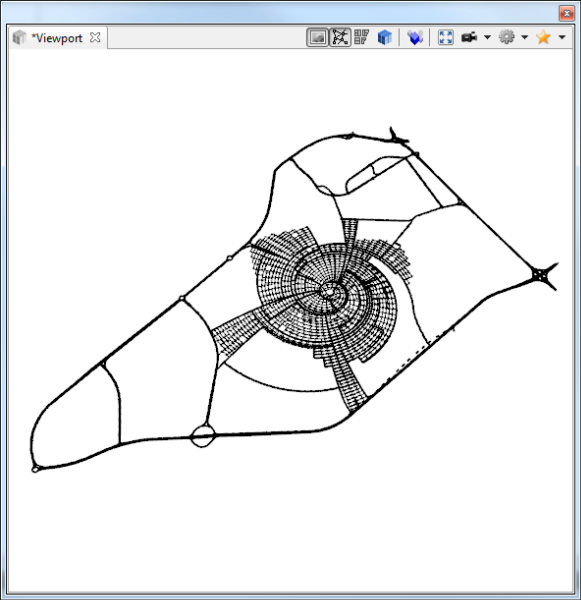
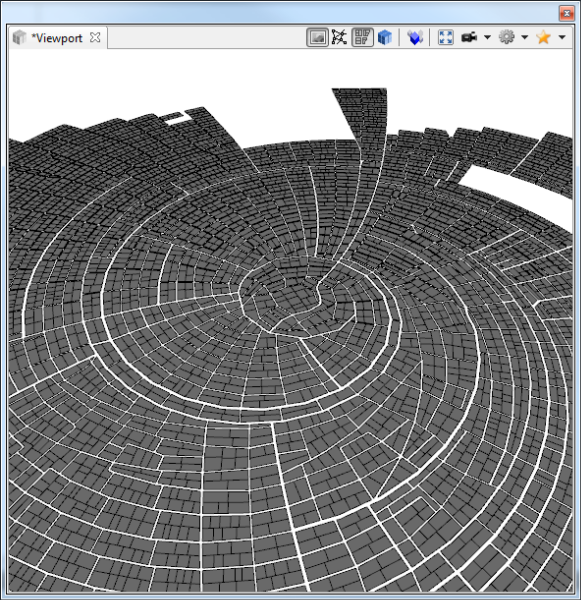
By applying simple extrusion rules with some green space percentage, a city model is generated.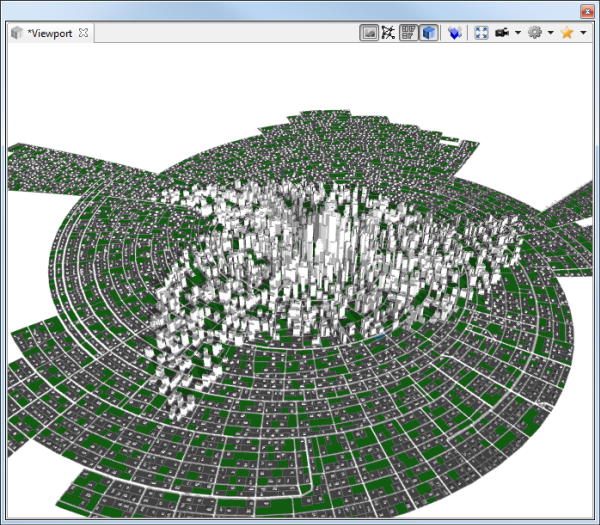
Greenspace and BuildUp area reports
- In the Navigator, double-click the rules/reporting_01.cga file to open the CGA editor to see the rules for your facade.
- Locate the Lot rule, and find the two lines with report() commands.
@StartRule Lot --> case p(greenspacePercentage/100): report("Area.Greenspace",geometry.area) GreenSpace else: report("Area.BuildUp",geometry.area) BuildingLot - Select some footprints, and generate models.
- Select an arbitrary set of generated models, and open the Reports pane in the Inspector.
- The N column displays the number of reports of the variables. The next column, %, displays that number in a percentage.
- The Sum column displays the sum of the reported values of each report variable. Again, the % column displays these results relative to each other in a percentage.
- The next three columns display additional statistic information about average, minimum, and maximum reported value per model.
Note:
By using a dot (.) as a separator in a reporting variable, the report output will display both variables as well as their combination (Area) summed up.
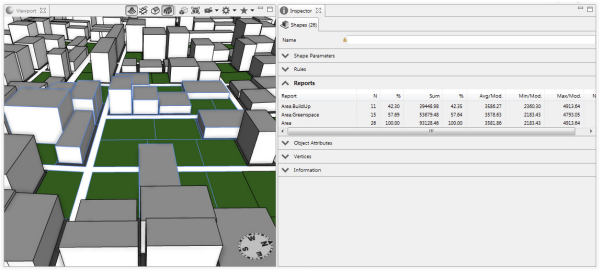
The Reports pane displays the two reported variables Area.BuildUp and Area.Greenspace, as well as the automatically added sum Area.
Note:
Report variables sharing the same group name before the dot character are automatically collected in a group variable.
Reports pane
The Reports pane displays reports depending on the current selection.
- Select a different set of generated models, and compare the report results in the Inspector.
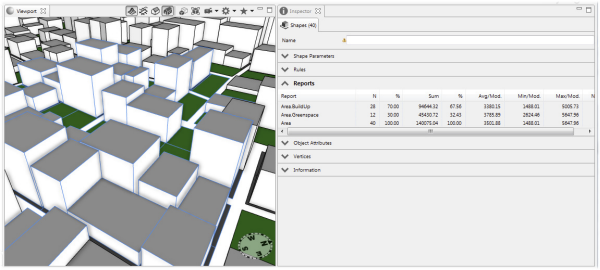
- Select a larger set of models.
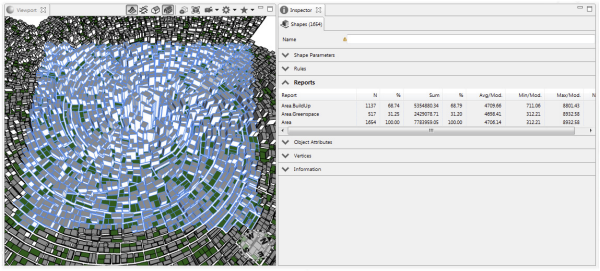
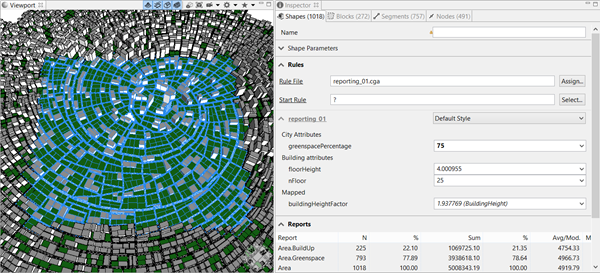
- In the rule parameters, change the value of greenspacePercentage to 75.
- Reselect the models to see the changes reflected in the reports.
Additional reports for GFA and FAR
This section shows how to add additional reports for GFA and FAR to the rule file.
Tutorial setup
- Open the Tutorial_11_Reporting/scenes/reporting_02.cej scene.
- In the Navigator, double-click the rules/reporting_02.cga file to open the CGA editor to see the rules for your facade.
Report Gross Floor Area (GFA) and Floor Area Ratio (FAR)
The Lot rule stores the total area of the lot to the plotArea attribute for the building. This information will be used later in the rules to calculate the Floor Area Ratio (FAR).
@Hidden
attr plotArea = 0 # used to calc FAR

@StartRule
Lot -->
	case p(greenspacePercentage):
		report("Area.Greenspace",geometry.area)
		GreenSpace
	else:
		set(plotArea, geometry.area)
		report("Area.BuildUp",geometry.area)
		BuildingLot
Compared to the rule file in the first section, the building mass is now split into floors. Find the FloorBottom rule. This rule (and the report() command) is called for every floor in a building, and the value of the reporting variable GFA is incrementally summed up, resulting in the sum of all floor areas.
The same is true for the FAR, where the area is divided by the plotArea stored earlier, resulting in the ratio of total floor area to plot area.
FloorBottom -->
		report("GFA",geometry.area)
report("FAR",geometry.area/plotArea)- Select a generated building, and locate the Reports pane in the Inspector.
- Select a generated building.
- Use the slider to change the distanceStreet parameter.
- Note how the values for FAR and GFA update to the new building model.

In addition to the reported values for area from the first section above, the new FAR and GFA report variables are displayed. The value 16 in the N column denotes the number of times the report variable has been called for the selection; in this case, it equals the number of floors. The Sum column displays the calculated FAR (15.16) and the GFA (60118.35).
Visualization modes
The rules/reporting_02.cga rule file offers the possibility to switch between different visualization modes for building models.
Select a building model, and change the vizMode rule parameter.
Report by usage type
You'll now extend reporting variables to different land-use types by floor.
- Open the Tutorial_11_Reporting/scenes/reporting_03.cej scene.
- In the Navigator, double-click the rules/reporting_03.cga file to open the CGA editor to see the rules for your facade.
Add land-use type
The following three attributes are added:
- mixedOffice globally controls the ratio of office space versus residential space in buildings with land-use type Mixed.
attr mixedOffice = 0.2 - The landuseType attribute for buildings can be individually set to Office, Residential or Mixed (Office and Residential). The initial value is set to randomly choose one land-use type equally.
@Range("Office","Mixed","Residential") attr landuseType = round-shape 33% : "Mixed" 33% : "Office" else : "Residential" - BaseFloors controls the number of retail floors on the buildings base. Residential buildings have no base floors, and Office and Mixed land-use types have one to three base floors chosen at random.
attr baseFloors =
	case landuseType == "Residential" : 0
	else : ceil(rand(0,3))
In the BuildingLot rule, you'll also add reports for Floor Height and Count.
BuildingLot -->
	report("Floor Height", floorHeight)
	report("Floor Count", nFloor)
	setback(distanceStreet)
		{ street.front: OpenSpace
		| remainder: Parcel }
Report by type
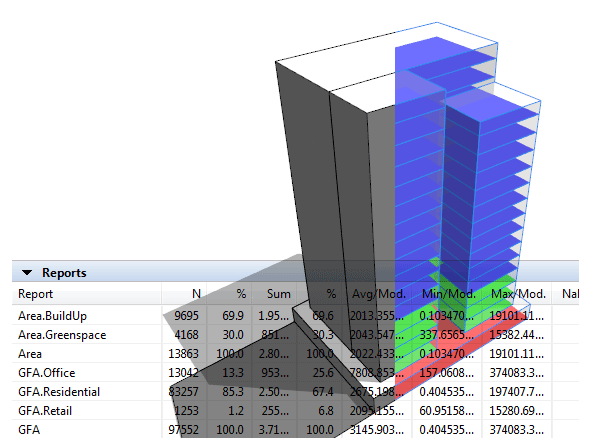
To be able to report floor areas by usage type, you'll extend the floorBottom rule with the argument type. Depending on this type, the area is reported to the corresponding usage type, denoted by GFA.usagetype. By using the prefix GFA, the report statistics will display the individual usage types as well as the summed up total GFA. Also, different colors are assigned depending on the usage type to visualize their function in the generated model (Red: Retail, Green: Office, Blue: Residential).
FloorBottom(type) -->
	case type == "Retail":
		report("GFA.Retail",geometry.area)
	 	report("FAR",geometry.area/plotArea)
	 	color("#ff4444") #Red
	 	FloorViz

	case type == "Office" || (type == "Mixed" && split.index < mixedOffice*split.total):
		report("GFA.Office",geometry.area)
	 	report("FAR",geometry.area/plotArea)
	 	color("#44ff44") #Green
	 	FloorViz

	else:
		report("GFA.Residential",geometry.area)
	 	report("FAR",geometry.area/plotArea)
	 	color("#4444ff") #Blue
	 	FloorViz
A special expression is used to differentiate between office and residential usage in the case of mixed land-use type. By using split.index (which equals the floor index in this context), it's ensured that office floors are generated up to the desired floor index, controlled by the mixedOffice attribute.
- Select and generate a building.
- Change thelanduseType parameter to get different representations of the building.
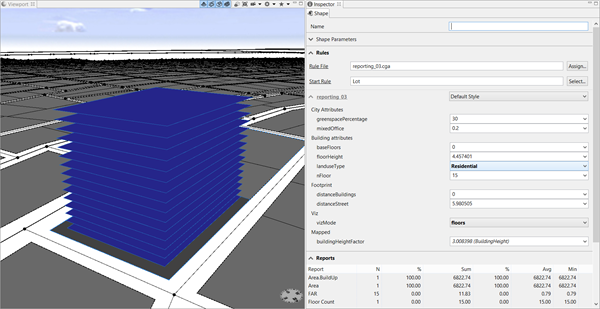
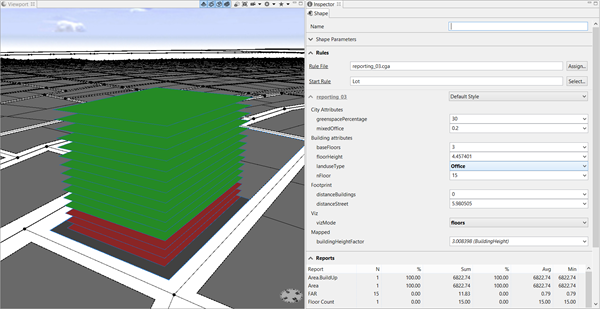
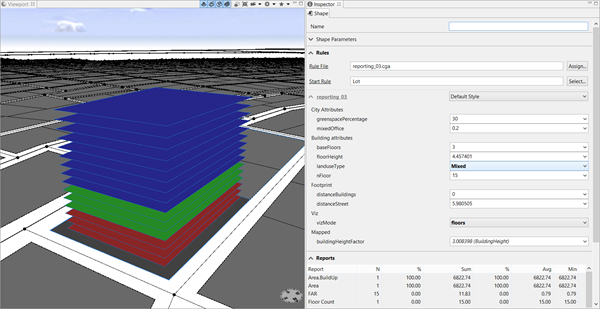
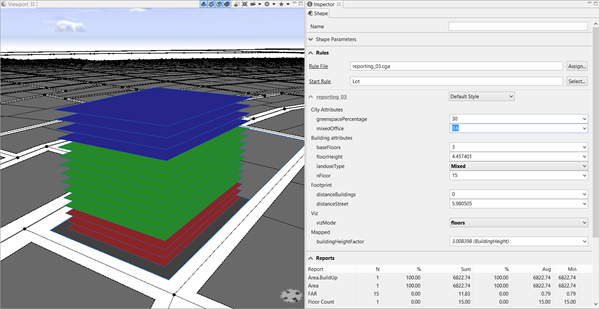
The new report variables are displayed in the Reports pane. In the following screen shot, GFA.Office reports six occurrences (six office floors) totaling 38777.78 m2 of office floor space, which is 46.15 percent of the total floor area.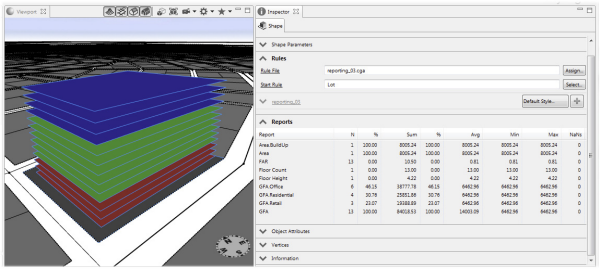
In the next section, you'll use a map layer to control land-use type distribution.
Reports controlled by land-use map layer
Rather than using a random distribution of land-use types, you'll now use a map layer to control the distribution.
Tutorial setup
Open the Tutorial_11_Reporting/scenes/reporting_04.cej scene.
Land-use type map layer
Map layers can be used to control the global appearance of a city. The reporting_04.cej scene already contains the map layer you're going to use. Unhide the Landuse Map layer in the Scene Editor to display it in the 3D viewport.
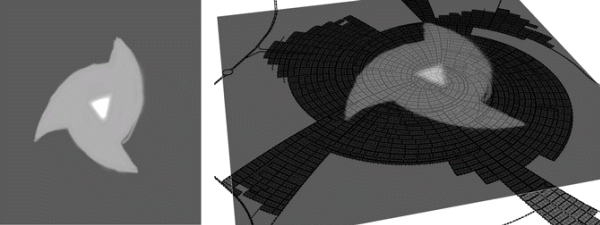
- In the Scene Editor, select the Landuse Map layer, and locate the Layer Attributes in the Inspector.
attr Office = brightness > 0.66 attr Mixed = !Office && brightness > 0.33 attr Residential = !Office && !Mixed attr landuseType = case Office : "Office" case Mixed : "Mixed" else : "Residential"" - Examine the corresponding Tutorial_11_Reporting/rules/reporting_04.cga rule file.
The first three attributes are controlled by the brightness of the map layer. For example, where the map is bright, Office evaluates to true.
As a result, the bright part in the center triggers office buildings, the middle part triggers buildings of mixed land use (retail, offices, and residential), and the outer part triggers residential buildings.
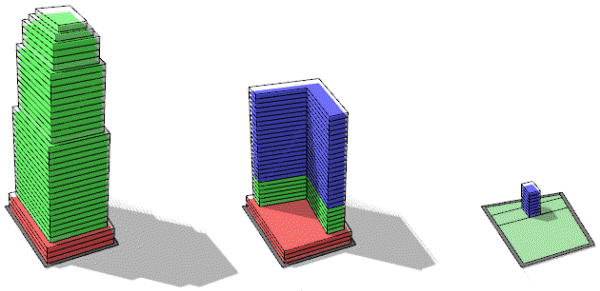
The reporting_04.cga rule file adds additional rules that create different mass models depending on the land-use type, including Mixed, Office, and Residential, as well as their successor rules.
City-wide reports
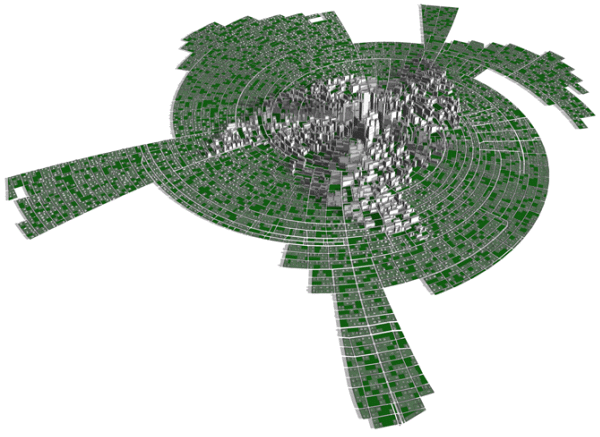
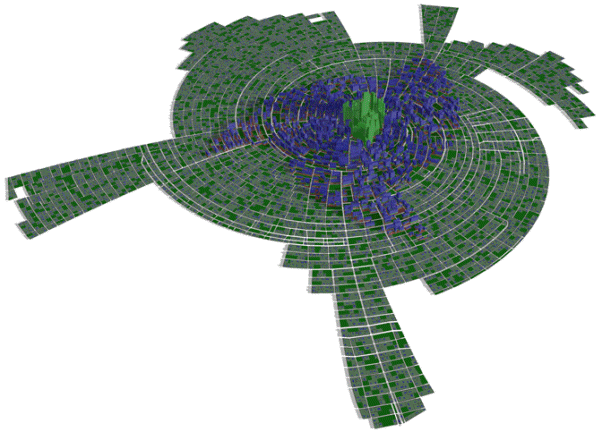
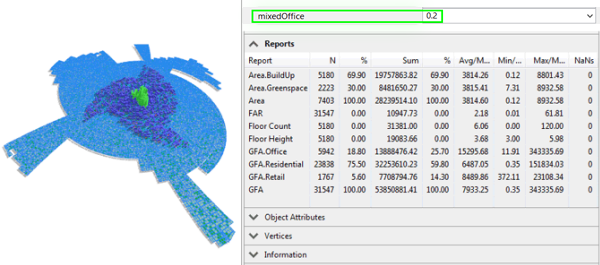
- Change the mixedOffice parameter from 0.2 to 0.3 (on all buildings), and generate the report.
- After generation has finished, reselect all buildings to see the updated reports.
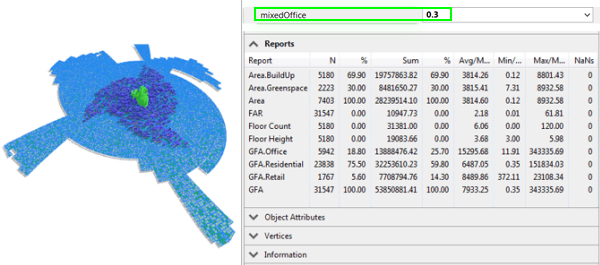
The office GFA increased from 18.8 percent to 23.9 percent for the entire city, while the residential area decreased from 75.5 percent to 70.4 percent.
Export the report data
To export the reported data, complete the following steps:
- Select the rows to export (Shift+click or Ctrl+click).
- Click Edit > Copy to copy the data into the clipboard (tab-separated).
- Paste it into Microsoft Excel or another application.

Another option for exporting report data is to generate a .csv file which breaks down the report by object and displays the corresponding value for each category. Some objects contain multiple floors and the .csv file will display the amount for that category for each building and floor.
- Click inside the export_report.py script file in the CGA editor.
- Click Python > Run Script to generate the .csv file.
- Double-click the data/reports.csv file to open the Excel spreadsheet.
