To access the tutorials in CityEngine, click Help > Download Tutorials and Examples.... After choosing a tutorial or example, the project is automatically downloaded and added to your workspace.
Prerequisites
- CityEngine 2016.1 or later
Introduction
This tutorial demonstrates a number of VFX-related workflows based on the Alembic exporter. We provide three examples: (1) Houdini with Mantra, (2) Maya with VRay and (3) Katana with RenderMan as downstream tools to process and render your Alembic city model. To complete this tutorial in full, you are required to install SideFX Houdini (Apprentice or higher), Autodesk Maya (2018) with VRay, The Foundry Katana (3.x) and Pixar RenderMan 22 for Katana. It is also possible to skip parts if one of these tools is not available.
This tutorial also requires Tutorial 9: Advanced shape grammar to be present in your CityEngine workspace.
Note:
These workflow tutorials are just one way of transferring models into DCC tools. You should consider adapting these examples to suit your custom pipeline. There is no guarantee that these examples contain the most efficient workflows for your specific pipeline.
Basic export into Houdini
In this section, you will export a single building as Alembic and map its material parameters to the Houdini Mantra renderer.
CityEngine
- Open vfx_workflows.cej, save it as vfx_workflows_part1.cej, and generate the default models with CityEngine.
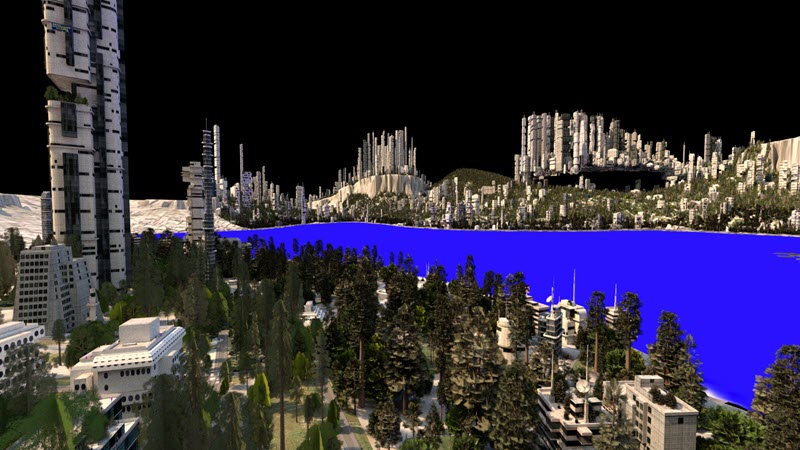
- Click the Skyline camera bookmark.
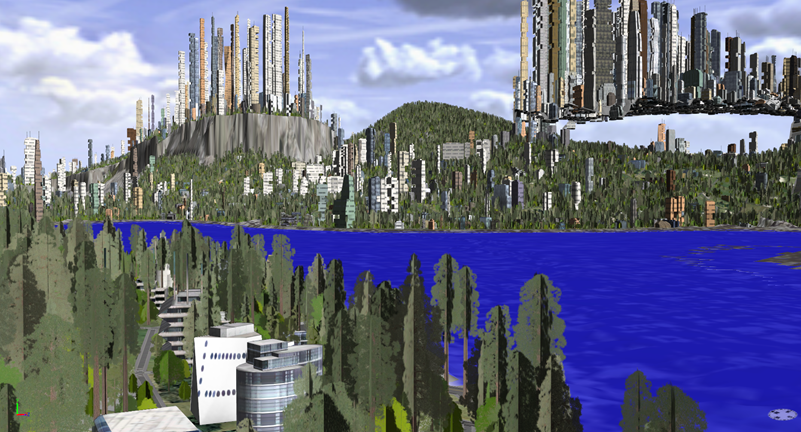
- Open the Waterfront camera bookmark to go to the tutorial building with the green tone.
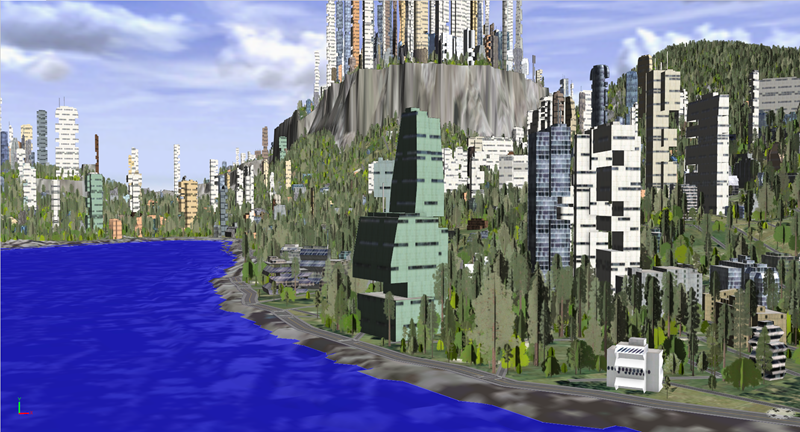
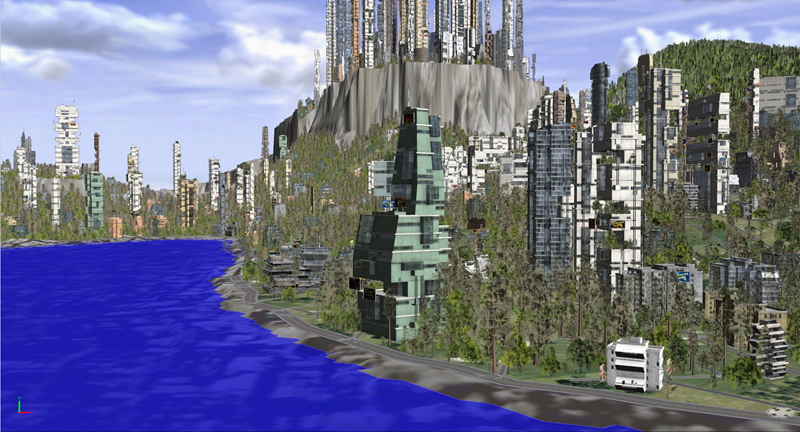
- Ramp up the level of detail to make it more compelling by setting the Level_of_Detail attribute to High in the Inspector.
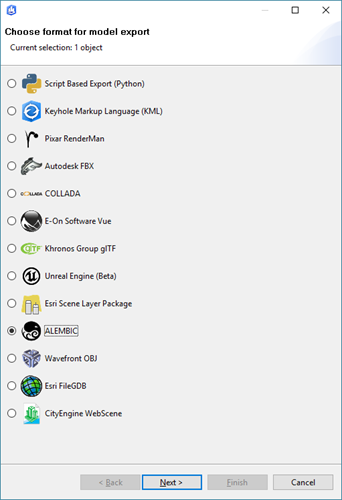
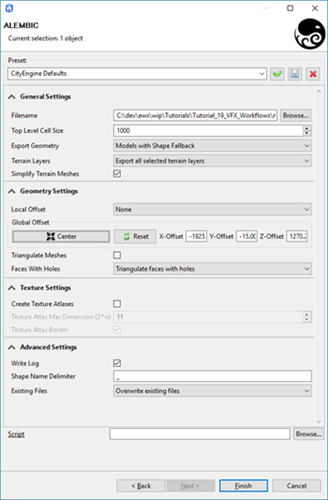
- Click File > Export Models... > Alembic to export the model to Alembic (use the default settings); for example, export the file to part1_waterfront_building.abc. You are exporting only a single building at this point to demonstrate how the whole pipeline works.
Note:
The CityEngine Alembic exporter will attach the material properties to the Alembic <polymesh>/.userProperties compound property node. For details about the layout of the Alembic node tree, refer to the diagram in Export ABC (Alembic).
Houdini
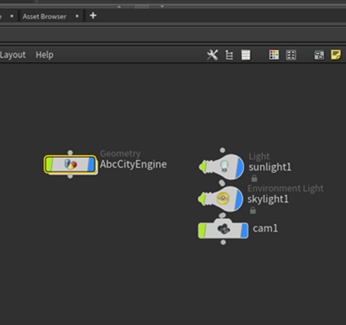
- Start Houdini and open the prepared Houdini scene in the tutorial project subdirectory, workflows/cityengine_alembic_workflow_v1.hipnc.
- Select the abc subnode inside the AbcCityEngine node and browse to the part1_waterfront_building.abc file.
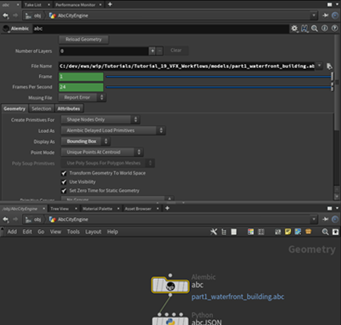
- In the Houdini viewport, type F to focus on the building model. You will see its bounding box representation.
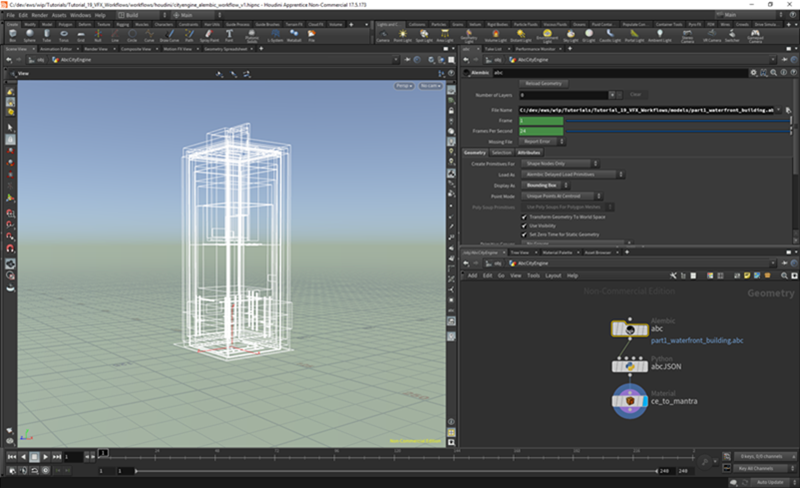
Note:
Houdini shows a bounding box for all Alembic leaf meshes. It does not yet show representations of intermediate Alembic nodes.
- In the abc parameter inspector, switch the Display As field between Full Geometry and Bounding Box.
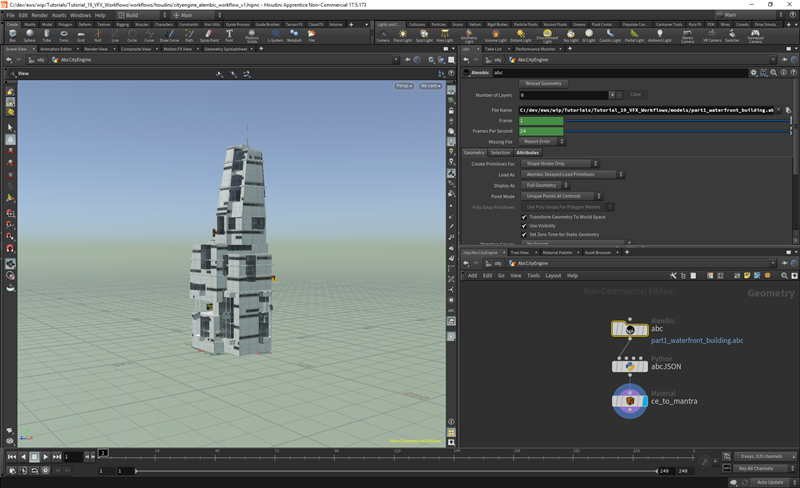
Note:
The Houdini scene is not set up to assign material attributes to the preview in the Houdini OpenGL viewport. This could be done similarly as the Mantra materials in step 7 below.
- In Render View, set the camera to Scene View 1 and click Render.
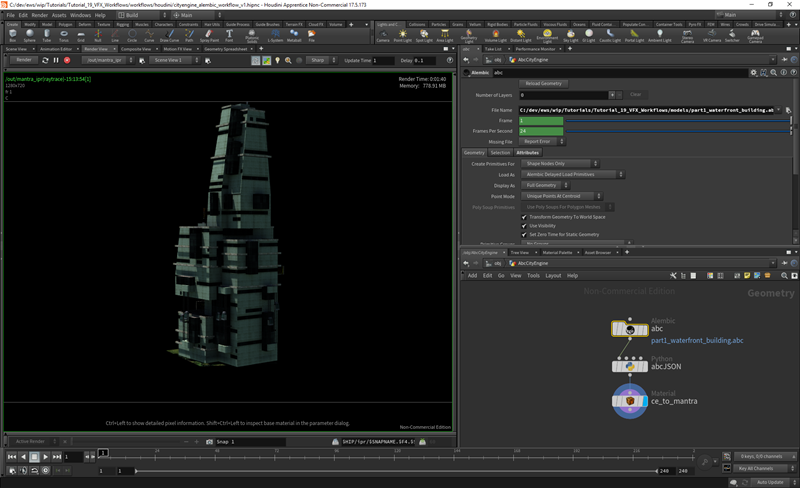
- Next you'll take a detailed look at the material assignment. Select the abc node, go to the Geometry Spreadsheet tab, and filter for "Primitives" in the primitive mode. Houdini displays the CityEngine material attributes in a JSON structure in the abc_userProperties column.

- Keep the Geometry Spreadsheet tab open and select the abcJSON node. It contains a bit of Python code to separate the JSON block into individual primitive attributes.

Finally, the ce_to_mantra nodes use the Houdini material override feature to override the base material settings with primitive attributes. Feel free to customize this and map more of the CityEngine material properties to Mantra materials.
Work with instances in Houdini
This section will demonstrate instancing and postexport editing of a scene in Houdini.
- In CityEngine, open vfx_workflows.cej again and save it as vfx_workflows_part2.cej.
- Click the Parthenon Gardens camera bookmark and turn off the terrain layer visibility.
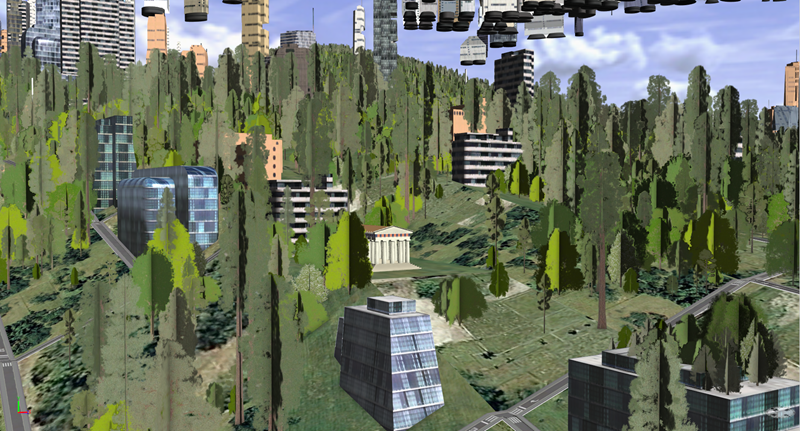
Notice how the same tree models and also the temple parts (for example, the columns) are reused a number of times.
- Using the top view, select the temple and a few trees around it and export the file to part2_parthenon_gardens.abc.
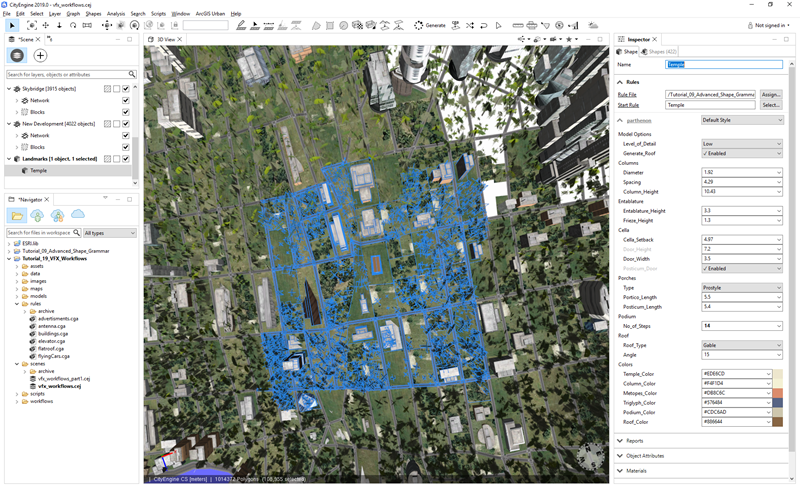
- In Houdini, save a copy of the Houdini tutorial scene and load the part2_parthenon_gardens.abc file.
- Select the Alembic node, and press F to focus the camera on the new content. You see the bounding box representation of the exported scene.
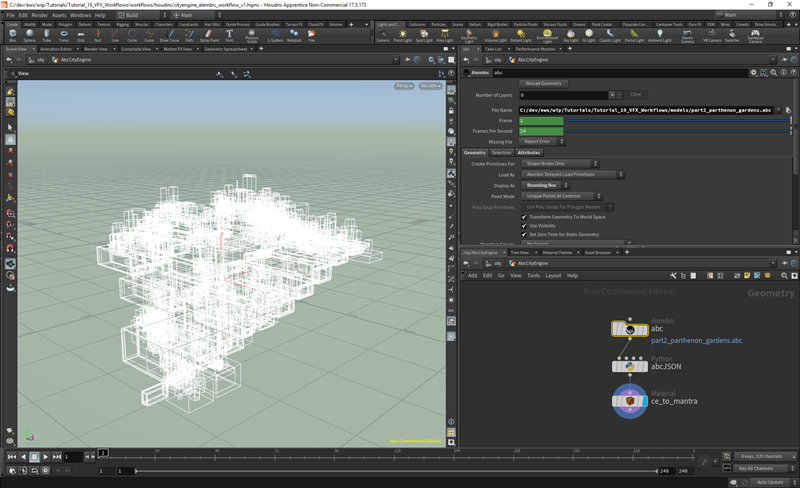
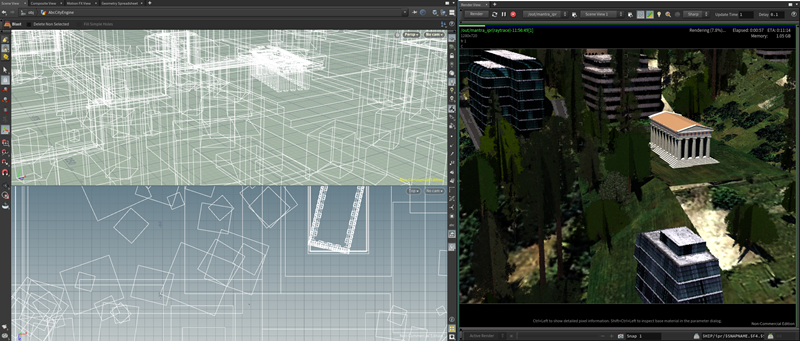
You can see how each asset instance is visible as an individual bounding box and how the Alembic exporter preserved the instance information of the trees. This allows you to do basic editing on each instance.
- If you do not like the tree blocking the view of the temple in the camera setup, you can adjust the camera and move the render tab into its own window and start the render. See the full image.
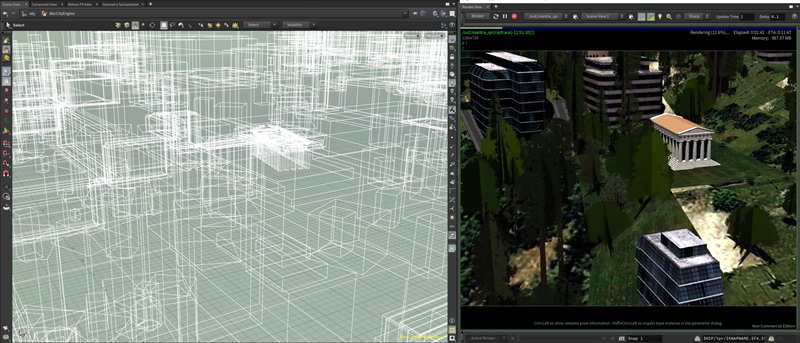
- Set up a split viewport with a top view to select the trees you want to remove.
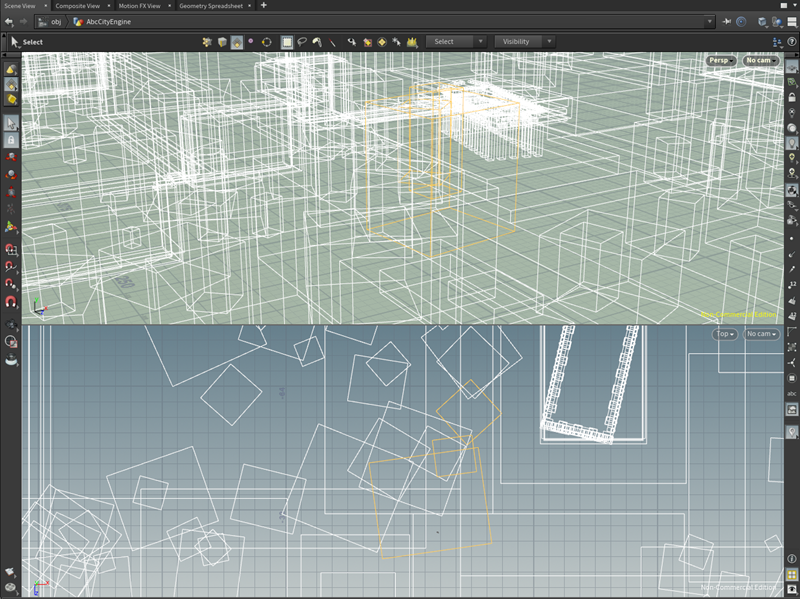
- Then move them out of the way. See the full image.
Import into Maya and render with VRay
This section demonstrates how to populate the materials of a VRayProxy at render time from the source Alembic file using a VRay posttranslation Python script.
Beta:
This part is still in beta as there is an unsolved problem regarding texture coordinates.
- Open vfx_workflows.cej and save it as vfx_workflows_part3.cej.
- Export a section of the waterfront to Alembic by using the Waterfront camera bookmark.
Alternatively, you can also use the provided Maya scene and set the path to the Alembic file in the "mesh" VRay proxy node (make sure to adjust the path in the post-translation script in any case).
- In Maya, import the Alembic file as VRayProxy by clicking Create > VRay > Import proxy....
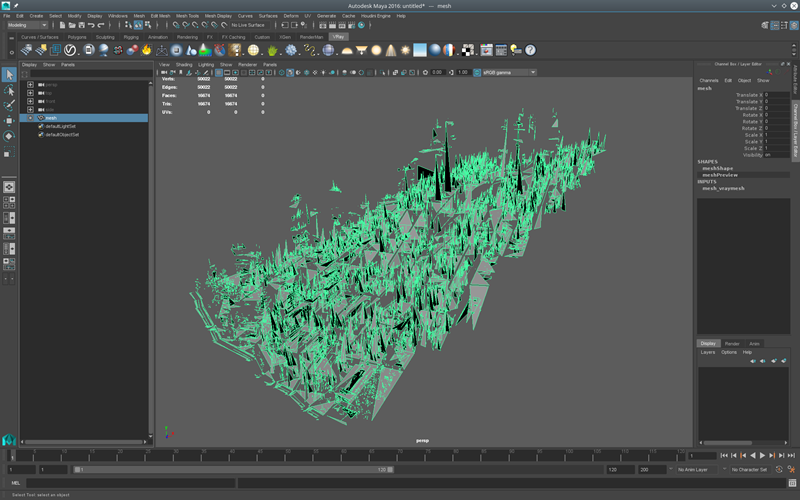
- In the outliner, select the new mesh object and press F to focus it. You will see an approximated version of the final model (VRay basically randomly removes triangles until it meets its preview triangle limit).
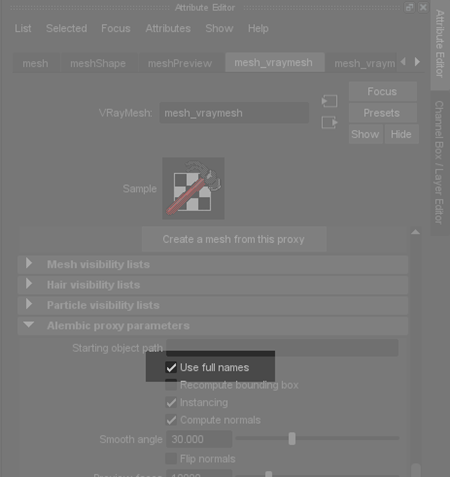
- Check the Use full names option in the attribute editor for mesh_vraymesh.
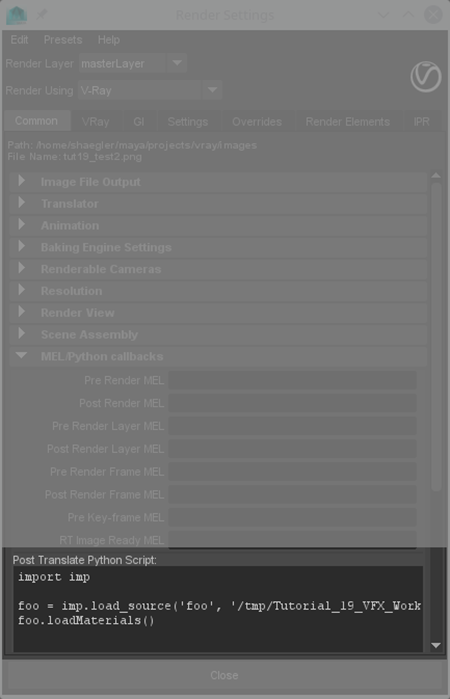
- Copy and paste the Python snippet in Tutorial_19_VFX_Workflows/workflows/maya_vray/vray_post_translate_py_snippet.txt into the VRay render settings Post Translation Python Script field. Make sure to adapt the path to the location of the Tutorial 19: VFX Alembic workflow CityEngine project.
- Click render (with VRay).
Final render of the whole scene. See the full image.
Level-of-Detail with Katana and RenderMan
This part of the tutorial requires an installation of Katana 3.x and RenderMan for Katana 22 or later.
CityEngine: Control level of detail with an attribute layer
It is the goal of this tutorial section to create a high-quality rendering of the Skyline camera bookmark view in RenderMan for Katana.
- In CityEngine, open vfx_workflows.cej again and save it as vfx_workflows_part4.cej.
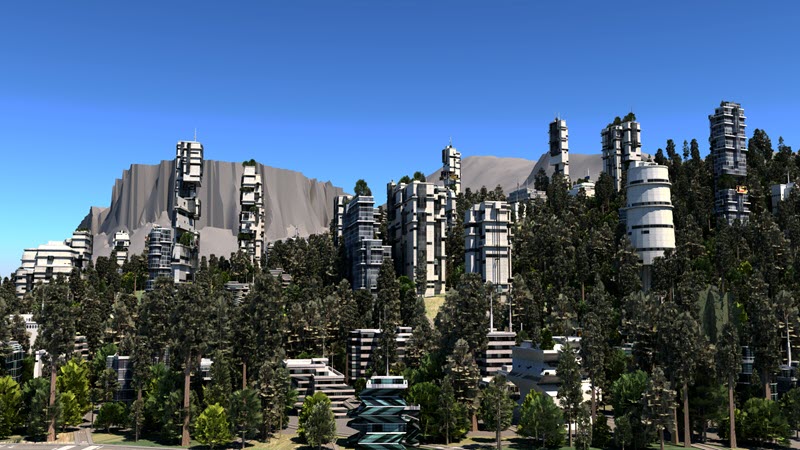
- Select the Skyline camera bookmark and maximize the viewport by pressing Spacebar. Assuming a wide-angle screen, your result will be similar to the image below.
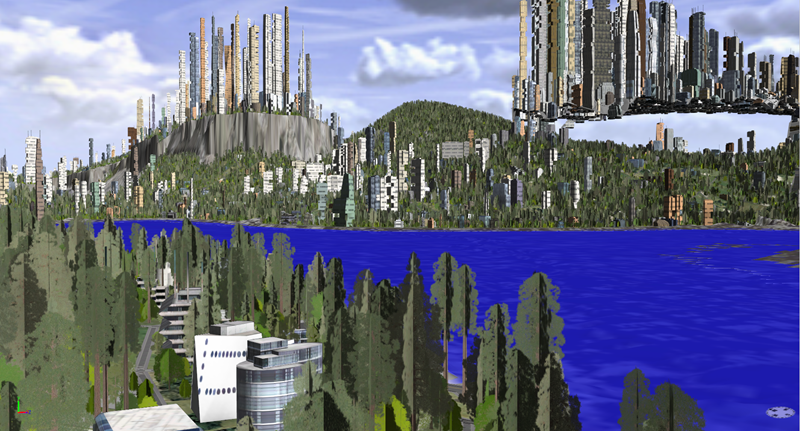
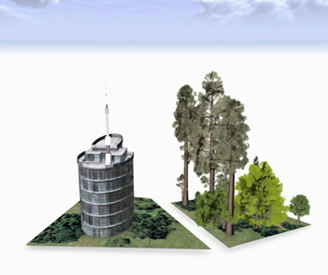
- The CGA rules used in this tutorial are inherited from the Example NYC2259 2015.0 and contain a level of detail (LOD) switch; in other words, there is more detail contained in the rules than generated by default. You can try this out by selecting a few shapes in the foreground and setting the level-of-detail attribute to High.
level-of-detail - Low level-of-detail - High 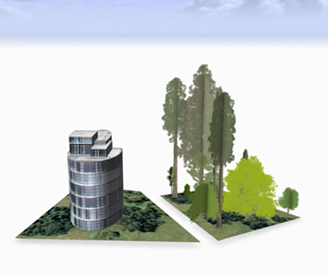
- Instead of exporting all models with a high LOD, you can be a bit smarter and control the level-of-detail attribute with a map. In the scene editor, go to the Maps layer group and change the visibility of the Level of Detail layer. Zoom out a bit to see the LOD more clearly.
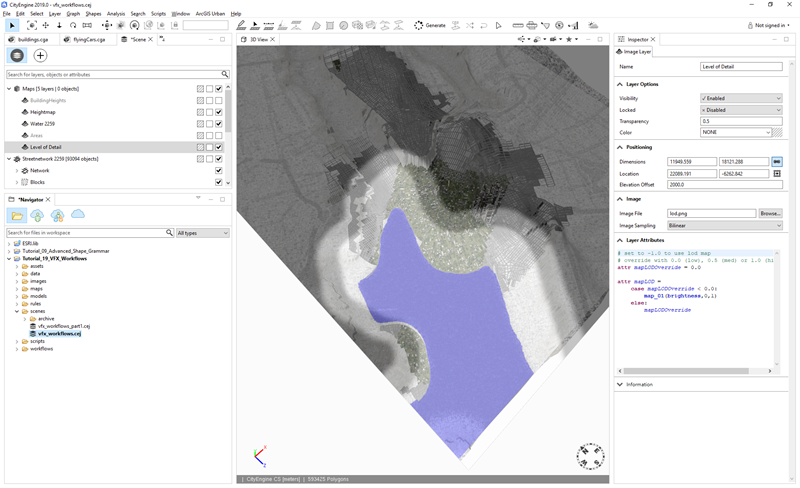
The gray level controls the level-of-detail attribute as follows:
Brightness level level-of-detail Plants representation 0 .. 0.3
Low
Fan
0.3 .. 0.6
Medium
Fan
0.6 .. 1.0
High
Realistic
- The Level of Detail layer contains a mapLODOverride attribute to enable or disable the influence of the map. Set mapLODOverride to -1.0 to activate the map for all shapes.
- To test the LOD map, select all shapes of the New Development layer and click Generate or press Ctrl+G. You will be able to see the models in the map in terms of LOD.
Note:
The visibility of the Level of Detail layer does not affect its influence on the level-of-detail attribute. You can hide the Level of Detail layer again to see the other layers better.
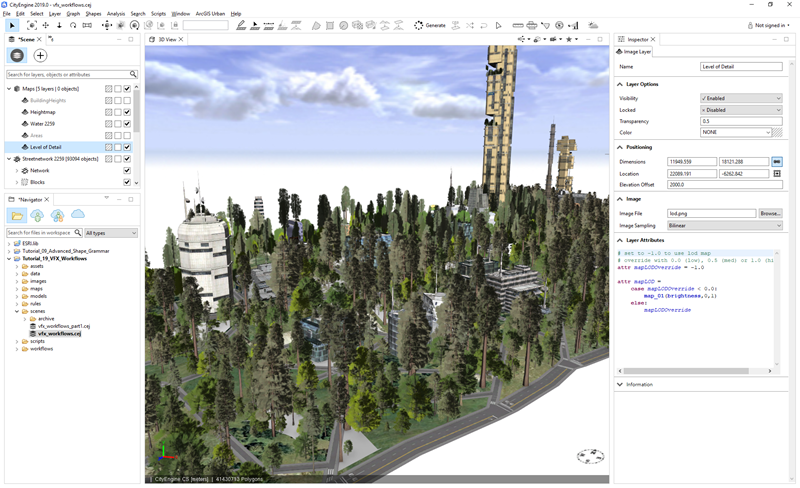
Note:
An important aspect of working with high LODs is not to overuse the Generate button. Generating too much geometry in the viewport will eventually slow CityEngine to a stop. The CityEngine exporter will generate (or regenerate) any selected shapes or models regardless of whether those have already been generated in the viewport. So the recommended workflow is to pregenerate a few selected parts of the model, and then select the required scene objects and export all.
- Export all your models to Alembic. Select the layers, click File > Export Models..., and save the file as part4_vfx_workflow.abc. This will take a couple of minutes to produce an approximately 1 GB Alembic file with approximately 41 Mio polygons.
- Run the provided Python script Tutorial_19_VFX_Workflows/scripts/textureConversion.py to convert the exported textures to a RenderMan-compatible texture formats (the script defaults to EXR). Open the script and press F9 to run it, it prints its progress in the Python console of CityEngine.
Katana: Render the scene in Katana with RenderMan
- In Katana, open the example project file Tutorial_19_VFX_Workflows/workflows/katana/ ce_abc_workflow_v2.katana.
- The node graph consists of these main building blocks:
- Alembic input: The CityEngine_Model is of type Alembic_In_Prman and reads the exported Alembic file. The Store_AbcRoot node is used to remember the Alembic file name in the scene graph.
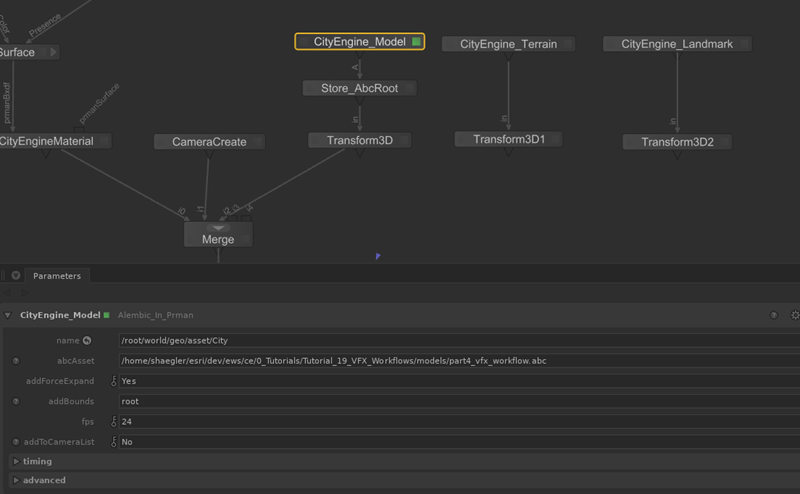
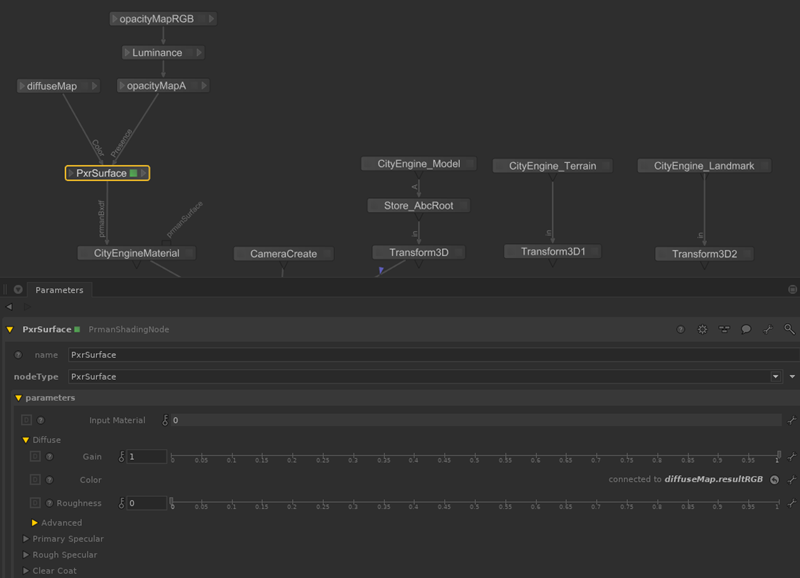
- Shading network: Here is a Katana NetworkMaterial node with a RenderMan PxrSurface shader. The shader reads two texture maps ( diffuseMap and opacityMap) and mixes in a diffuse color. Below, you will control these three material attributes with values from the CityEngine Alembic file.
- The OpScript node OpScript_MapCityEngineMaterialProperites is using a Lua script to connect the Alembic user properties (in other words, CityEngine materials) with the RenderMan shading network attributes.
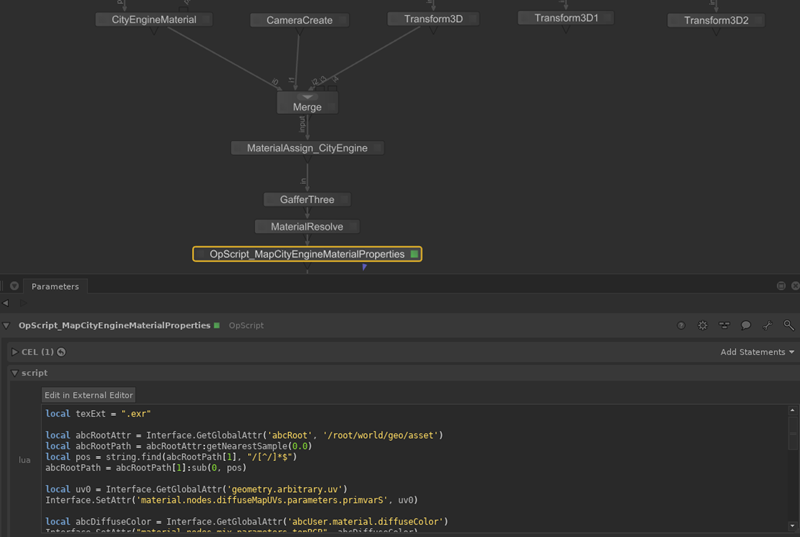
- Alembic input: The CityEngine_Model is of type Alembic_In_Prman and reads the exported Alembic file. The Store_AbcRoot node is used to remember the Alembic file name in the scene graph.
- Next, set up the Alembic file from Basic export into Houdini:
- In the node graph, select the CityEngine_Model and set abcAsset to the part1_waterfront_building.abc file.
- In the scene graph, expand the graph to /root/world/geo/asset/CityEngineRoot and select CityEngineRoot.
- In the viewer, click Look through camera > .../camera. Press F. You see the bounding box of the CityEngine model (in other words, the top level of the Alembic file).
- Press P to render the scene. You see the RenderMan output in the monitor.
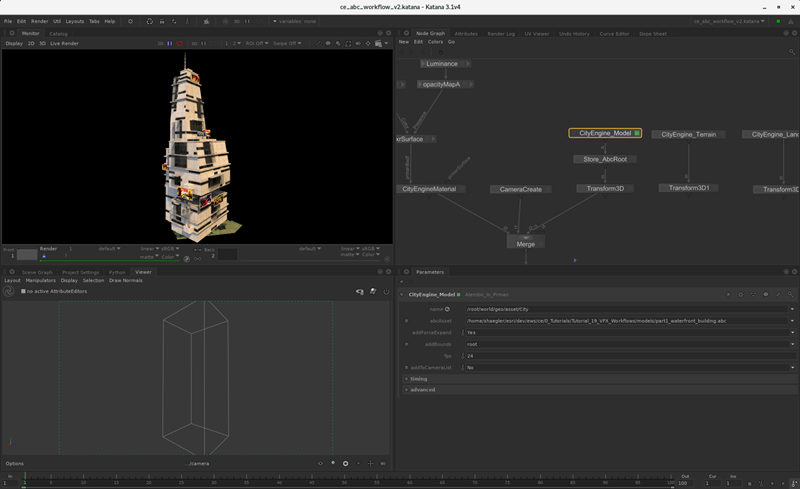
- In the scene graph, expand the tree below CityEngineRoot and observe how the individual building components become visible in the viewer. This is the main workhorse to keep the Katana viewer interactive for heavy scenes.
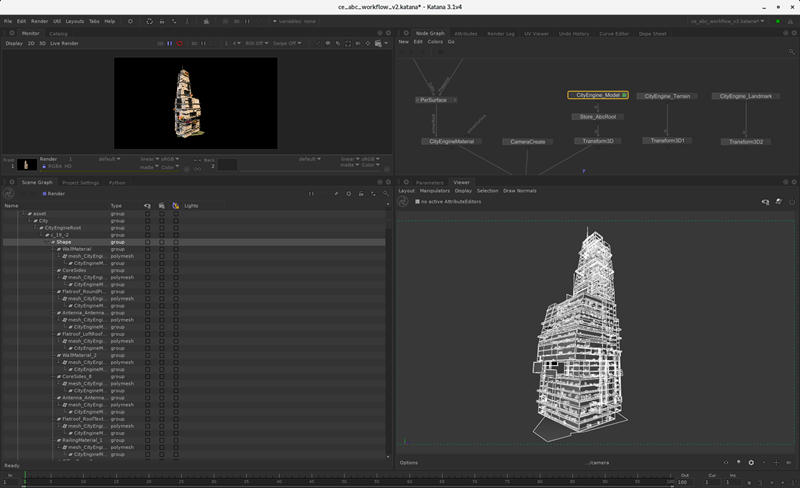
- Now it is time to render the whole scene. Repeat the previous step with the previously exported part4_lod_control.abc file. Make sure you expand the scene graph to only one level below CityEngineRoot. After a few minutes' loading time, you should see the bounding boxes of the grid level.
- In CityEngine, export the heightmap and water layers to part4_terrain.abc, assign it in the node CityEngine_Terrain, and connect the node to the merge node. Optionally, you can also export the temple landmark to Alembic and connect it with the prepared "CityEngine_Landmark" import node.
- Repeat step 3 with the previously exported part4_lod_control.abc file. Make sure you expand the scene graph to only one level below City/CityEngineRoot. You will see the following bounding boxes of the grid level:
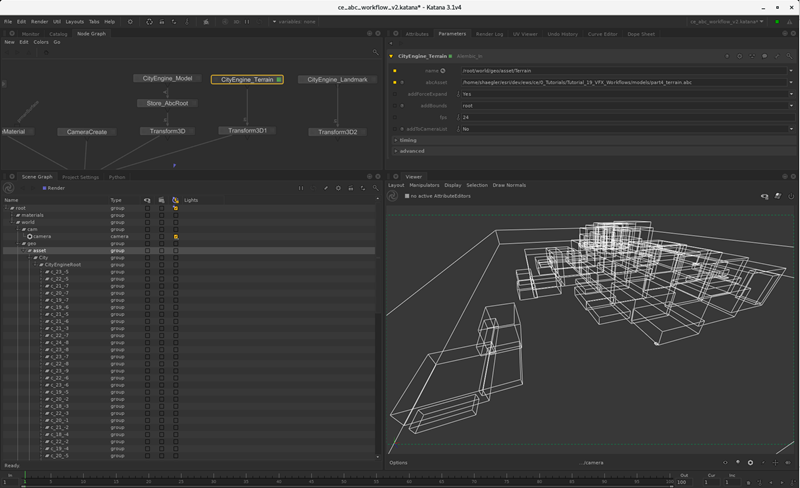
- Click Render and allow RenderMan to run. See the full image.
