To access the tutorials in CityEngine, click Help > Download Tutorials and Examples.... After choosing a tutorial or example, the project is automatically downloaded and added to your workspace.
Set up a new project
Create a new project and scene
First, you'll create a new CityEngine project.
- Click File > New > CityEngine > CityEngine project.
The Select a wizard dialog box appears.
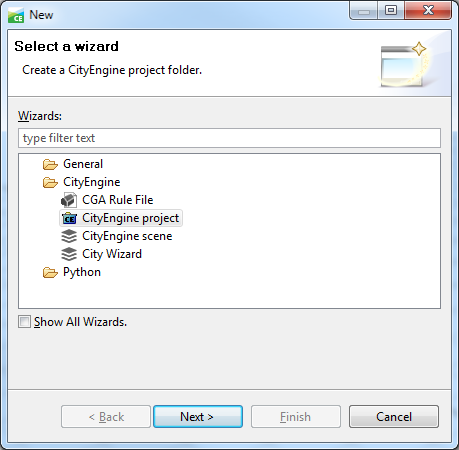
- Click Next, name your project MyFirstCity, and click Finish.
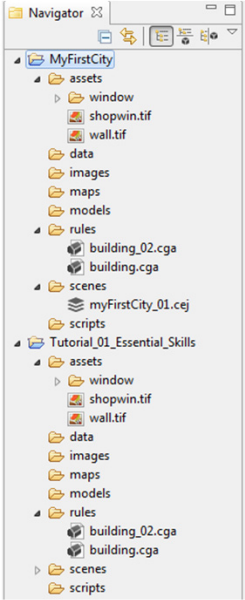
A new project is created and appears in the Navigator (by default, located in the upper left corner of the CityEngine window). The default folders that store your project data, such as assets, rules, and scenes, are already present, though empty.
Next, you'll create a new scene.
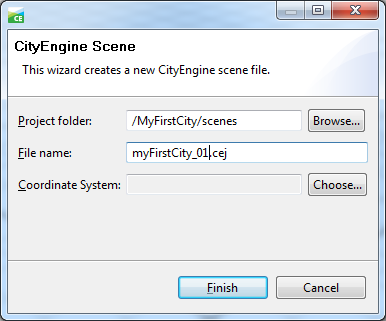
- Click File > New > CityEngine > CityEngine scene.
The CityEngine Scene dialog box appears. Name your scene myFirstCity_01.cej.
Copy rules and assets
Later in this tutorial, you'll need rule files and assets for the generation of the building models. You copy these files from the main Tutorial 1: Essential Skills project, which you should already have linked to your workspace.
Now you'll copy all necessary files from the downloaded Tutorial 1 project into your new project.
- Use copy paste (Windows and Linux: Ctrl-C and Ctrl-V/Mac OS: Command-C and Command -V) on your keyboard or from the right mouse button context menu.
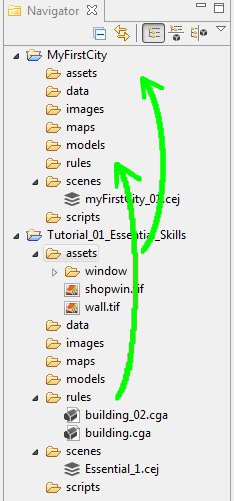
- Copy the contents of both the assets and rules folders.
Your Navigator should look like the following screen shot:
First street layout
Random street grow
After the new project has been set up, you’re ready to start creating the first street layout in your newly created scene.
First, you'll create a street network.
- Click the viewport to make it the active window.
- Click Graph > Grow Streets.
The Grow Streets dialog box appears.
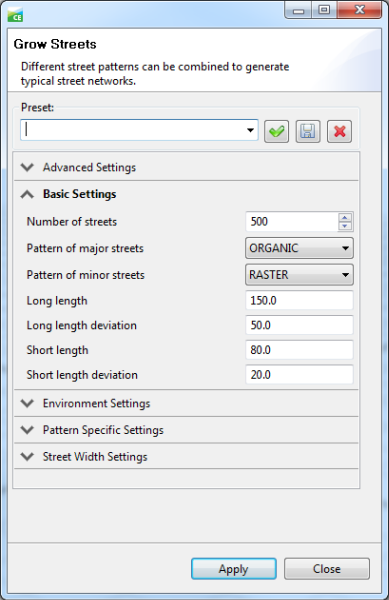
- Keep the default settings for now.
- Click Apply, and close the dialog box.
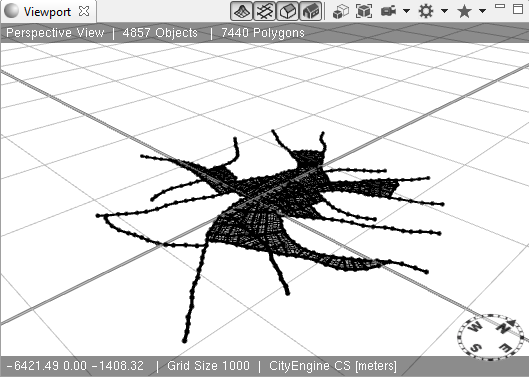
Approximately 500 streets were created, but you can't see them all in the viewport until you frame the view.
- Press the A key to frame all objects in the viewport. Your viewport should look similar to the following screen shot:
Navigation and selection
Navigation
Navigating in the viewport is one of the most essential skills a CityEngine user has to learn. This section looks at the different navigation schemes available.
- Click Edit > Preferences > General > Navigation Devices > Mouse.
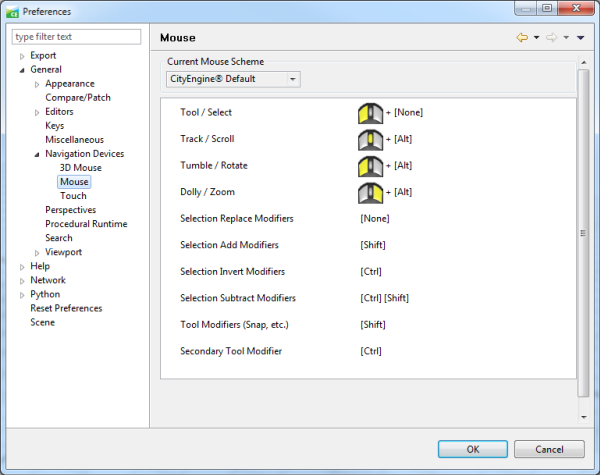
Note:
For those who have a 3D Connexion 3D Mouse (https://www.3dconnexion.com/), there are specific preferences for that. 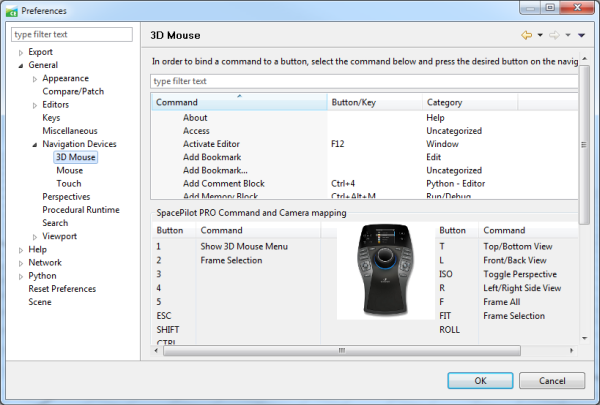
You'll focus on the default navigation scheme. The options are shown in the following table:
| Navigation command | Windows and Linux keyboard shortcut | Mac OS keyboard shortcut |
|---|---|---|
| Tumble the view | Alt+left mouse button | Option+ lmb |
| Pan the view | Alt+middle mouse button | Option+mmb |
| Zoom | Alt+right mouse button (or use the mouse wheel) | Option+rmb |
Tip:
- For efficient navigation of the constant use of the frame key F, use the frame button in the viewport’s toolbar.
- Use the tumble/pan/zoom based navigation as early as possible. After a few minutes, it will become natural to you.
Selection
To interact and edit the objects in your scene, you need to select them. Start the Selection Tool using the mouse button or press Q. Select the objects by clicking in the viewport.
Note:
The F9–F12 keys toggle the visibility of the four main object types: Map Layers, Graph Segments, Shapes, and Models. Deactivating the visibility of other object types usually simplifies making proper selection.
Selection types
The selection types are described in the following table:
| Selection type | Result |
|---|---|
Single click | Selects a single object |
Right-to-left rectangular selection | Selects all objects inside or touching the selection rectangle |
Left-to-right rectangular selection | Selects all objects completely within the selection rectangle |
The left-to-right rectangular selection is usually used to select tiny objects such as single Street Graph Nodes when there are many objects occupying the same space.
Modifier keys
While the Selection Tool is active, press Ctrl and Shift to either add or subtract from your selection. The modes are also listed in the Selection Tool submenu in the toolbar.
Selection context menu
Once you have a selection, the right mouse button context menu contains entries with which you can select additional elements.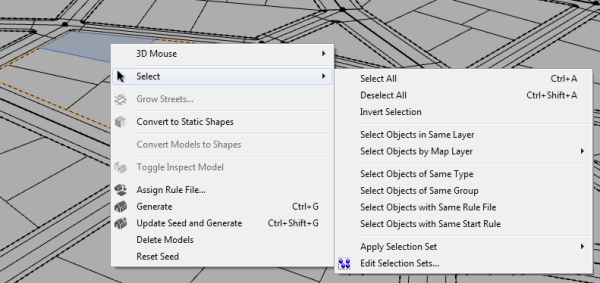
The selection items are described in the following table:
| Selection mode | Selection element(s) |
|---|---|
Select Objects of Same Type | Types: shapes, graph nodes |
Select Objects of Same Group: | In the same block/street |
Select Objects with Same Rule File | Same rule file assigned (on all visible layers) |
Select Objects with Same Start Rule: | Same start rule (on all visible layers) |
Model generation with rules
3D model generation
CityEngine is a procedural modeling application. This means that CityEngine uses rules to generate the 3D model.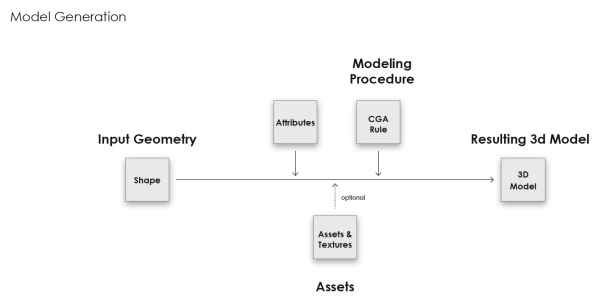
Assign rules
In this tutorial, the rules are already provided. You'll use them now.
- Select one block, and change its subdivision parameters in the Inspector from Recursive Subdivision to Offset Subdivision as shown below:
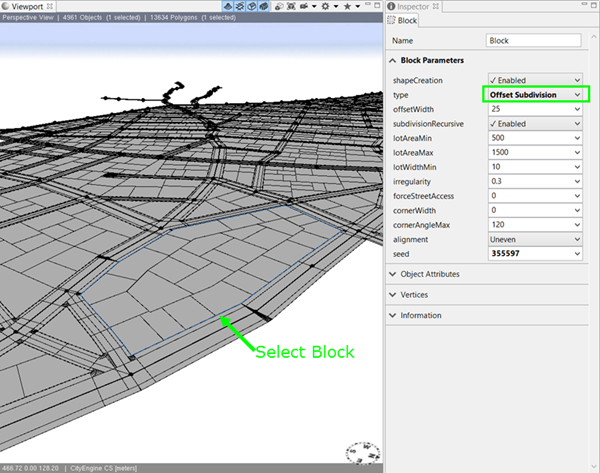
For more information on block subdivision and dynamic city layouts, see Tutorial 2: Terrain and dynamic city layouts.
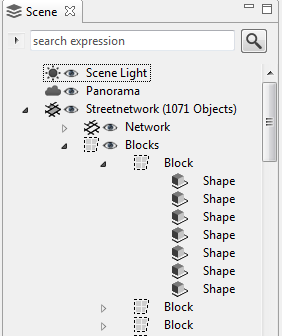
- Select one shape within the block, and use the context menu to Select Objects of Same Group.
- Drag and drop the building.cga rule file onto the selected shapes (highlighted orange).
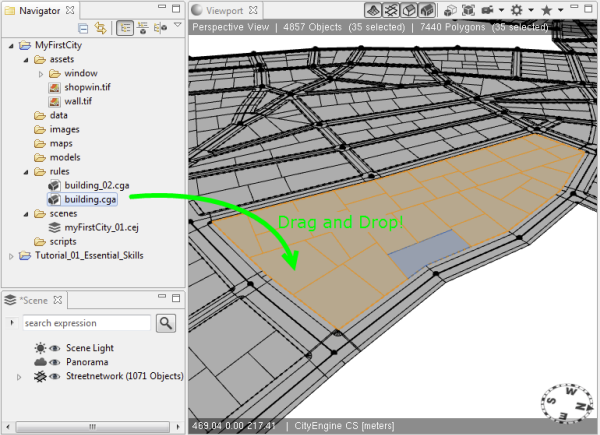
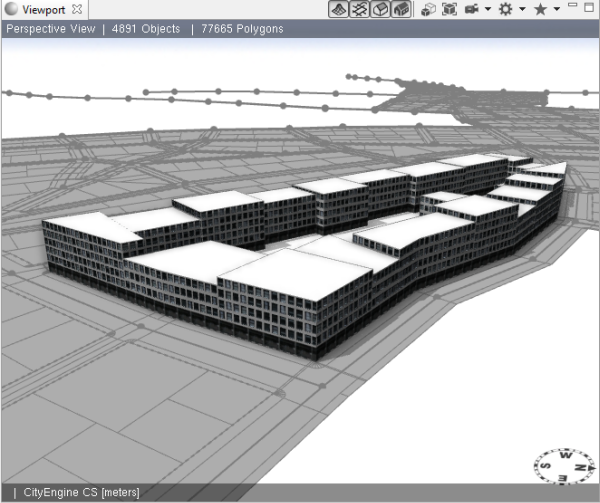
After dropping the rule onto the shapes, the model generation is automatically started. Your first buildings appear. Make sure the visibility of models is activated by toggling with F12.
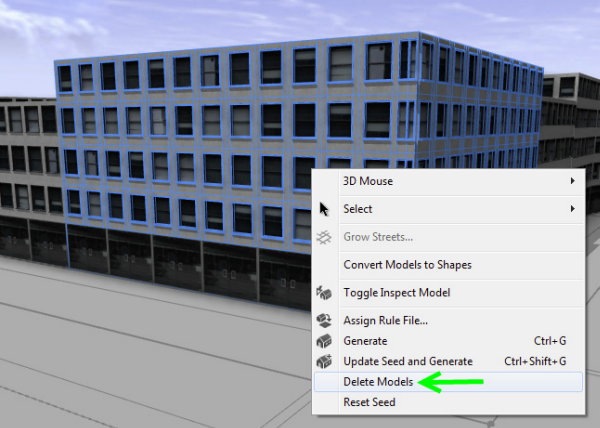
Generated models can also be deleted in the right mouse button context menu.
- Select the footprint shape again, and click Ctrl+G (Mac OS: Command+G) or use the Generate button
 on the toolbar to generate the model on the selected shape.
 New variations of the buildings can be created by changing the seed value.
- Use the Update Seed button
 on the toolbar or click Ctrl+Shift+G (Mac OS: Command+Shift+G).
 The following image shows an example of different seed values for height:
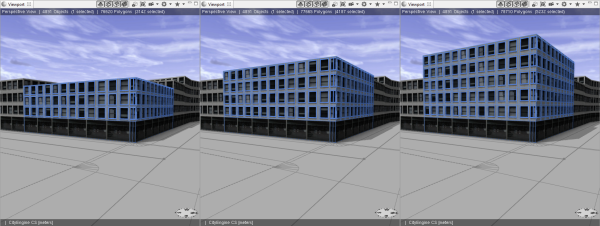
- Manually edit the rule’s building height parameter in the Inspector:
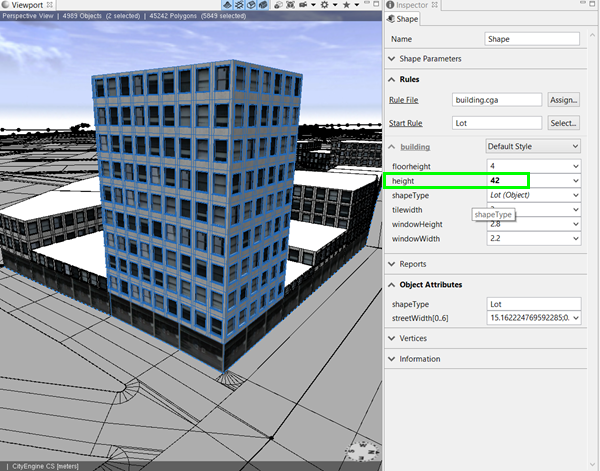
Once you manually change attributes in the Inspector it will become bold and override the definitions of the rule.
- Reset the attributes to the building.cga rule definitions by right-clicking the arrow next to the attribute in the Inspector and choosing Reset user attributes.

Rule editing
Explore a rule file
CityEngine’s rule system uses CGA code, a dedicated scripting language unique to CityEngine. Because CGA is a scripting language, it offers you a generic and flexible tool to create 3D models for all types of cities. From modern to contemporary, from ancient to futuristic, anything’s possible.
Explore the provided rule you've been using so far.
- Open the building.cga rule in the Rule Editor by either double-clicking the CGA rule file in the Navigator or using the Rule File link in the Inspector.
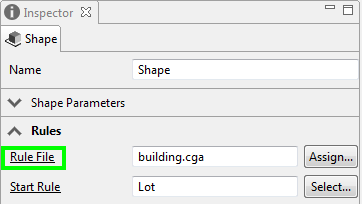
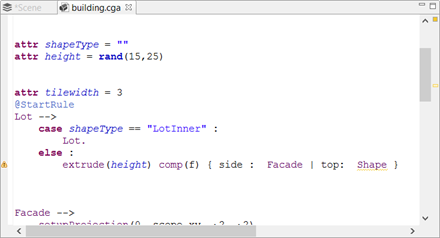
- Start editing the building.cga rule in the Rule Editor.
Edit the rule file
- Inspect building.cga rule. the Height is defined as a random value between 15 and 25.
attr height = rand(15,25)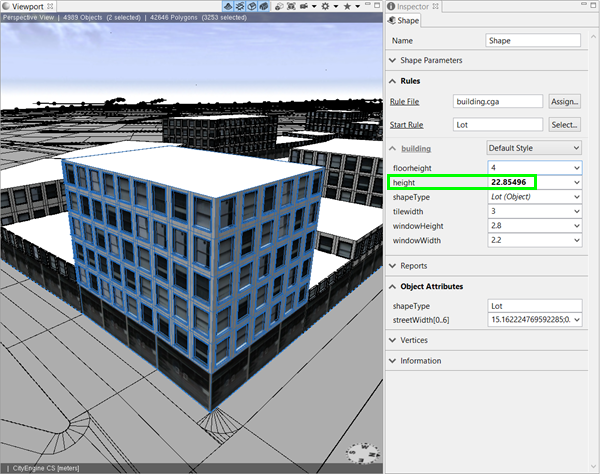
The building has a random height value of 22.82.
- Change the random height values in the Rule Editor.
attr height = rand(15,80)The height is now defined as a random value between 15 and 80.
- Save the rule.
- Regenerate the building by clicking Update Seed or pressing Cntrl + Shift + G on your keyboard.
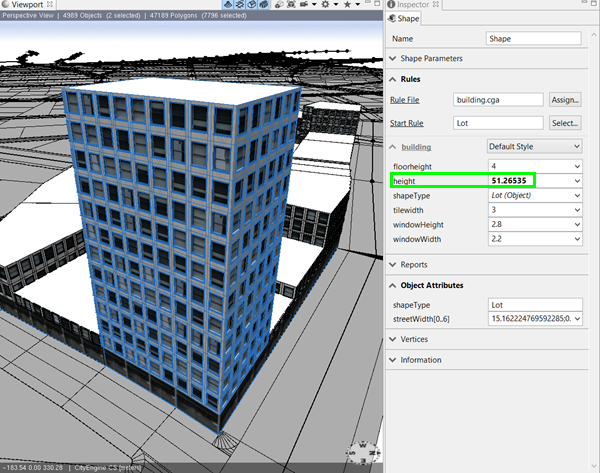
The building now has a random height value of 51.27.
Note:
The reason you use Update Seed is because the height is a random value and you need to update the random seed value when regenerating the building.
- Add roof geometry by adding a new Rule named Roof to the building.cga rule. To do this, do the following:
- Edit the Lot rule so it looks like this:
Lot --> case shapeType == "LotInner" : Lot. else : extrude(height) comp(f) { side : Facade | top: Roof } - Add the Roof rule and define the shape as roofHip with an angle of 22.5 degrees..
Roof --> roofHip(22.5) Shape - Save the rule.
- Edit the Lot rule so it looks like this:
- Regenerate the building, but this time, click the Generate Models button
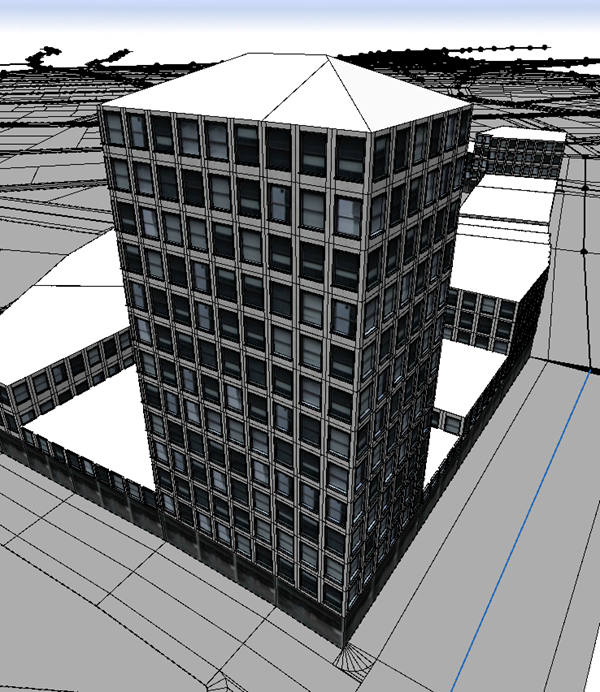
 or press Cntrl + G on your keyboard. By doing this, you will keep the building height at 51.27 and see the new roof geometry.