The following tips and shortcuts help you work in CityEngine.
Navigation
Navigate in a scene by selecting objects in the scene and pressing F to frame the selection. CityEngine then zooms to the selection and frames it in the Viewport. Also, use bookmarks to save specific camera angles and reference back to them.
Get map data
Get map data from ArcGIS Online and ArcGIS Enterprise to add context to an existing CityEngine scene. You can also choose a location and create a CityEngine scene without needing any data. Click File > Get map data to get started.

Apply CGA rules to shapes
You don't need to know CGA code to benefit from procedural modeling and CGA. Add existing CGA rules from the CityEngine community or from the rule library included in CityEngine to building footprints or polygons you created to make new building models.
- Search for rule package (RPK) file in All Portal. You can find rules created across the CityEngine community and apply them to the shapes in your scene. You can then customize the parameters in the Inspector window.
- Apply CGA rules installed with CityEngine from the ESRI.lib folder in your workspace.
- A quick way to generate the models is to drag the RPK or rules over the selected shapes.

Explore CityEngine in virtual reality
Explore CityEngine scenes and compare scenarios in virtual reality (VR) with the ArcGIS 360 VR web app in ArcGIS Online. Export CityEngine scenes and save bookmarks in CityEngine to allow navigation to camera views in VR. In the CityEngine app, click File > Export 360 VR Experience and select the scenarios to export. See the Esri Community ArcGIS 360 VR announcement for more information.
Work with scenarios
Scenarios allow you to create multiple designs within a single scene and then compare them with each other. Dashboards are also scenario enabled and can show the values for multiple scenarios simultaneously, allowing you to compare design performance.
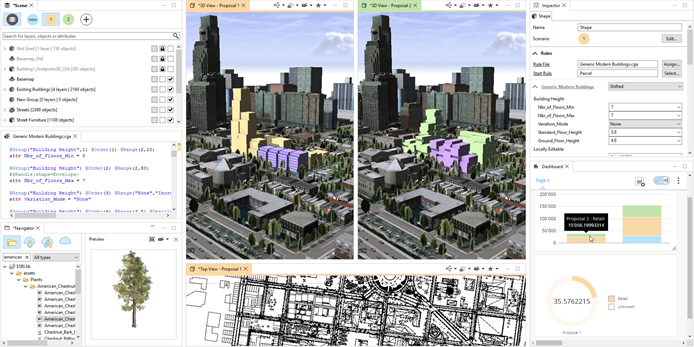
- Open Dashboards and pick the attribute you want to compare. You can create multiple cards to display multiple attributes.
- Compare scenarios side-by-side with different layouts.
- Right-click selected objects for scenario options.
- Manage scenarios in Scene Editor and Inspector.
- If the 3D model has handles, you can change the attributes by modifying the handles. Otherwise, change the values directly in Inspector and see the results reflected in Dashboards.
You can apply custom changes that affect only a specific scenario or you can make global changes that can be applied across all scenarios. They provide a way to store multiple design alternatives in a single scene. Furthermore, the different scenarios can be exported with the 360 VR experience. To learn more about scenarios, download Example Philadelphia 2019.0 in CityEngine (under Help, click Download Tutorials and Examples) or read the Scenarios in CityEngine blog.
Sync features in CityEngine
You can add, update, and manage polygon feature layers hosted by ArcGIS Online. CityEngine allows you to do the following:
- Create a polygon feature layer directly in CityEngine and publish to ArcGIS Online.
- Modify an existing ArcGIS Online polygon feature layer in CityEngine and synchronize the updates to ArcGIS Online or ArcGIS Enterprise.
- Make external edits to a polygon feature layer added in CityEngine, such as with ArcGIS Pro, and synchronize the updates to the layer across the ArcGIS platform.
Sign in to ArcGIS Online or ArcGIS Enterprise in CityEngine to have access to publishing to ArcGIS Online or viewing content tabs in Navigator.
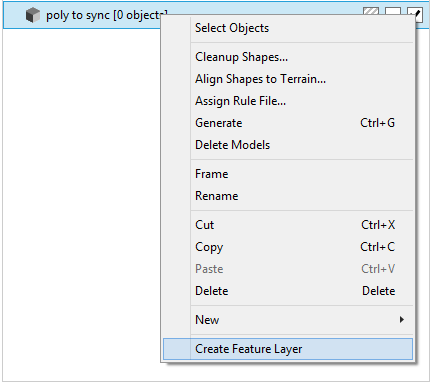
To create a feature layer in your portal, right-click the new polygon layer in Scene Editor and click Create Feature Layer.
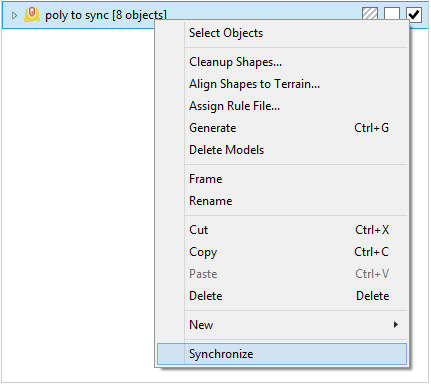
To sync your local changes to the feature layer, right-click the feature polygon layer in Scene Editor and click Synchronize.
To add an existing polygon layer from portal, right-click Navigator and select Import.
Visibility analysis
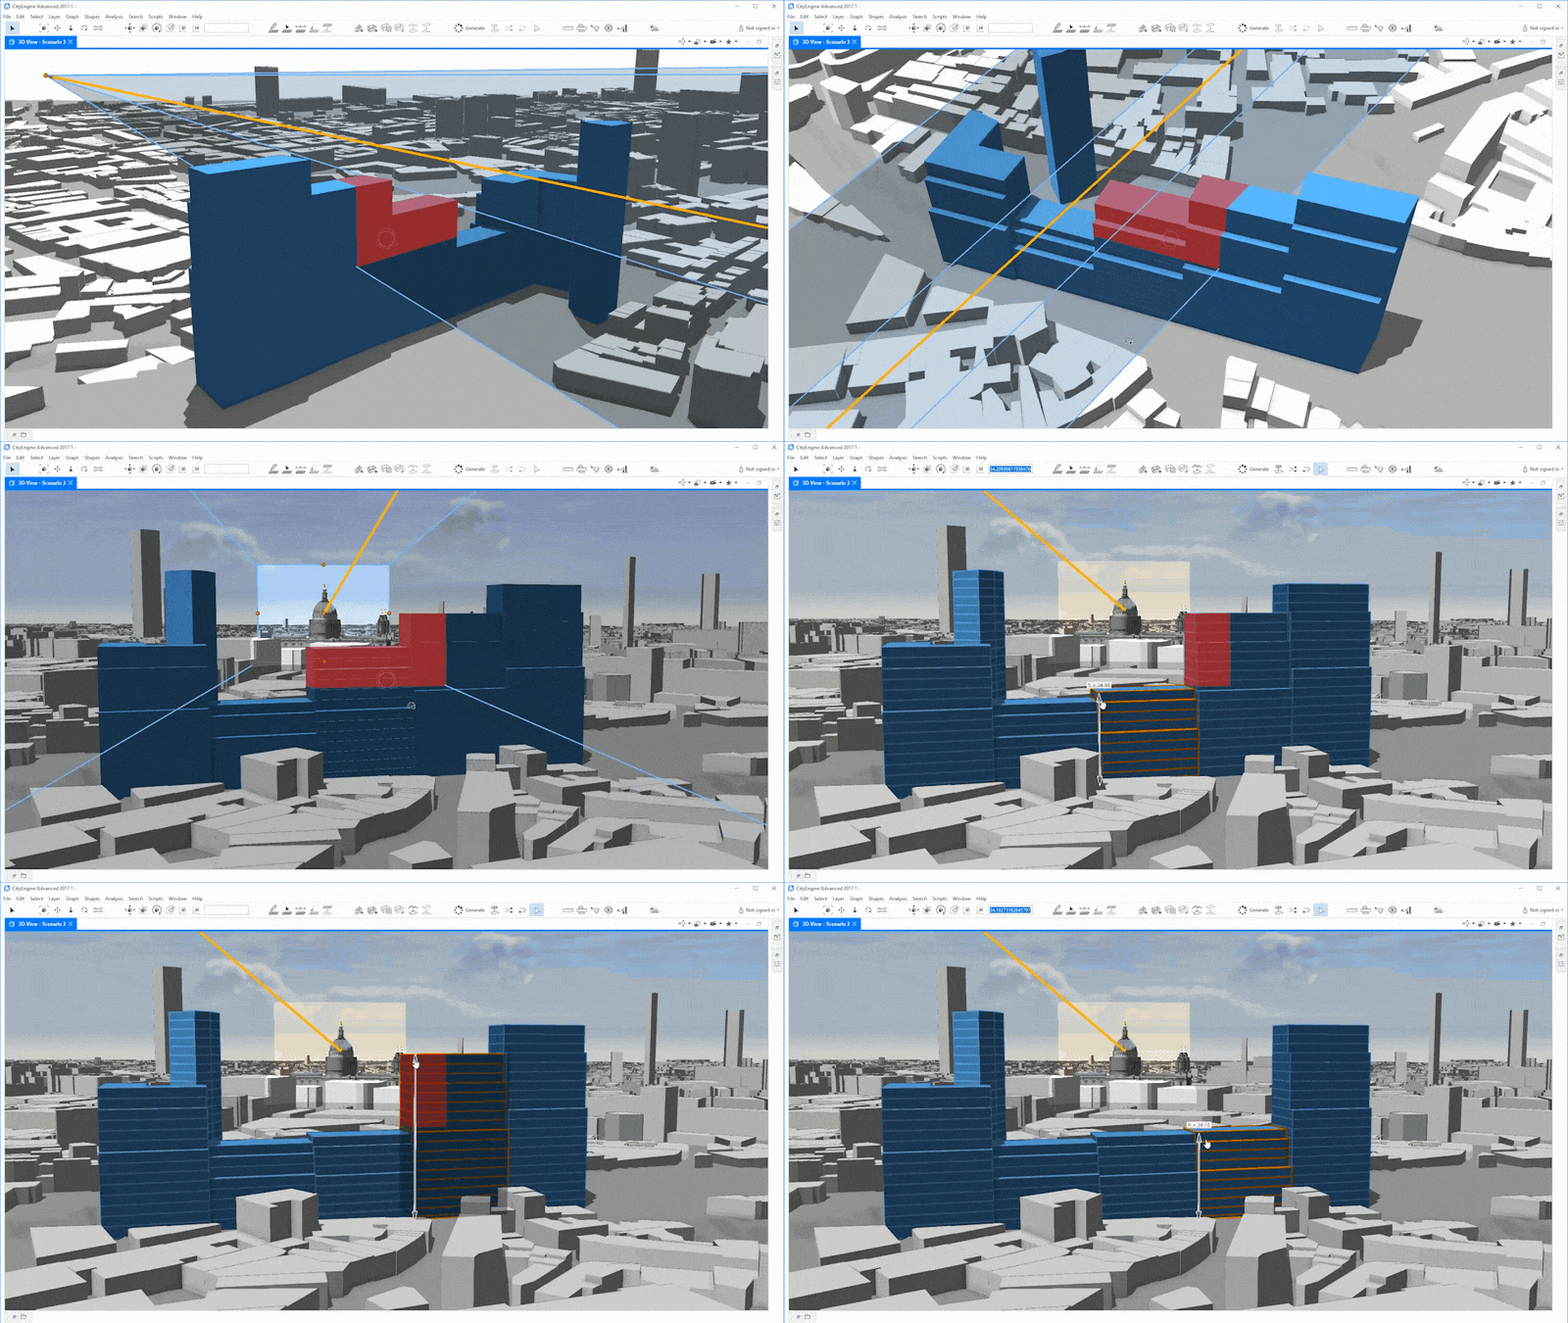
The Visibility analysis tools display surfaces and structures that are visible and hidden from an observer. The Viewshed tool shows visibility from a camera-like observer. With the View Dome tool, you can visualize visible and hidden areas from an omnidirectional observer. Finally, the View Corridor tool creates a protected view where any scenario building visible in the corridor is colored. Plus, you can view visibility statistics about your scene in Inspector. See the visibility analysis blog post for more information.
Measure features
You can measure lengths and areas in CityEngine to analyze a scene and get a deeper understanding of the environment.
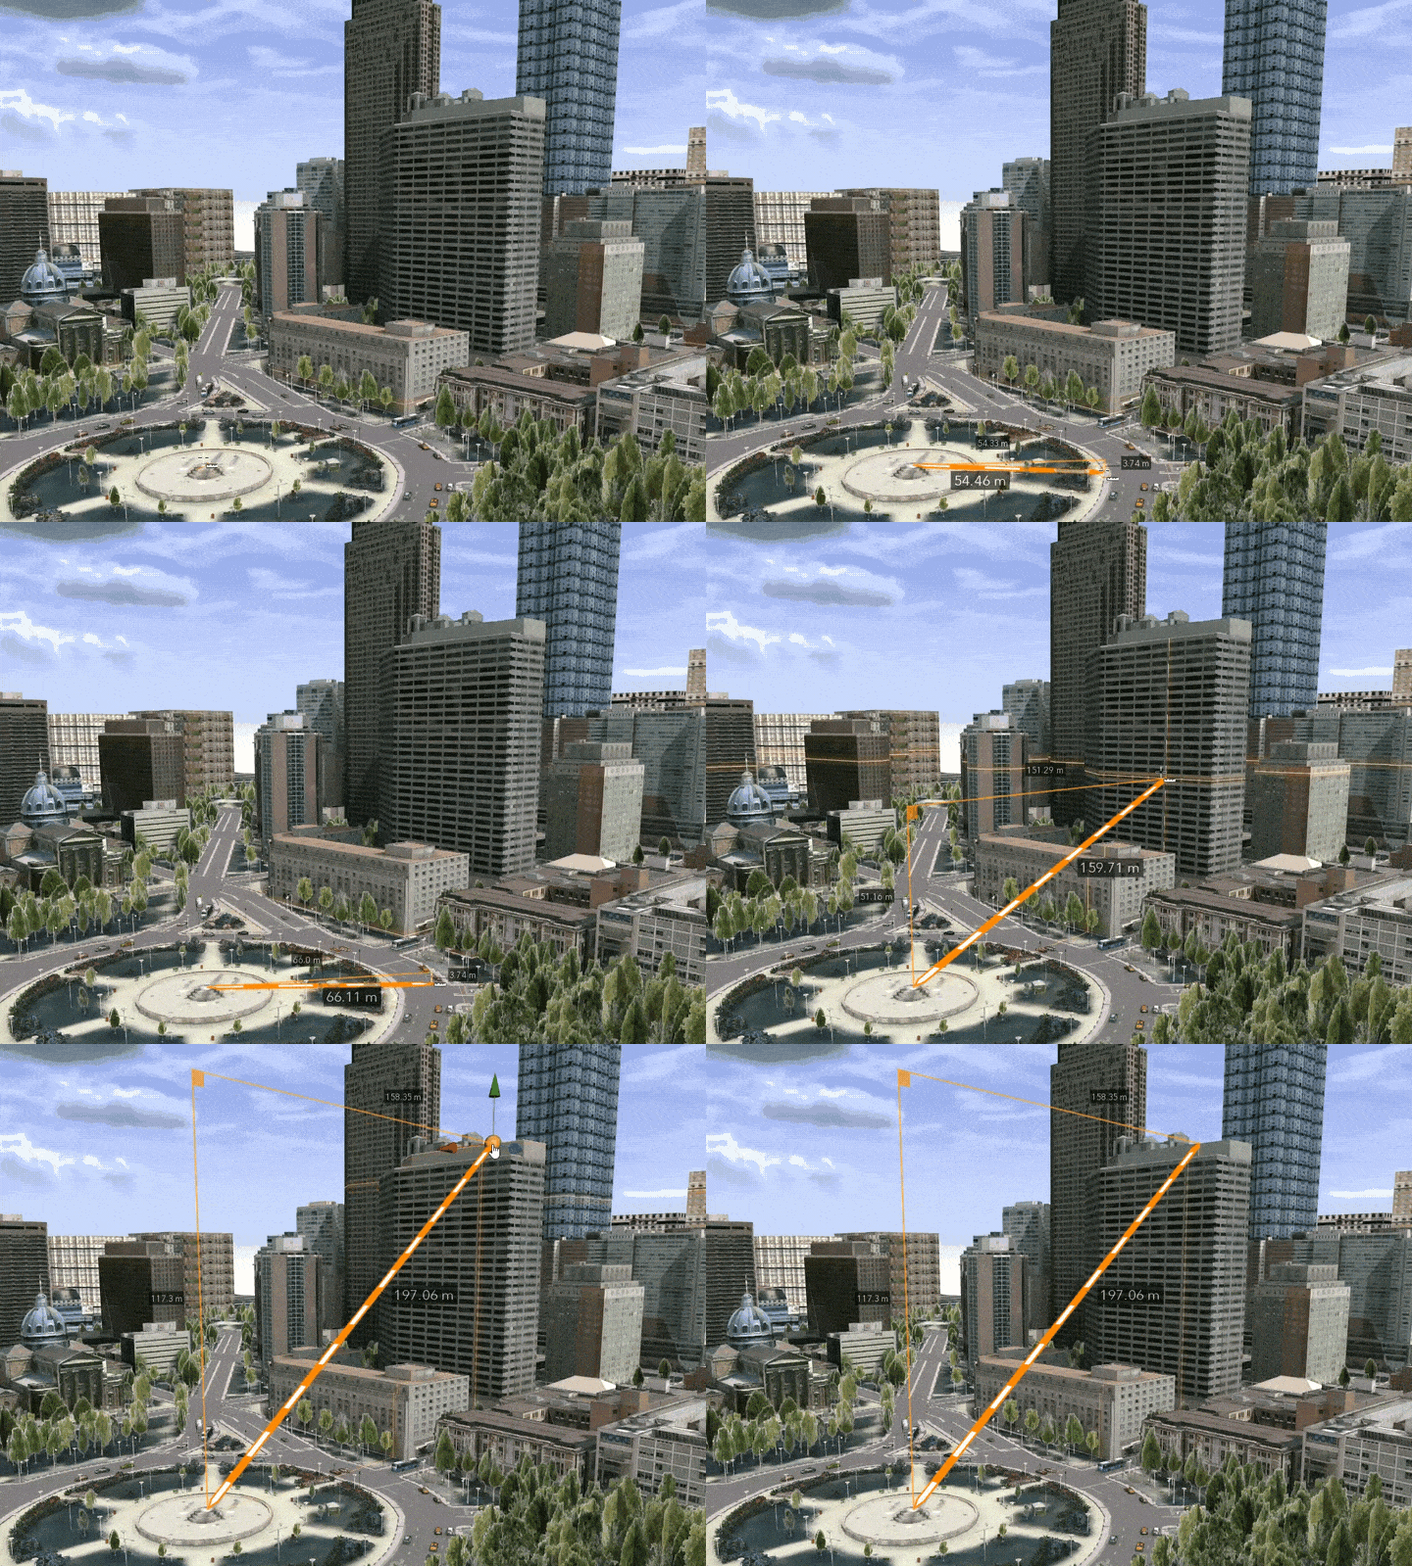
Apply edits locally to features
Change a specific feature of a CGA-generated building, such as a window or door, by selecting the building with the Local Edit tool.

See the Local edits tutorial for more information.
Tools
Use the CityEngine toolbar to create, modify, analyze, and regenerate features. The toolbar is organized in the following way:
- Navigation tools—Navigate in Viewport, such as frame, pan, and zoom.
- Transform tools—Transform objects, such as move, rotate, and scale.
- Graph tools—Draw graph networks.
- Terrain tools—Edit terrain with interactive brushes and align to shapes.
- Shapes tools—Draw shapes such as polygons and ellipses.
- Model tools—Generate and apply rules to shapes to create models. Modify models with local edits.
- Analysis tools—Perform measurement and visibility analysis.
- Properties—Change scene environment settings.
Toolbar keyboard shortcuts
Press the Alt key and use the buttons to pan, rotate, or dolly zoom. Also, you can quickly zoom to a feature by selecting the feature and then pressing F. The following are other common shortcuts:
| Action | Description |
|---|---|
Click while pressing Alt | Rotate scene |
Right-click while pressing Alt | Pan scene |
Wheel click while pressing Alt | Dolly zoom |
F | Frame selection |
B | Look around |
I | Choose whether to isolate the selection |
Q | Selection tool |
W | Move |
R | Rotate object |
E | Scale |
Numpad 0-9 | Switch camera bookmarks |
M+D or M+A | Measure distance (D) or Area (A) |
Double-click a window | Open a window in full view |