Learn how to create apps using the ArcGIS GeoBIM widgets in ArcGIS Experience Builder by following the instructions below.
Open ArcGIS Experience Builder and create an app
To open ArcGIS Experience Builder and begin with an app template, complete the following steps:
- Sign in with an ArcGIS account and access the Experience Builder app from the app launcher
 in the portal.
The ArcGIS Experience Builder landing page appears.
- Click Create new.
The template page opens to display all available app template options.
The following examples use the Blank fullscreen template.
- Click Create on the Blank fullscreen template.
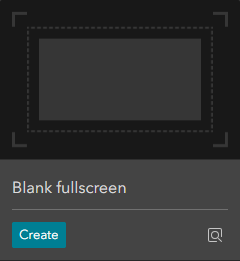
The builder page opens to a blank fullscreen template.
Use the Document Viewer widget with a web scene containing 3D models
The Document Viewer widget allows you to view 2D and 3D content stored in Autodesk Construction Cloud (ACC). If a web scene contains 3D models created from ArcGIS Pro BIM Cloud Connection, the Document Viewer widget allows you to view the model's spatial context with the source engineering document.
If you do not have a web scene ready, use ArcGIS Pro to add and publish BIM models to a web scene.
- On the Insert widget tab
 , drag the Map and Document Viewer widgets into the blank template.
 - In the Map widget settings, add the web scene that contains models imported from the ArcGIS Pro BIM Cloud Connection.
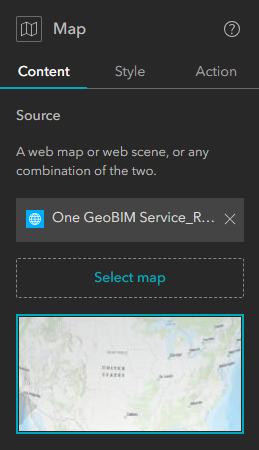
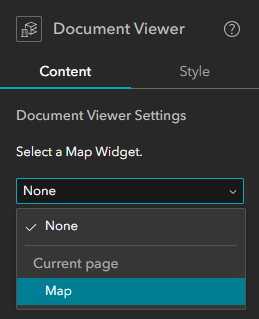
- In the Document Viewer widget settings, click the Select a Map Widget drop-down menu, and select the Map option that contains the web scene.
- Click Save, click Publish, and click Preview to open the ArcGIS Experience Builder app.
- Click the Log in hyperlink in the Document Viewer widget and authenticate with Autodesk.
After you sign in, the Document Viewer widget shows a No document to display message.
- Click an element of the model in the web scene.
The associated engineering document opens in the Document Viewer widget, and the extents will zoom to the same element that was selected in the web scene and will also be highlighted.

Use the Document Viewer, Document Explorer, and Link Explorer widgets with a GeoBIM project map
In addition to the Document Viewer widget, the Document Explorer and Link Explorer widgets provide other methods to interact with your ACC project data.
The Document Explorer widget displays a comprehensive view of all BIM projects, folders, and supported documents that are linked to the account that was configured in the ArcGIS GeoBIM project.
Note:
To use the Document Explorer widget, you must use a data source that contains a single ArcGIS GeoBIM feature service. If the data source does not have or contains more than one ArcGIS GeoBIM feature service, the message No GeoBIM Feature Service found in this View. Please use a Web Map or Scene that contains layers from only one GeoBIM Feature Service. displays.
The Link Explorer widget displays all supported documents linked to GIS features in your data source. See Add links to individual features and Add links to features using rules to learn more. Select ACC links from the Link Explorer widget to visualize them in the Document Viewer widget.
If you do not have a GeoBIM project map, see Create a project, Create a project account, and an Overview of ArcGIS GeoBIM tools to get set up.
- On the Insert widget tab
 , drag the Map widget and two Document Viewer widgets into the blank template.
 - Add the Widget Controller widget and drag the Document Explorer and Link Explorer widgets inside it to allow more screen space for the Map and Document Viewer widgets.
- In the Map widget settings, add the project map that was generated after creating the ArcGIS GeoBIM project.
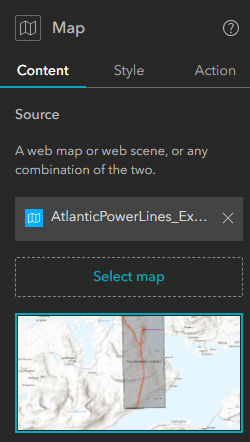
- In one of the Document Viewer widget settings, click the Select a Map Widget drop-down menu, and select the Map option that contains the GeoBIM project map.
You can leave the second Document Viewer widget settings set to None.
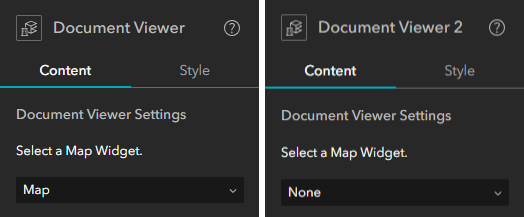
- In the Document Explorer widget settings, ensure that the Map option is selected on the Select a Map Widget drop-down menu. Select the Document Viewer option on the Select a Document Viewer widget to display documents drop-down menu.

- In the Link Explorer widget settings, ensure that the Map option is selected on the Select a Map Widget drop-down menu. Select the Document Viewer 2 option on the Select a Document Viewer widget to display documents drop-down menu.

- Click Save, click Publish, and click Preview to open the ArcGIS Experience Builder app.
- Click the Log in hyperlink in one of the Document Viewer widgets and authenticate with Autodesk.
After you sign in, the Document Viewer widgets will show a No document to display message. The Link Explorer widget will show a No linked documents to display message, and the Document Explorer widget will display the name of the linked ACC account.
Note:
If you expand the account name in the Document Explorer widget, you will see all BIM projects that are connected to your GeoBIM project map.
- Click any feature from the GeoBIM layers, such as a document or issue, in the project map.
The Document Viewer widget connected to the Map widget displays the first available link for the selected GIS feature. The other Document Viewer widget will still contain the No document to display message as it is not connected to the Map widget.

The Document Explorer widget filters to show the BIM project associated to the selected GIS feature.

The Link Explorer widget displays all the links associated to the selected GIS feature. The account and BIM project names also display below each linked item.
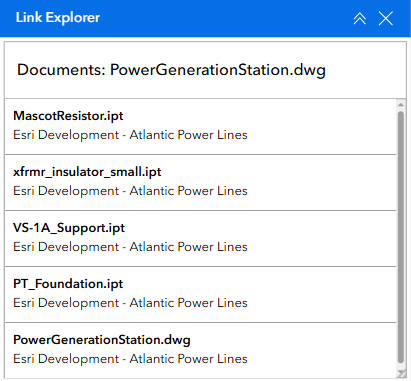
- Click any other link listed in the Link Explorer widget.
The second Document Viewer widget opens the link selected from the Link Explorer widget. The link displayed in the first Document Viewer widget remains visible, allowing you to view and analyze multiple source ACC project documents in tandem.
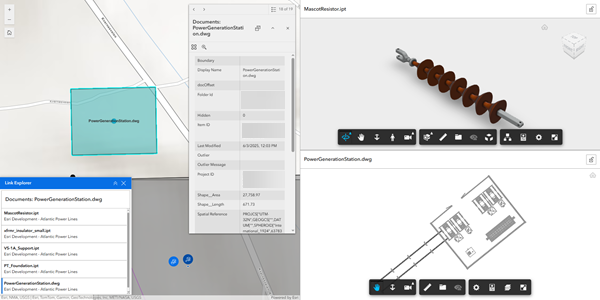
After completing this tutorial you will have created two ArcGIS Experience Builder apps with varying setups of the Document Viewer, Document Explorer, and Link Explorer widgets. Continue to explore other Experience Builder widgets that can add value to your BIM project workflows.