In this topic
This is an archive related to a previous version of Esri Maps for MicroStrategy. If you need the current version go to http://doc.arcgis.com/en/maps-for-microstrategy/.
Customize the map contents
Show and hide the Contents pane
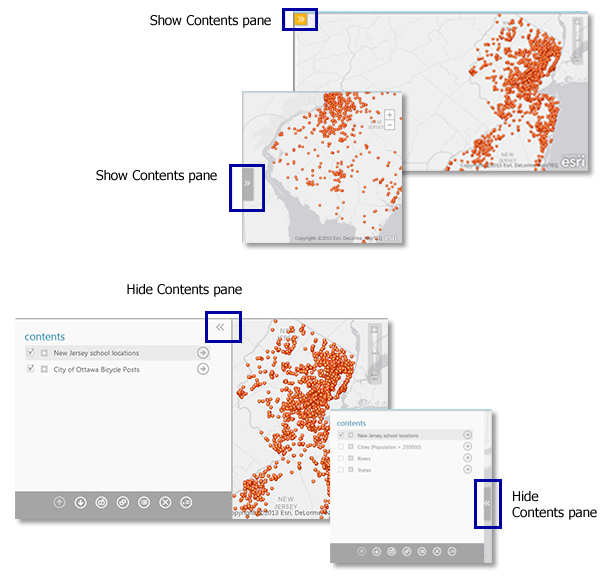
When you add data to your map, the data appears as one or more layers listed on the Contents pane. When you want to work with the layers in your map—for example, toggle layer visibility, style your data, configure clustering, and so on—you can display the Contents pane and access your layers of data. You can hide the Contents pane at any time when you want a full view of the map.
- To show the Contents pane, press the Show map contents button.
- To hide the Contents pane, press the Hide map contents button.
Depending on the size of the map, the Contents pane and controls may be displayed slightly differently. Maps smaller than 450 pixels wide typically display a compact pane, as shown below.

Toggle a layer's visibility
The Contents pane lists all layers available to display in the map. By default, Esri Maps for MicroStrategy displays all available layers. Using the check box beside each layer name, you can specify which layers to display and which ones to hide from view, making it easier for you to work with features on the map. For grouped styles, you can also hide individual groups as desired.
- Press the Show map contents button to display the Contents pane.
- On the Contents pane, do one of the following to define a layer's visibility:
- To show the layer on the map, check the check box beside the layer name.
By default, all available layers are visible (selected).
- To hide the layer from the map, uncheck the check box.
Items on the specified layer are no longer displayed on the map.
- To show the layer on the map, check the check box beside the layer name.
- You can also toggle the visibility of individual groups:
- Press the plus sign (+) beside the layer name to expand the layer contents.The Contents pane displays the styling applied to the selected layer. If the features in the layer are styled by group, the Contents pane shows the styling of all the groups.
- Press in the center of the row for the group you want to hide.Text identifying the group turns light gray, and the specified group is hidden in the map.
- Press on the group again to restore its visibility.
- Press the plus sign (+) beside the layer name to expand the layer contents.
Rename a layer
Layers that you add to the map can be renamed on the Contents pane. When you first add a layer, the layer name is determined by the layer's data source. When you change the layer name on the Contents pane, only the display name of the layer is changed; the name in the underlying data is not affected.
- Press the Show map contents button to display the Contents pane.
- Press the layer name to highlight it. Alternatively, press the Rename layer button at the bottom of the Contents pane.

- While the layer name is highlighted, type the new layer name.
- Press outside the text area to finish.
Change the order of layers
The order in which layers are listed in the Contents pane represents how layers are drawn on the map. Within the map, the layers listed at the top draw over those listed below them, and so on, down the list. You can easily move layers in the Contents pane to adjust their drawing order.
- Press the Show map contents button to display the Contents pane.
- Choose the desired layer in the Contents pane to highlight it.
- Use the Move layer down and Move layer up buttons at the bottom of the Contents pane to move the selected layer to the desired order.

