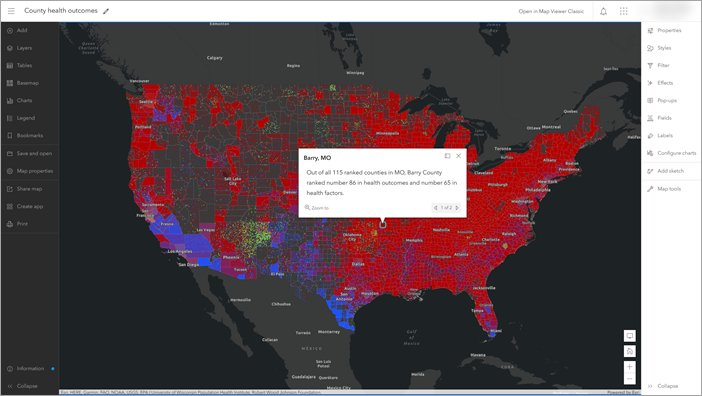
Using Map Viewer, you can create interactive web maps that you can share. It features responsive mapping and real-time updates to the map as you work. Map Viewer has an intuitive design that allows you to view and manage content in one dedicated area and to customize and configure a map in another area. The following sections provide an overview of the new design and tools.
Tip:
You can use keyboard shortcuts to quickly complete common workflows in Map Viewer. To view the full list of keyboard shortcuts in Map Viewer, press Alt+? on Microsoft Windows or Option+? on Mac.
Map Viewer design
An ArcGIS web map is an interactive display of geographic information that you can use to tell stories and answer questions. Web maps contain a basemap, a set of data layers (many of which include interactive pop-ups with information about the data), an extent, a legend, and navigation tools to pan and zoom.
Use Map Viewer to view, explore, and create web maps in ArcGIS Online. Navigate the map to view various areas. Click features or imagery on the map to view pop-ups with information about the data. Rotate the map to get a new perspective. Experiment with zoom levels to see which features and layers are visible at different scales.
Map Viewer includes two vertical toolbars—the Contents (dark) toolbar and the Settings (light) toolbar. Use the Contents toolbar to manage and view the map contents and work with the map. Use the Settings toolbar to access options for configuring and interacting with map layers and other map components.

Use the Expand and Collapse buttons at the bottom of each toolbar (for example,  and
and  on the Settings toolbar) to expand or collapse them. You can also use the Hide interface button
  on the map to collapse both toolbars at once and maximize space to work with the map.
Contents toolbar
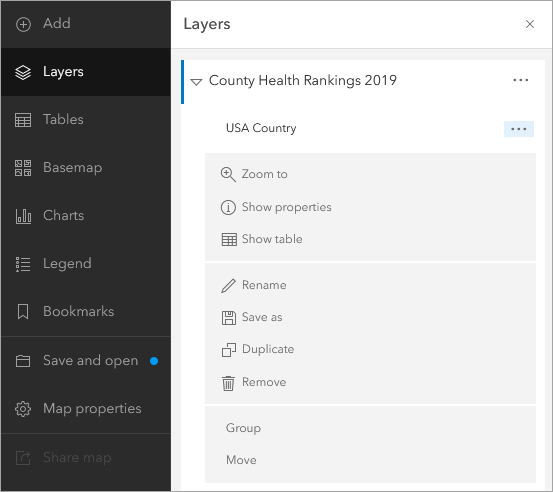
Manage and view key components of the map using the Contents (dark) toolbar buttons. For example, you can change the basemap and add layers. Click the Layers button  to see what layers are in the map.
Note:
You can explore maps, add and configure layers, and more without signing in. To save your work, sign in before creating a map.Layers in the map are drawn in the same order in which they appear in the Layers pane. You can organize layers to draw in any order and click Hide layer  or Show layer
  to hide or show, respectively, individual layers. You can also click Options
  to expand the list of options for the layer and view the layer's properties.

If the map contains a group layer, you can display one specific layer from that group without individually showing or hiding the other layers. To do this, turn on or turn off the Exclusive visibility toggle button.
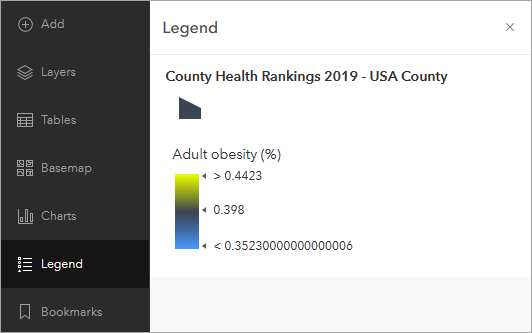
Some layers have symbology that appears in a legend. View the Legend pane to see how the data layer is represented on the map.

You can also use the Contents toolbar to perform actions such as opening, saving, sharing, and printing maps. Use the Information button to learn what to expect in future updates.
Settings toolbar
The Settings (light) toolbar includes options for working with individual layers in the map, as well as options for working with the map itself. Select a layer in the map to access the layer options on the toolbar. You can use the selector at the top of the active pane to quickly switch layers.
Layer options are at the top of the Settings toolbar. The layer options displayed depend on the type of layer selected and, in some cases, the data contained in the layer. For example, the Clustering button is only displayed when a feature layer containing point features is selected.
Use the Settings toolbar to configure pop-ups, filters, clustering, labels, and more. Your changes are instantly visible on the map, allowing you to experiment and explore various options. Click the Styles button  to explore smart mapping styles exclusive to Map Viewer, such as dot density, as well as many other styles. You can try different symbols and color ramps for features and imagery in the map.
Some buttons on the Settings toolbar allow you to interact with and get new information from the map. These buttons are displayed at the bottom of the toolbar. You can search for locations, measure distance or area, view time-enabled data, get directions, and find geographic coordinates.