Scene properties define the appearance of any layer participating in the scene and the environment in which the layers will be visualized. After you have added and configured your layers and the ground, you can set scene properties such as illumination, weather, effects, and so on. Depending on the ArcGIS application that you are using, you can set different scene settings.
Workflows
To author a scene that can be used in different applications in ArcGIS, the following properties need to be considered.
Metadata
Metadata is information describing the scene and helps your audience to better understand the source and purpose of the scene. For example, you can include a description to let others know what the intention of the scene is or add credits to assure the correct copyright information is defined. When you save your scene, ensure that you enter the item details such as thumbnail, title, summary, and tags so it will be easier to maintain and share the scene. If you publish the scene and its metadata as a web scene from ArcGIS Pro, all metadata will be published as well and can be reviewed and updated in the item details in ArcGIS Online or ArcGIS Enterprise.
Illumination
Simulating sunlight and shading in a scene gives 3D features a realistic appearance and enhances the visual appeal of a scene. For example, you can set the sun position based on a date and time. After setting the sun position, you can include shadows to make the scene more realistic.
When viewing a web scene in Scene Viewer, you can adjust the daylight. ArcGIS Earth, in addition to the daylight effect, allows you to animate shadows. ArcGIS Pro distinguishes between the illumination for a local and global scene. While global scenes allow you to pick a date and time, in local scenes, you can additionally define the sun position by altitude and azimuth.
To make the appearance of the sun position realistic, you can turn on shadows. Each object in the scene will cast a shadow.
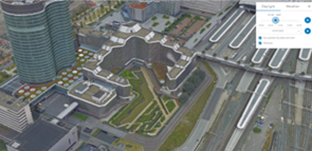
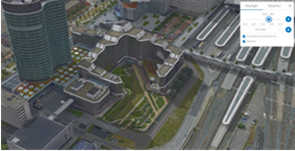
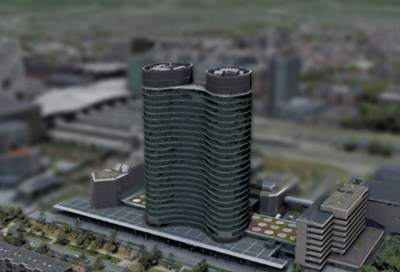
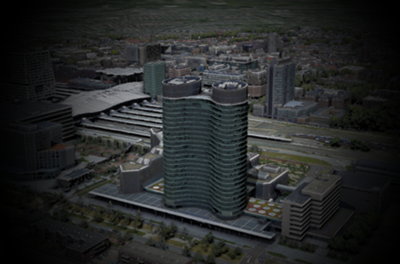
Location in Utrecht, the Netherlands, at 9:00 a.m. and 4:00 p.m. with shadows applied in Scene Viewer.
Weather
You can use weather effects in Scene Viewer or ArcGIS Earth to create a specific atmosphere in your global scene. For example, if your scene shows the impact of flooding, you can increase the realism of the scene by adding rain and clouds. Weather effects you can apply to a scene are sunny, cloudy, rainy, snowy, and foggy.

Effects in a scene
To create visualization beyond the realistic representation of the world, you can use effects. Often effects require more computational resources and therefore are best suited for desktop applications.
In ArcGIS Pro, you have several options to apply effects. When creating animations, it can help to apply visual effects. For example, you may want to de-emphasise data flaws or promote a different artistic reality.
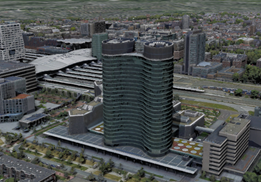
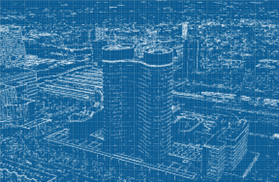
In other cases, you need to apply camera effects to set the focus of your audience to a specific object like a new building, for example.
If you want to create a specific effect in a layout or print, you have additional options to apply postprocessing effects.
Considerations
When working with mesh data, the texture often already includes the shadows of buildings at the time the data was collected. You should inspect the mesh to see whether the shadows in the texture contradict the shadow you defined during authoring of the scene.
Required software
You will need ArcGIS Pro or Scene Viewer to visualize water bodies realistically in ArcGIS. You will need an ArcGIS Online or ArcGIS Enterprise account to publish and share the layers across your organization.
Explore the following resources to learn more about scene properties in ArcGIS.
ArcGIS help documentation
Reference material for ArcGIS products:
- Set illumination for scenes in ArcGIS Pro
- Apply visual effects in ArcGIS Pro
- Apply camera effects inArcGIS Pro
- Apply postprocessing effects to a scene in ArcGIS Pro
- Display options in ArcGIS Pro
- Set scene properties in Scene Viewer
- Adjust daylight settings in Scene Viewer
- Visualize weather in Scene Viewer
- Daylight in ArcGIS Earth
ArcGIS blogs, stories, and technical papers
Supplemental guidance about concepts, software functionality, and workflows:
Tutorials
Guided, hands-on lessons based on real-world problems:
Developer resources
Resources and support for automating and customizing workflows:
Esri community
Online 3D community to connect, collaborate, and share experiences:
- Ask the 3D community questions