Note:
You must sign in to an ArcGIS account to use the ArcGIS for Excel functions.
Use the ArcGIS for Excel Function Builder tool to access functions for geocoding, data enrichment, and routing operations.
Microsoft Excel includes a set of functions or formulas that you can use to calculate information in a worksheet. ArcGIS for Excel includes similar functions. Each function or formula starts with the equal sign (=) in a cell followed by the function name and the cell range to which it applies.
Tip:
As you write a function in a cell, you also specify the cell or cells in a column or row to apply the function. The function automatically populates the specified cell or cells with the function and potentially overrides any previously existing data. This ensures data integrity.
See Get started with ArcGIS for Excel to start using ArcGIS for Excel.
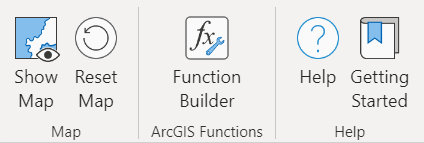
Once you become familiar with the functions, you can access them from the Function Builder tool on the ArcGIS for Excel toolbar.
Note:
The geocoding, GeoEnrichment Service, and routing functions consume credits. The SUGGESTADDRESS function consumes credits when you request more than 15 suggestions. Helper Functions do not consume credits. To clear the ArcGIS for Excel functions cache, click the Clear cache button in the Settings pane.
You can copy the examples in this topic into an Excel cell or cells to better understand how functions work. You can also use examples from the ArcGIS for Excel functions and formulas topic to test functions from the Function Builder tool.
Some ArcGIS functions may fail with an error that the service is not available when running them within a cell in Excel. Contact your organization administrator to enable the service or get more information.
See ArcGIS Enterprise and ArcGIS Online documentation for more information on services.
To use the Function Builder tool to access the functions, complete the following steps:
- Open a Microsoft Excel worksheet.
- Click the ArcGIS tab.
- Choose a cell with your data.
- On the ArcGIS for Excel toolbar, click Function Builder.

The Function Builder tool opens in the task pane with the Choose function and Set parameters tabs active.
Tip:
Check the Don't show this again check box to skip the welcome screen the next time you access the Function Builder tool.
- Click OK.
The Choose function tab is enabled by default and displays function drop-down menus.
The number of the cell you selected is visible in the Choose function pane description.
- Choose a function.
Once you choose a function, the related Set parameters tab appears.
- On the Set parameters tab, provide parameters for the selected function and do any of the following:
- Add a header using the ADDHEADER function.
- Click Update to run the function.
- Click Choose function to exit a function without running it. This returns you to the functions drop-down menu.
See the Esri Community Function Builder blog article for more information.
- Once the Microsoft Excel sheet is populated with information from the function, do one of the following to return to the map frame:
- Click the Close button
 .
. - Click the ArcGIS for Excel button.
- Click the Close button
- On the ArcGIS for Excel toolbar, click Show Map to view your changes.
