Sometimes projects that you process with ArcGIS Drone2Map will not have perfect results. Many factors can cause poor-quality reconstruction. In the past, the solution to those issues was to fly the same project area again. However, with improvements to how products are generated in ArcGIS Drone2Map, there are now multiple methods to improve the quality of these outputs. Both 2D and 3D output products can be corrected for areas of poor reconstruction or display issues. These built-in methods offer ways to achieve accurate results without the need for postprocessing software.
Since there are many possible processing issues that could occur this topic will outline some of the most common problems and suggest potential solutions using these methods.
Uncalibrated images
The Adjust Images step in ArcGIS Drone2Map is when the software attempts to determine the correct position and orientation in 3D for each image in a series of aerial images so they can be compiled and mapped to the surface of the earth. Without a well-matched adjustment, your products will not be as accurately mapped to the earth's surface or mosaicked into clean products.
One problem that can occur during processing is seeing many flight images marked as uncalibrated and subsequently dropped from the adjustment. There can be many different causes of this, but the two most common causes are a lack of good overlap/coverage between images or the subject matter being too homogenous (i.e. vegetation) to accurately match neighboring images.
A potential solution to these uncalibrated images is to increase the image scale that the tie points are generated. By default, ArcGIS Drone2Map uses an initial image scale of 1/8 (Eighth image size). If an image is dropped during the free network adjustment, it is not used during the refinement process. Modifying the Initial Image Scale value to 1 (Original image size) will help improve tie point generation and lead to more consistent matches between images.
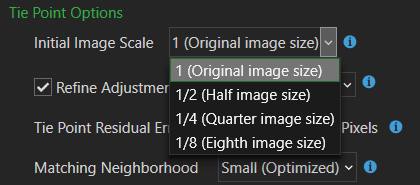
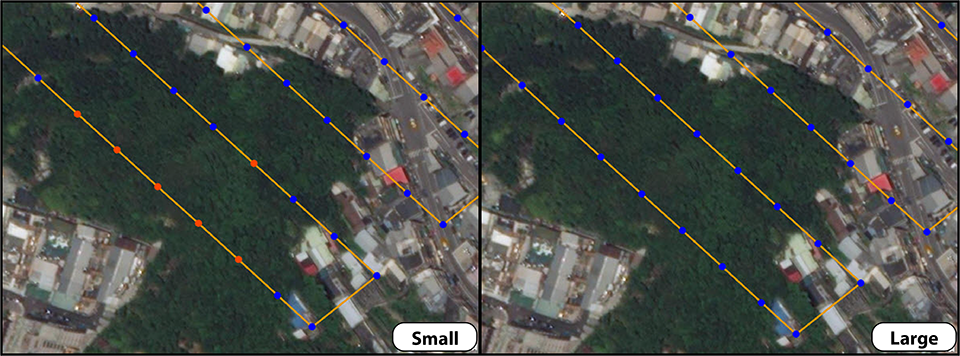
Another solution would be to increase the size of the matching neighborhood that ArcGIS Drone2Map will use to find matching neighboring images. This can be done through the Processing Options Adjust Images section. The setting for Matching Neighborhood handles what size of a neighborhood the adjustment will use when finding neighboring images. Increasing this setting from Small (Optimized) to Medium or Large will increase the number of candidates for tie points between neighboring images.
If these suggestions do not help, then the problem might be the flight itself. The project may need to be re-flown with proper flight planning guidelines. For flight recommendations see the following blog: Drone2Map flight planning
Waterbody or feature reconstruction issues
Water by nature can be quite turbulent and reflective. Therefore, it is notoriously hard to derive feature points between drone images where much of the image is of water. Attempting to process these images in photogrammetry software can sometimes cause the water body areas in the orthomosaic to have artifacts and display as patchy, discolored, or jagged areas.
When this happens in a ArcGIS Drone2Map project you can attempt to correct the erroneous areas by applying a waterbody mask. This functionality can be found on the Home tab under the Pre-Processing tools group. A waterbody mask can either be drawn as a polygon or imported from a polygon feature class over the area experiencing reconstruction problems. There are two processing methods when using a waterbody mask, precise and coarse. The precise option assumes you have precisely defined the boundaries between what is water and what is not using the waterbody mask polygon. The coarse option allows for more flexibility and will attempt to correct water areas even if manmade features or shoreline areas appear within the waterbody mask polygon.
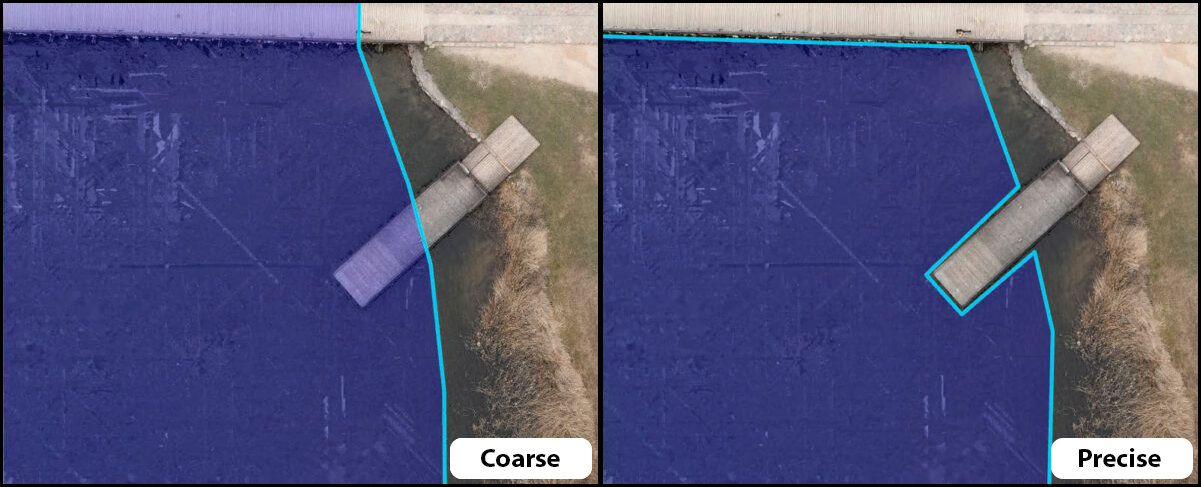
Regardless of the option chosen, when the processing is re-run the waterbody mask area will be interpolated to smooth the area.
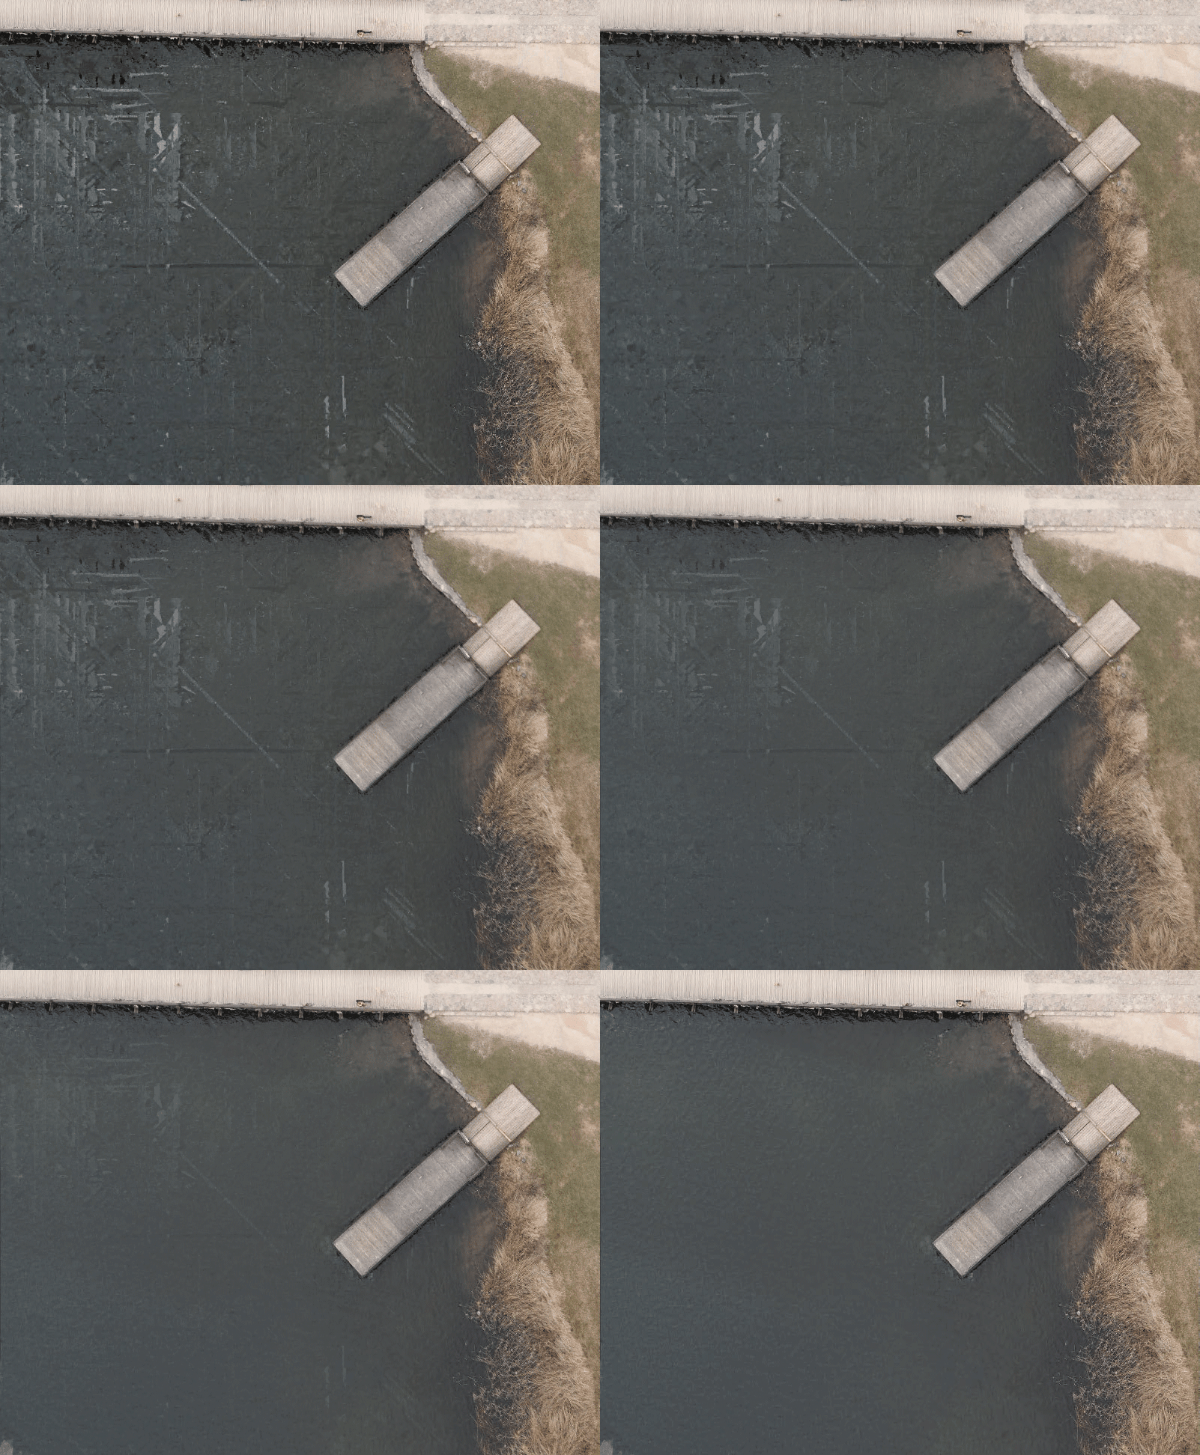
In addition to the waterbody mask, you can use the correction feature tool. This tool allows you to define a polygon or multipatch area over a 2D or 3D product that may have been reconstructed poorly so it can be re-processed in higher detail. It can be very useful for when most of your project came out as expected but a feature you may have wanted to highlight needs more definition. For more information on how this functionality works, see: Use correction features
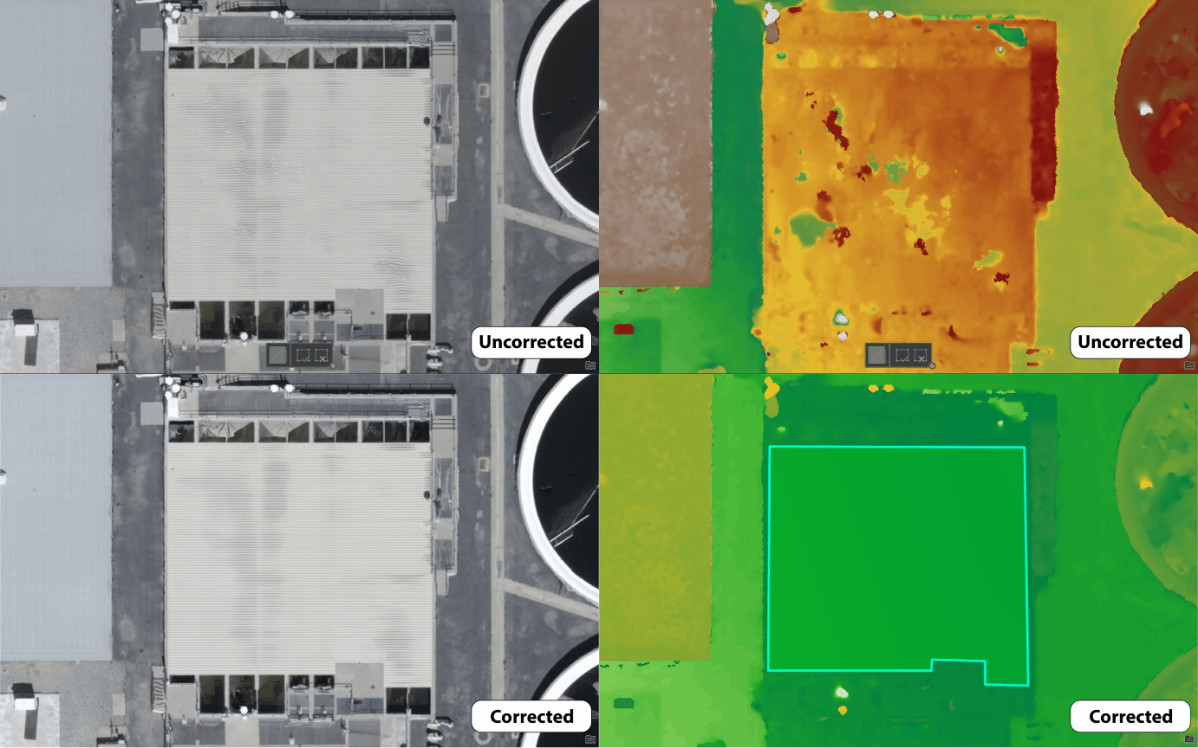
Both the waterbody mask and correction features tools can be used with tile-based processing. Where True Orthomosaics are initially generated as tiles, then mosaicked together to give you seamless products. Which is helpful because Drone2Map can then select and re-process only the tiles that overlap with the polygon features that you have drawn. This method drastically cuts down on processing times and allows for faster turnaround when running quality control on your projects. Backups are also created each time you process so that you can revert to the original result if you are not fully satisfied with the new changes.
Vertical alignment issues
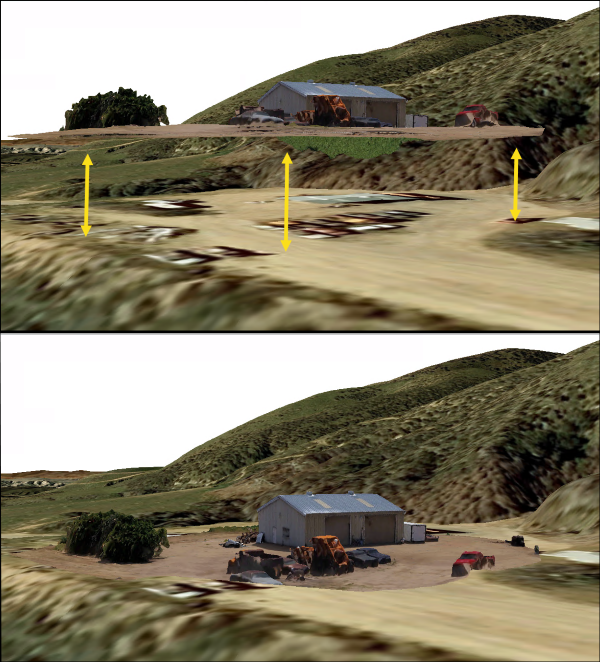
If you see that your output products are not matching up with the elevation surface when viewing them in a map or scene then the most likely culprit is your flights vertical accuracy. Many popular drone models do not consistently record accurate altitude information during a flight. The vertical GPS data from a drone can be offset by as much as 9 meters at times. This is often the main cause of most vertical alignment issues seen in ArcGIS Drone2Map.
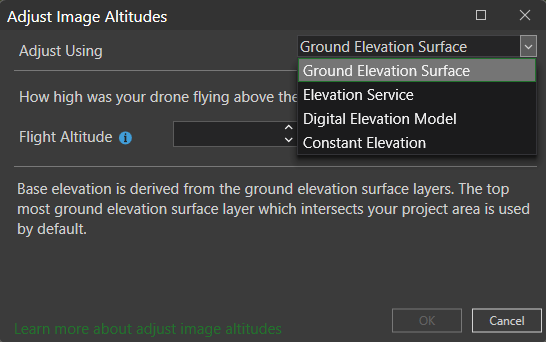
One of the quickest and most convenient ways of fixing the altitude is to use the Adjust Image Altitudes tool found under the Flight Data tab. Once you have selected the problematic image points you can adjust the height of those images to align with a variety of input elevation sources. This is generally a good option if you are planning on publishing your imagery products to ArcGIS Online or ArcGIS Enterprise and aren’t concerned with survey grade accuracy.
Another way to attempt correcting poor vertical accuracy is to use Ground Control Points (GCPs). It is always good practice to collect GCPs with each flight project if possible. If you frequently find your products are appearing above or below the elevation surface when viewing them within a map or scene, then GCPs will help align the heights properly. When you import ground control points into Drone2Map each point should have a pre-recorded height or elevation value. By linking images together using those GCPs and running your processing, the software will adjust the output products to the same elevation as the GCPs.
Even if you did not have the chance to collect GCPs within the field for that given project you can still create GCPs. Drone2Map allows you to create GCPs based off the basemap. While this is not going to be close to the accuracy you will receive by collecting ground control points in the field, it can still help with adjusting products to align with the ground surface.
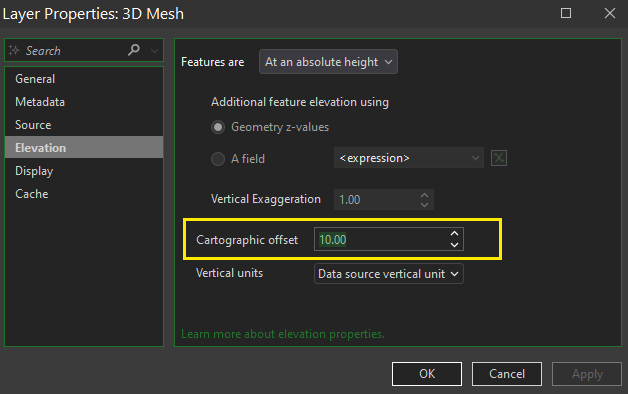
A temporary vertical adjustment can be made to layers that do not appear at the correct height in the 3D Map. By applying a cartographic offset, the z-value of the entire layer can be moved up or down in the 3D Map. It can be useful if you are attempting to quickly get a layer that is either floating above or the below the basemap to correctly align vertically.