Note:
You need the following account and license types to use this workflow:
- Microsoft license—You need a Microsoft 365 license, with the Contributor role or higher, to enable time animation.
- ArcGIS account type—Standard users can perform all the functions of this workflow; you do not need to sign in.
You can use time animation to configure the way time-aware data appears on a map.
See Time-aware data to learn about temporal content.
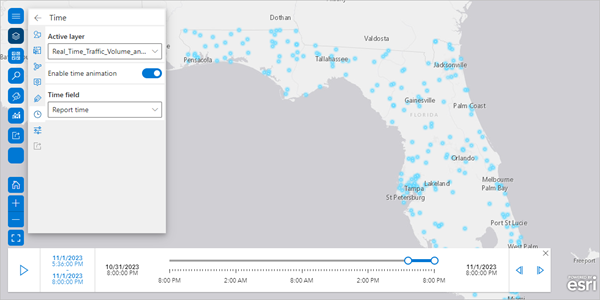
When you enable time animation on a map layer, you use the Time pane to configure the field in the data that contains the time information. You can also configure the animation slider to specify playback speed, time interval, and whether cumulative data is displayed on the map.
To view a time animation, the data used to create the map layer must contain date and time information. For more information, see Data preparation.
To enable time animation on a map layer, complete the following steps:
- Sign in to ArcGIS.
- From the map tools, click Layers
 .
.The Layers list appears.
- At the top of the Layers list, click Layer options
 .
.The Layer options pane appears.
- Choose a layer to modify from the Active layer drop-down menu.
- From the Layer options pane, click Time
 .
.The Time pane appears.
- Turn on the Enable time animation toggle button.
The Time field drop-down menu becomes active.
A time slider appears at the bottom of the map with the default options.

- From the Time field drop-down menu, choose the column in the data that contains the date and time information to animate.
The drop-down menu only displays columns that contain temporal data.
- To turn off time animation on a layer, turn off the Enable time animation toggle button.
- Click the Back button
 to return to the Layers list or click the Close button
  on the time slider to turn off time animation.