Note:
You need the following account and license types to use this workflow:
- Microsoft license—You need a Microsoft 365 license, role Contributor or higher, to save layers with label configurations.
- ArcGIS account type—Standard users can perform the functions of this workflow; you do not need to sign in.
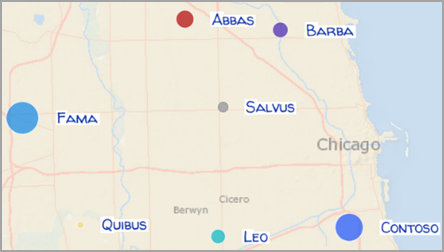
Labels are short pieces of text that describe the features in an ArcGIS for Microsoft 365 layer. You can enable and configure labels for map layers.
See Labels to learn about labeling map layers.
Enable labels
To enable labels on a layer, complete the following steps:
- Open a map-enabled report or create one. Activate edit mode for the report.
- In the Layers list, click Layer options
 on a data layer.
 - From the Layer options , click Labeling
 .
.The Labeling pane appears.
- Turn on the Enable labels toggle button.
The label configuration options become active.
- Turn off the Enable labels toggle button to turn off labels for the layer.
The label configuration options become inactive and labels are removed from the map.
Configure labels
To configure labels, complete the following steps:
- Ensure that labels are enabled for the layer you want to modify.
Once labels are enabled, the label configuration options become active in the Labeling pane.
- From the Label field drop-down menu, choose an attribute to use as the label.
- Specify how the label will display by doing any of the following:
- Specify the Font, Size, and Format values for the text.
- Choose a color for the text from the Color options or click Edit
 and use the color selector. You can also specify a custom color by RGB or hexadecimal code.
 - Choose a Placement value to align the label relative to the feature.
- Set the Visible range value of the label.
Drag one or both handles of the Visible range slider to set the minimum and maximum visibility. The arrow below the slider indicates the current zoom level.
You can use the scale identifiers such as Country, City, and Building when selecting a zoom scale as you use the slider.
To set a more precise scale, click the drop-down menu next to the scale identifier and choose a zoom level.
- Turn on the Enable halo toggle button to add a halo outline around the text. Set the width of the halo using the drop-down menu and choose the halo color.

- Click the Close button
 or the Back button
  to close the Labels pane and display the map.