Note:
You need the following account and license types to use this workflow:
- Microsoft license—You need a Microsoft 365 license, with the Contributor role or higher, to use this workflow.
- ArcGIS account type—You must sign in to an ArcGIS account to complete the steps in this workflow.
Adding content from ArcGIS as a reference layer is a quick way to add context to a map's data layer.
See Reference layers to learn more about adding content from ArcGIS to a map.
When you sign in to your ArcGIS account, you can search for content from your organization, your organization's groups, and public content. If you are not signed in, only public content appears in the search results.
Note:
To make the data available to add, see Add a custom reference layer to ArcGIS.
Note:
Shared content availability depends on settings established by the item owner, your user type and role, and organization settings. For information about shared content, see Share content in the ArcGIS Online help.
When you add a reference layer to a map in ArcGIS for Power BI, the ArcGIS item type that appears in the gallery is filtered according to your account type.
If you are signed in to your ArcGIS account, the following item types are available:
- Feature service layer
- Map service layer
- Vector tile service layer
- Image service layer
- Web map
To add content from ArcGIS, complete the following steps:
- Sign in to your ArcGIS account.
- From the map tools, click Analysis
 .
.The analysis tools appear.
- Click Reference layer
 .
.The Reference layer pane appears.
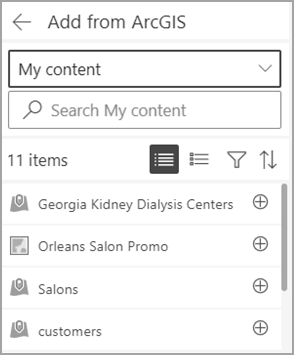
- Click the ArcGIS button.
- Choose a search location from the drop-down menu.
- Type one or more keywords in the search text box.
Tip:
To learn more about searching for ArcGIS content, see Browse and search content in the ArcGIS Online help.
The search results dynamically appear as you type.

- Optionally, do any of the following to customize the format of the results:
- Click the List button
 and the Details button
  to change the view.
 - Click the Filter button
 and do any of the following:
- Turn on the Search within map area toggle button to only see results that contain data for the current view of the map.
- Use the check boxes to filter results by item type.
- Choose a date range from the drop-down menu to filter results by date modified, or choose Custom date range and use the calendar to select a start date and end date.
- Click Clear filters to remove all filters.
Note:
If your organization administrator has restricted access to searching for content outside of your organization, the search returns only results from your organization.
- Click the Sort button
 to sort the results by date modified, title, oldest, or most recent.
 - Click a search result to open a details pane that provides information about the content, such as the author's name, the date it was created, and its privacy status.
Tip:
Click the Show layer details button
 in the details pane to view content in a new window.
- Click the List button
- Click Add
 and choose the ArcGIS content to add to the map.
The content appears on the map and is also added to the Layers list. The map view zooms to display the extent of the layer.
Note:
Adding some types of data consumes ArcGIS credits.
- To remove ArcGIS content from the map, click Remove
 .
.Alternatively, from the Layers list, select the layer, click Layer options
 , and click Delete
  .
. - When you are finished, click the Back button
 and click Close to close the pane.