Sharing 3D GIS mapping content with others can be done in a variety of ways, and sometimes the most effective way is as a video or image. For example, an explanatory 3D GIS video can be posted on social media, hosted on a web site, or left looping on a publicly displayed screen, allowing more people to view it without the need for specific experience, training, applications, or hardware. The easily consumed delivery format increases the scope of people who will be able to access it.
As videos and images are purely read-only formats, it is important to have scenes that properly represent the data and information you want to share. You should also carefully consider the viewpoints chosen when exporting them, to ensure common problems, like obscured content and perceived sizes due to the distance from the camera, are avoided as much as possible. When producing videos, you should have a good idea of the story you need to convey and how the 3D content can help explain it. The best videos and images will come from well-authored 3D scenes.
For cases in which you need people to interactively explore 3D data, you should instead choose to publish content online as scene layers, web scenes, and stories, or collate maps and layers into packages that can be made available to other GIS professionals working on mobile or desktop applications.
Producing images
Exporting images from a 3D view is essentially the same process as exporting an image from a 2D view. There are different methods available, from quick and simple approaches to more deliberate workflows that require additional thought and the specification of the output resolution and aspect ratio.
Images are a good option for sharing 3D content when the hosting media is static, like a printed handout, or when the consuming bandwidth is limited. They are also less distracting for cases in which other content, like explanatory text and tables and charts and photographs, need to come to the foreground.
When producing images, you should also consider how many are needed. For example:
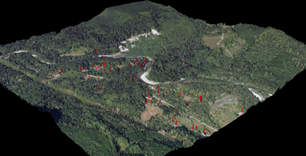
- One image can provide an overview of a 3D area, such as the extent and size of a city.
- Two images will show a change in state, such as before and after an event.
- A series of images with changing perspectives can describe a 3D object, such as a series of viewpoints around a mountain peak or a proposed new building.
Images of the 3D view
For quick creation of images, you can capture the currently displayed 3D view as an image. This is helpful for cases in which you want an expedited way to share graphics with others, or for cases in which the scene contains all the required information and you do not need to include additional scene adornments like north arrows or data credits.'
There are several ways to create an image directly from a 3D view, including:
- Screen capture—You use the system's Print Screen option to copy the screen to your clipboard, and then paste the result to an image editor, like PaintShop Pro or Gimp, for optional additional editing before sharing with others. You may also have dedicated tools, such as SnagIt or Camtasia, that allow more precise screen capturing options ii. In ArcGIS Pro, there is also a specific Capture to Clipboard command on the Sharing ribbon tab for maps and scenes. This technique works for all 3D applications that render on a screen, but the quality and resolution of the image will be limited to the display hardware.
- Printing the display—You use the application’s Print option to export directly to a printer, or to a supported file format like PDF or PNG. This technique is available for web scenes using the browser window’s Print option (e.g., using Microsoft Edge or Google Chrome) and ArcGIS Pro using the Print Map command on the Sharing ribbon for a scene. The output format and resolution options are dependent on the specific application.
- Exporting the scene view—You use the dedicated export to image capability for the application. In ArcGIS Pro, you can use the Export Map option on the Share ribbon for a scene view. The export pane provides many options in file formats such as JPEG, PDF and PNG, as well as choosing the compression options and resolution of the image. In Scene Viewer, you can export a snapshot and ArcGIS Earth allows you to create an export layout with the current scene view.

Images with overlay elements
For more complex images that include overlay elements on top of the 3D view, like titles and watermark logos and north arrows, you can use ArcGIS Pro or ArcGIS Earth layouts to author a printable page that contains the 3D map frame.
The workflow for this in ArcGIS Pro is:
- On the Insert ribbon, add a new layout with the appropriate page size.
- Add a data frame element that references the 3D scene.
- As needed, add static text elements, image elements, etc., onto the page.
- As needed, add dynamic elements like north arrows and date values onto the page.
- Share the layout as an image.
See the Export and share current view topic to learn about creating layouts in ArcGIS Earth.
Producing videos
Exporting videos from a 3D view is supported in ArcGIS Pro only, using the animation framework. The state of the view—including the camera viewpoint, layer visibility, and map time—are captured in keyframes, and then a video is created by interpolating between the various states. You can create a fly-through of a cityscape, show building construction over time, go below the surface to show geology, or show shadows changing throughout the day.
Videos are a good option for sharing 3D content when the message needs to show objects from multiple viewpoints or includes changes over time. Videos are also less distracting for cases in which other content, like explanatory text and tables and charts and photographs, need to come to the foreground.
When producing videos, you should always keep the target audience in mind. For example:
- Will they be viewing it on their phones, their tablets, or large monitors and televisions?
- Are there expectations as to how long the video will be—seconds, minutes, hours?
- Does the video need post-processing work to include audio or music?
- Do you need to include background information, in addition to what’s shown in the 3D view?
Authoring fly-through videos
A simple video to create is a fly-through, in which the camera flies along a 3D path in the scene to show off static content. For example, you could fly over the landmarks of Paris, or fly along the route of a famous explorer. As the content is not changing, you can focus purely on the speed and view direction of the camera.
The workflow to create a fly-though video in ArcGIS Pro is:
- On the View ribbon, in the Animations group, click Add.
- Navigate the camera to the starting viewpoint, and on the Animation ribbon, click the Append button to add a new keyframe.
- Navigate the camera to the next viewpoint, and click Append to add another keyframe. Repeat this step as many times as needed.
Note:
By default, the animation will allocate 3 seconds to move between keyframes.
- On the Animation ribbon, click the Play button to preview the flight path.
- Optionally, adjust the flight timing by:
- Changing the total Duration on the Animation ribbon.
- Selecting a keyframe in the Animation Timeline pane and changing its duration on the Animation Properties pane.
- Selecting a section (or all) of keyframes on the Animation Timeline pane, right-clicking, and choosing the Apply constant speed option.
- Export the animation to a video file by clicking the Movie button on the Animation ribbon, filling in the parameters, and clicking Export. There are also helper functions to use other properties in the scene, like bookmarks, to define the camera’s flight path.
Authoring videos with overlay elements
For more complex images that include overlay elements on top of the 3D view, like titles and logos and dynamic map time, you will need to add and define animation overlays. These elements display on the screen, on top of the 3D view, and can help explain to the user what is being shown. For example, a title with the city name and a watermark logo for the national tourism agency will explain where the data situated and who created the video. More complex dynamic elements, like one that shows the current map time, can be used to give feedback on properties within the scene itself. For example, displaying dynamic time text will better explain how the shadow of a building is moving over the course of a day.
The process to add overlays to an animation in ArcGIS Pro is:
- Fully author an animation first, and then add overlay elements as a final step.
- In the Timeline Pane, select the span of keyframes for when the overlay should display. For example, for title text, select all the keyframes.
- On the Animation ribbon, expand the Overlay gallery and choose an overlay to insert. For example, choose the Shadow Title text element.
- Define the required properties for the element. For example, enter Proposed Construction for a text element and exit edit mode.
- Optionally, view and update properties for overlay elements on the Overlays tab of the Animations Properties pane.
After you have added all your overlays, preview the animation in the view, make any additional adjustments to the appearance or display duration of the overlays, and then export to a video file.
Considerations
What is the destination/hosting application?
- Social media applications have different preferences for resolution and frame rate.
- TV and streaming services have very specific requirements.
Can you keep the file size at a manageable level?
- As you increase the resolution of your images and videos, file size increases. That is, doubling the width and height of the output resolution increases the total pixel count (and therefore the potential file size) by a factor of 4.
- As you increase the frame rate of your video, you will get the appearance of smoother playback, but can also potentially increase the total file size.
Required software
For quick creation of images, you can screen capture any 3D application. If you need to create layout with a 3D view, you will need ArcGIS Pro or ArcGIS Earth. You'll needArcGIS Pro to create videos.
Explore the following resources to learn more about producing videos and images in ArcGIS.
ArcGIS help documentation
Reference material for ArcGIS products:
Videos
Esri-produced videos that clarify and demonstrate concepts, software functionality, and workflows:
Tutorials
Guided, hands-on lessons based on real-world problems:
Esri training
Authoritative learning resources focusing on key ArcGIS skills:
Esri community
Online places for the Esri community to connect, collaborate, and share experiences:
- Ask the 3D community questions