You can use the HF Zero Shot Text Classification model in the Process Text Using AI Model tool available in the GeoAI toolbox in ArcGIS Pro. Follow the steps below to use the model for text classification.
Classify text
Complete the following steps to classify text:
- Download the HF Zero Shot Text Classification pretrained model from ArcGIS Living Atlas of the World.
- Browse to Tools on the Analysis tab.

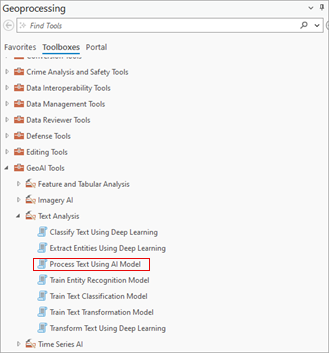
- Click the Toolboxes tab in the Geoprocessing pane, select GeoAI Tools, and browse to the Process Text Using AI Model tool under Text Analysis.

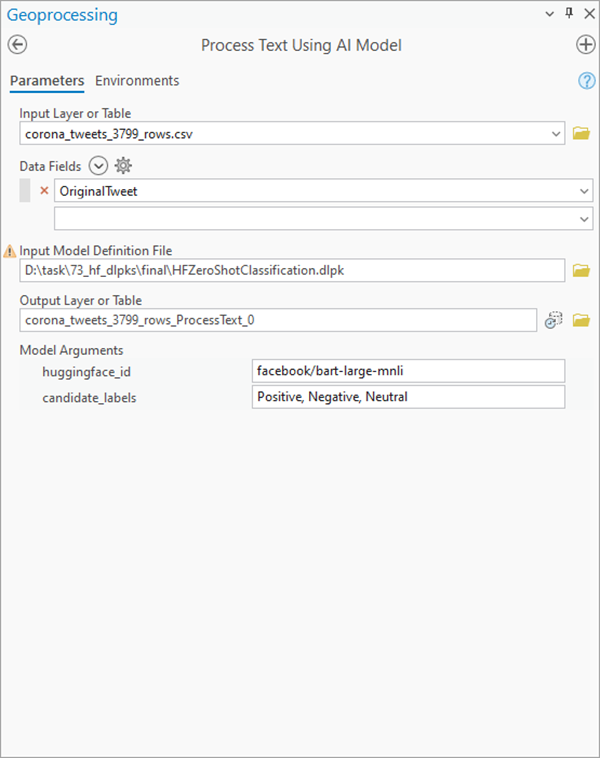
- Set the variables on the Parameters tab as follows:
- Set Input Layer or Table to the input point, line, or polygon feature class, or table containing the text to be classified.
- Set Data Fields to the text column to classify.
The column must be named input_text. You can select multiple columns from the drop-down menu, but processing will only be done on input_text. The other columns will be copied to the output.
- For Input Model Definition File, select the model .dlpk file.
- Set Output Layer Or Table to the name of the output table that will contain the results.
- For Model Arguments, change the values of the arguments if
required.
- huggingface_id—The model ID of a pretrained zero shot text classification model hosted on
huggingface.co.
Zero shot text classification models can be filtered by selecting the Zero-Shot Classification tag under the Tasks section within the Natural Language Processing category on the Hugging Face model hub, as shown below:

The model ID follows the format {username}/{repository}, as displayed at the top of the model's page:

Only those models that have config.json are supported. This file can be verified under the Files and versions tab of the model page, as shown below:

- candidate_labels—A comma-separated list of categories for classification (for example, "Positive, Negative, Neutral").

- huggingface_id—The model ID of a pretrained zero shot text classification model hosted on
huggingface.co.
- Set the variables on the Environments tab as follows:
- For Processor Type, select CPU or GPU.
It is recommended that you select GPU, if available, and set GPU ID to specify the GPU to be used.

- For Processor Type, select CPU or GPU.
- Click Run.
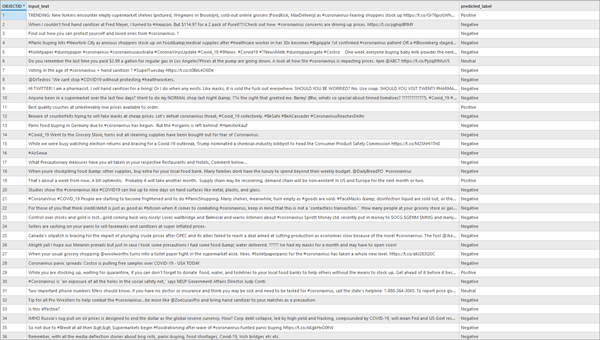
Once completed, a new output table is added to the current geodatabase.
