You can use the HF Image Inpainting model in the Classify Pixels Using Deep Learning tool available in the Image Analyst toolbox in ArcGIS Pro. Follow the steps below to use the model for classifying pixels in images.
Supported imagery
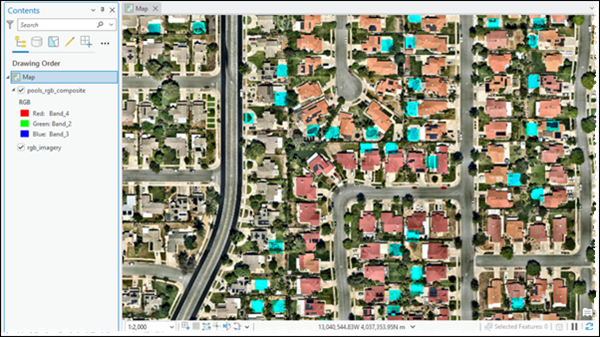
This model can be used with a 4-band, 8-bit imagery created by combining an RGB imagery with a binary mask raster.
Use any 3-band, 8-bit RGB raster as your base imagery. Ensure the bands are in the following order:
- Band 1: Red
- Band 2: Green
- Band 3: Blue
This could be a satellite, drone, or aerial image.
Create a separate raster representing the binary mask for the region to inpaint. In this mask, pixels should have the following values:
- Pixels to be inpainted should have a value of 1.
- All other pixels should have a value of 0 or NODATA.
You can create this using tools such as Reclassify, or by exporting a manually created polygon mask using the Polygon to Raster tool.
Using the Composite Bands tool, you can combine the RGB image and binary mask. Ensure the order of the bands is [Red, Green, Blue, Mask] (total of 4 bands).
Inpaint images
Complete the following steps to inpaint masks from the imagery:
- Download the HF Image Inpainting model and add the imagery layer in ArcGIS Pro.
- Zoom to an area of interest.

- Browse to Tools on the Analysis tab.

- Click the Toolboxes tab in the Geoprocessing pane, select Image Analyst Tools, and browse to the Classify Pixels Using Deep Learning tool under Deep Learning.

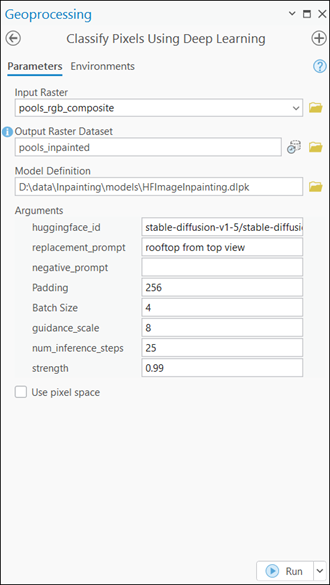
- Set the variables on the Parameters tab as follows:
- Input Raster—Select the imagery.
- Output Raster Dataset—Set the output classified raster name that will contain the inpainted results.
- Model Definition—Select the model .dlpk file.
- Arguments—Change the values of the arguments if
required follows:
- huggingface_id—The model ID of a pretrained Image Inpainting model hosted on Hugging Face.
Image Inpainting models can be filtered by choosing the Text-to-Image tag in the Tasks list on the Hugging Face model hub, as shown below:

The model ID consists of the {username}/{repository} as displayed at the top of the model page, as shown below:

Only those models that have model_index.json are supported. The presence of these files can be verified on the Files and versions tab of the model page, as shown below:

- replacement_prompt—The prompt is a textual instruction describing what the model should generate in the masked region of the image. It focuses on the desired appearance, such as subject matter, style, texture, or color. Effective prompts are concise yet detailed, guiding the model to produce high-quality, contextually relevant results.
- negative_prompt— The negative prompt specifies what the model should avoid generating in the masked region. It helps steer the diffusion process away from unwanted features like distortions, low-quality outputs, or incorrect styles.
- Padding—The number of pixels at the border of image tiles from which predictions are blended for adjacent tiles. Increase its value to smooth the output while reducing edge artifacts. The maximum value of the padding can be half of the tile size value.
- Batch Size—The number of image tiles processed in each step of the model inference. This depends on the memory of your graphics card.
- guidance_scale—Controls how strongly the diffusion model follows the replacement_prompt during generation. Higher values increase adherence to the prompt but may reduce creativity and diversity. Typical values range from 1.0 to 30.0, with around 8 recommended for balanced results.
- num_inference_steps—The number of denoising steps used to generate the image. More steps generally improve image quality and detail but increase generation time. Common values range from 15 to 50.
- strength— Used to determine how much the original image is altered. A higher value results in more significant changes, while a lower value preserves more of the input image. Allowed values range from 0.0 to 1.0.

- huggingface_id—The model ID of a pretrained Image Inpainting model hosted on Hugging Face.
- Set the variables on the Environments tab as follows:
- Processing Extent—Select Current Display Extent or any other option from the drop-down menu.
- Cell Size (required)—Set the value to 0.3.
- Processor Type—Select CPU or GPU.
It is recommended that you select GPU, if available, and set GPU ID to specify the GPU to be used.

- Click Run.
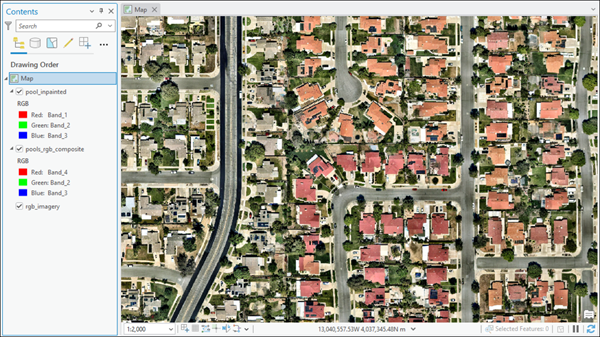
The output layer is added to the map.
