ArcGIS Connectors for Power Automate includes a connector that accesses your ArcGIS Enterprise account to perform certain actions. To use the ArcGIS Enterprise connector, your organization must be running ArcGIS Enterprise 11.0 or later. The organization must also be public facing and able to receive requests over the internet. ArcGIS Connectors for Power Automate do not support connections to disconnected ArcGIS Enterprise deployments or configurations using a Microsoft on-premises data gateway. See the Esri Developer topics about OAuth 2.0 authentication and Register an OAuth application to learn more.
You can connect to ArcGIS Enterprise in one of two ways, depending on whether you connect before beginning a flow or while in a flow.
If you are operating in ArcGIS Enterprise 11.2 or earlier, you must create an application in your organization. In ArcGIS Enterprise 11.3 and later, you can proceed by creating a flow.

Create a connection to ArcGIS Enterprise in Power Automate
There are two ways to create a connection between a connector and the ArcGIS Enterprise application in Power Automate: before beginning a flow or while in a flow.
Connect before beginning a flow
To connect to ArcGIS Enterprise from Power Automate before beginning a flow, complete the following steps:
- Open Power Automate and sign in with your Microsoft account.
- From the pane on the left, click Connections.
Note:
You may need to click More > Connections.

- Click New connection.
- Using the search tool, search for ArcGIS.
- Click the ArcGIS Enterprise connector.
The ArcGIS Enterprise window appears.
- Provide the following information, some of which you may need to get from your organization:

- ArcGIS Enterprise URL—The URL of your ArcGIS organization's home page.
Note:
Do not include http:// or subdomain pages. For example, if the URL is http://webadaptorhost.domain.com/webadaptorname/home, enter the URL as webadaptorhost.domain.com/webadaptorname. See the ArcGIS Enterprise topic about Portal for ArcGIS URLs for more information.
- Client ID—For ArcGIS Enterprise 11.3 and later, enter arcgisforpowerautomate. For ArcGIS Enterprise 11.2 and earlier, this is the unique identifier for the application you created to link to the ArcGIS Enterprise connector. The Client ID value is on the application's Settings page under App ID. Follow the steps in Create an application in ArcGIS Enterprise to get this information.
- ArcGIS Enterprise URL—The URL of your ArcGIS organization's home page.
- Once the required fields are populated, click Create.
A login prompt appears.
- Sign in with your ArcGIS Enterprise account information.
You can now use the actions in Power Automate that are available with this connection.
Connect while in a flow
To connect to ArcGIS Enterprise while in a flow, complete the following steps:
- Open Power Automate and sign in with your Microsoft account.
- Click Create in the pane on the left.
- Click Instant cloud flow.
A new window appears.
- Provide the flow name and click Manually trigger a flow.
- Click Create.
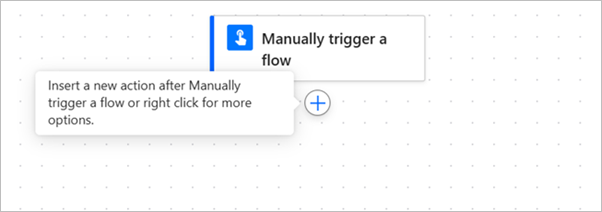
The flow creation page appears.
- Click the plus sign to insert a new action.

The Add an action pane appears.
- In the Add an action pane, search for ArcGIS and click the ArcGIS Enterprise connector from the results.
- Click the desired action from the list of available ArcGIS Enterprise actions.
A connection window appears.
- Provide the following information, some of which you may need to get from your organization:
- ArcGIS Enterprise URL—The URL of your ArcGIS organization's home page.
Note:
Do not include http:// or subdomain pages. For example, if the URL is http://webadaptorhost.domain.com/webadaptorname/home, enter the URL as webadaptorhost.domain.com/webadaptorname. See the ArcGIS Enterprise topic about Portal for ArcGIS URLs for more information.
- Client ID—For ArcGIS Enterprise 11.3 and later, enter arcgisforpowerautomate. For ArcGIS Enterprise 11.2 and earlier, this is the unique identifier for the application you created to link to the ArcGIS Enterprise connector. The Client ID value is on the application's Settings page under App ID. Follow the steps in Create an application in ArcGIS Enterprise to get this information.
- ArcGIS Enterprise URL—The URL of your ArcGIS organization's home page.
- Once the required fields are populated, click Sign in.
An ArcGIS login prompt appears.
- Sign in with your ArcGIS Enterprise account information.
You can now use the ArcGIS Enterprise actions in Power Automate that are available with this connection.
Create an application in ArcGIS Enterprise
To create an application in ArcGIS Enterprise 11.2 and earlier, complete the following steps:
- Sign in to your ArcGIS Enterprise organization.
Note:
Ensure that your account has the appropriate privileges to create content. - On the My Content tab on the content page, click New item and click Application.
The New item menu appears.
- Under Application type, choose Other application.
Note:
In Enterprise 11.2, the application setup process may ask for a URL. If prompted, enter https://make.powerautomate.com/.
- Click Next.
- Provide a title for the application.
- Optionally, select a folder, and provide tags and a summary.
- Click Save.
The application's overview page appears.
The application appears in your content.
Get information for the connector
To ensure that Power Automate connects with the necessary application in ArcGIS Enterprise, configure the application's registration settings and get information for the Power Automate connector.
To configure the application and get information, complete the following steps:
- Verify that you are signed in.
Note:
Ensure that your account has the appropriate privileges to create content. - On the My Content tab on the content page, click the title of the application you created in the previous section.
The application's overview page appears.
- With the application open, click Settings on the toolbar.
- In the Application section, under App Registration, click Update.
The Registered Info pane appears.
- Add the following redirect URIs to the application:
- urn:ietf:wg:oauth:2.0:oob
- https://global.consent.azure-apim.net/redirect
- https://global.consent.azure-apim.net/redirect/arcgisenterprise

Note:
These URIs may already be listed.
- Click Update.
The application appears with a list of updated redirect URIs.