In order to use the tools and batch files demonstrated in the previous sections, steps must be taken to adapt them to your particular data. In this section, you will explore the following tasks:
- Setting up your file structure to parallel the sample project
- Using the geoprocessing tool with your own data
- Creating and using batch files to automate the workflow with your own data
Note:
Both the geoprocessing tools and batch files call a Python script called MDCS.py. The parameters for this script are specified in the tool dialog box (in the case of the geoprocessing tools) or in xml configuration files (in the case of the batch files). More information about MDCS and the configuration parameters can be found on the MDCS GitHub page.
Set up your file structure
While your project and associated directories can be set up in many ways, these instructions will mirror the sample project structure.
- Copy the PreprocessedOrthos directory into C:/Image_Mgmt_Workflows/. Rename the new directory to suit your project.
- Ensure that the data, Logs, and MD directories are empty.
- Copy your data collections into the data directory (organize each collection in a separate folder). Take note of the kinds of preprocessed orthophotos you have in each collection.
- Create the file geodatabase you wish to use and save it to the MD directory.
Use the geoprocessing tools with your data
The geoprocessing tool dialog box will prompt you to enter the necessary information specific to your project. Where is your preferred geodatabase and input data? Does the data need black edges of NoData trimmed (as in the case of County Compressed Mosaics)? Is your data leaf-on (as with NAIP imagery)? Once you've entered the desired information, the tool should be ready to work with your data.
Note:
The geoprocessing tools rely on configuration files named *Generic.xml in …\Parameter\Config\PreProcess. If parameters need to be changed that are not included in the tool dialog, these configuration files must be edited, using the process described in How to edit XML configuration files, below. Be careful editing these files to avoid breaking the geoprocessing tools.
Use the batch files with your data
Batch files take a little extra prep work than the geoprocessing tools, but once set up properly they can process your data automatically, with little or no input required.
When implemented, each batch files calls Python scripts that process the data. These scripts rely on XML configuration files to define the appropriate input parameters. To adapt the example batch files to your imagery, you will need to (1) edit the input parameters in the XML configuration file(s), and (2) edit the batch file to point to your new XML file.
Note:
The file geodatabase you wish to use to organize your mosaic datasets should already be created. Find more information about creating file geodatabases here.
How to edit XML configuration files
First, you'll edit the provided example XML configuration files to work with your data by following these steps:
- Navigate to the …\Image_Mgmt_Workflows\PreprocessedOrthos\Parameter\Config\ directory.
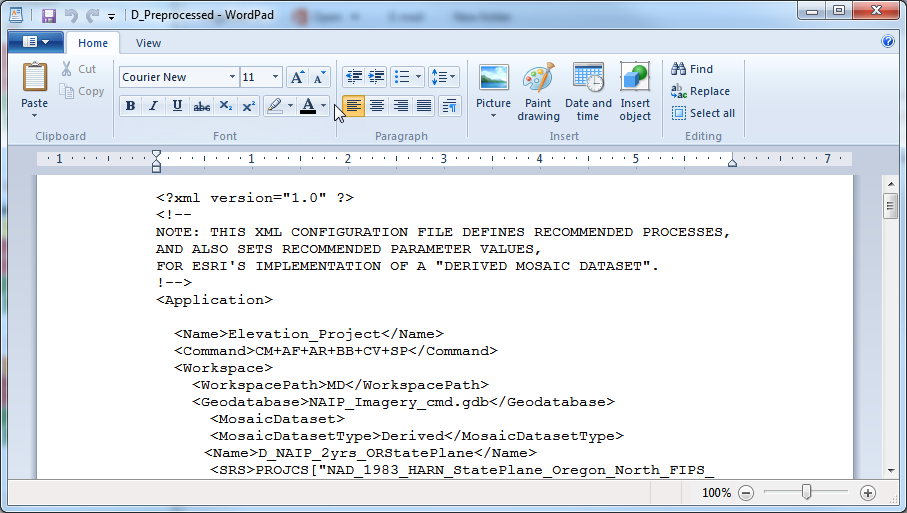
- Right click the XML configuration file you wish to edit, select Open with, and choose your preferred text editor (WordPad is a good option). The open XML file should look something like the image below.
- Edit fields as necessary, keeping the formatting the same. The fields you are most likely to edit in the XML configuration files for source and derived mosaic datasets are listed in the tables below.
- WorkspacePath: Path to the directory that contains your geodatabase
- Geodatabase: Name of your geodatabase
- Name: Name of your mosaic dataset
- SRS: Projection
- dataset_id: ID of your raster
- data_path: Path to the directory that contains your input data
- (FieldName: Year) Expression: Enter image date in double quotes
- (FieldName: Source) Expression: Enter the URL to the source you wish to attribute for the input data in double quotes
- (FieldName: Metadata_URL) Expression: If your metadata is hosted online, enter the URL here in double quotes
- (FieldName: LeafStatus) Expression: Enter "ON" for leaf on data; enter "OFF" for leaf off data (in double quotes)
- Name: Name of the application
- WorkspacePath: Path to the directory that contains your geodatabase
- Geodatabase: Name of your geodatabase
- Name: Name of your mosaic dataset
- SRS: Projection
- data_path: Path to the mosaic dataset you wish to add (list as many as desired)
- Save the new version of the XML configuration file to your project's ../Parameter/Config/ directory using an appropriate name.
| Heading (in XML file) | Tag to edit: Description |
|---|---|
<Workspace> | |
<MosaicDataset> | |
<AddRaster> | |
<Sources> | |
<CalculateValues> |
In the XML file for derived mosaic datasets, you are most likely to edit these fields:
| Heading (in XML file) | Tag to edit: Description |
|---|---|
<Application> | |
<Workspace> | |
<MosaicDataset> | |
<Sources> |
How to edit batch files
Second, to adapt the batch files to your data, follow these steps. You will probably need to create a new batch file for creating source mosaic datasets and one for creating a derived mosaic dataset.
- Open your preferred text editor (WordPad is a good option).
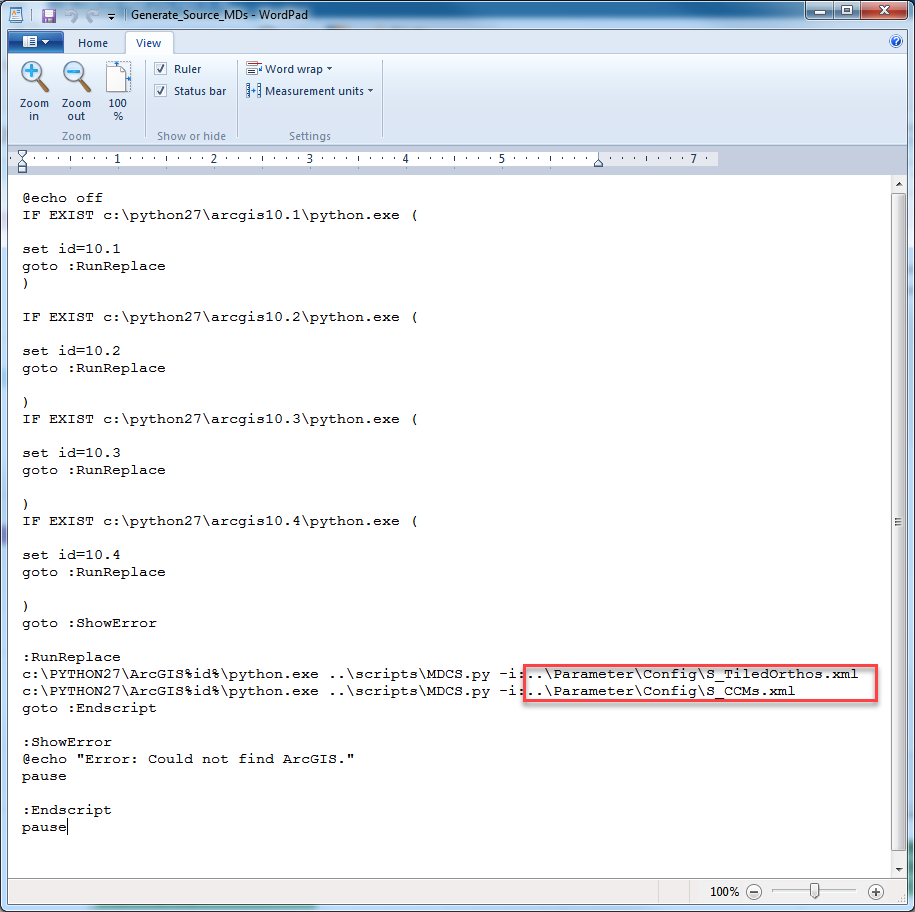
- From the main menu, select Open and navigate to the …\Image_Mgmt_Workflows\PreprocessedOrthos\BatchFiles\ directory. Select the batch file you wish to adapt and click OK.
- Locate the listed xml file paths (red box below).
- Change the xml file paths to point to the location of the new XML configuration files you saved in step 4.
- Save your edited batch file to your project's BatchFile directory using an appropriate name.
Note:
You may need to set the file type filter to "All Documents" before you can view the .bat files.
To run the batch file, locate the file in the directory where you saved it and double click the file.
After reading this section, you should have the information you need to use the workflow tools and scripts with your own data. If you have additional questions not addressed here, check out the Workflow tab for a deeper dive into what's happening under the hood of the Managing Preprocessed Orthophotos workflow.