Once the ortho mapping workflow is complete, you can generate orthomosaics or DEMs, or use the image collection (a mosaic dataset referencing the original images).
Extract DEMs from the imagery
In the Product section of the Ortho Mapping tab, you can create DEMs (DSMs and DTMs) from the imagery.
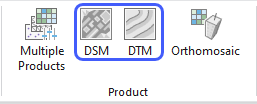
In the user interface, you can specify either a DSM (top surface extracted from point cloud) or a DTM (estimated bare earth with filters applied to remove vegetation and buildings).
If you plan to use the DEM for orthorectification, specify DTM.
In Generate ortho mapping products using the custom wizard, learn more about the algorithms available to generate the point cloud used to create the DEM: Extended Terrain Matching (ETM), Semi-Global Matching (SGM), and Multi-View Matching (MVM). It is typically best to test with the default (ETM), but consider MVM if your DEM does not show enough detail, or SGM if your imagery content shows urban buildings. When working with historical aerial imagery, MVM is recommended.
DEM generation is a fully automated process. Once created, it is recommended that you review a hillshade version of the product to gauge the quality and determine if corrections are required. DEM editing tools to remove artifacts are provided in Pixel Editor (ArcGIS Image Analyst required).
Extracting a DTM is only possible in image overlap regions covered by multiple images. In any areas with no overlap, your DEM will have gaps.
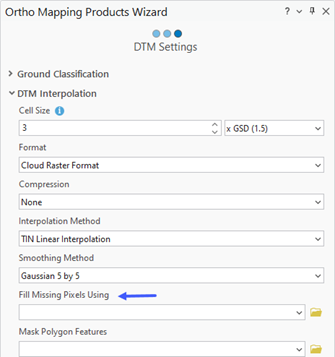
On the DTM Settings page, in the DEM Interpolation section, you can fill in DEM gaps with another source—ArcGIS Online World Terrain, for example.
Create orthomosaics
You can create an orthomosaic as a single output file. This can be used in ArcGIS Pro or shared as a tile layer with ArcGIS Online or ArcGIS Enterprise.
Note:
As an alternative to sharing the orthomosaic as a tile layer, you can also use ArcGIS Image Server to share the mosaic dataset Consider which approach makes the most sense to share for your use case.
See Generate an orthomosaic using the Orthomosaic wizard for details about the standard workflow.
If you follow the wizard, it will ask for elevation source (DEM) even if you have previously specified this. It is recommended that you use a bare earth DTM generated from the adjusted images for this process, not a DSM. Alternatively, an older authoritative DEM matching the topography of the adjusted images can be used. If there are significant topographical differences between the older DEM and the adjusted images, use of the older DEM is not recommended.
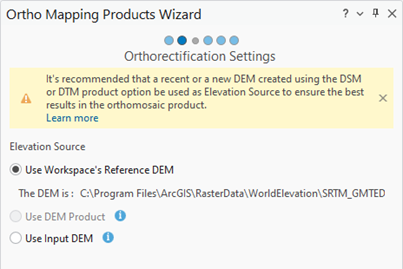
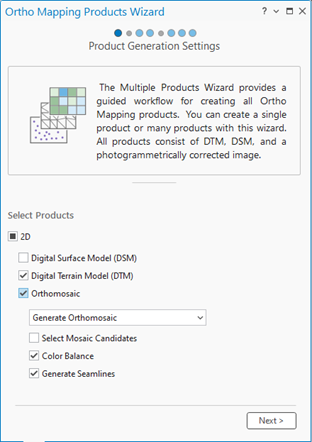
In the Orthomosaic wizard, you will be asked for color balancing and seamline options before specifying the spatial resolution and file format for your output orthomosaic.
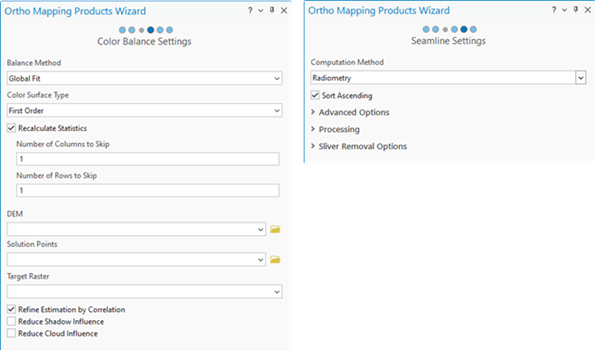

If you do not want to apply color correction or seamlines, use the Custom output wizard, which allows you to disable various steps (or run only one step) if desired.
Use the image collection
The image collection in the Contents pane is a mosaic dataset, the optimum data structure in ArcGIS for managing and processing imagery. It allows you to review the full content of the source imagery.
The mosaic dataset will orthorectify images on the fly, but the accuracy and visual appearance may not be optimized until block adjustment has been performed and a suitable DTM is used within the mosaic dataset.
Once a DTM is applied, the image collection provides an accurate preview. It can then be used directly in ArcGIS Pro or shared as a dynamic image service (with ArcGIS Image Server), and you may not need further processing.
The resulting mosaic dataset may also be used in stereo (requires ArcGIS Image Analyst)—if you want to extract point elevation values from the imagery, for example.
The mosaic data can also be used to perform quality assurance. When the dynamic orthomosaic satisfies the project requirements, you can then use the Export, Generate Raster or Tile Caching tools to persist the mosaic as a static dataset.
Depending on your use case, the mosaic dataset with a DTM applied may be the final required output. Alternatively, you may need to generate DEMs or orthomosaics, as well.
Optimize the mosaic dataset
Mosaic datasets perform on-the-fly orthorectification—as you pan and zoom around the project area, the system will detect the appropriate images, orthorectify them, and mosaic them together for display. (Learn more about best practices for managing imagery using mosaic datasets.)
To locate the mosaic dataset representing the image collection in an ortho mapping workspace, select the image collection in the Contents pane, right-click to select Properties, choose Source, and navigate to the appropriate geodatabase in the Catalog pane.
There are many parameters that can be changed that affect on-the-fly rectification. The following are recommended parameters for you to consider for the best experience.
Sort Order / Mosaic Method
This defines the ordering of the images. By default, the ordering may be set to NorthWest. In this mode, the image that is most northwest is displayed with highest priority (on top of other overlapping images). This has the advantage that the order of the images does not change as you pan, but it may not use the most central part of the image. If the mosaic method is changed to Closest to Nadir, the image where the distance from camera center to image center is smallest is displayed on top. Closest to Center is similar for scanned imagery. This typically provides the most accurate visualization, as effects of DTM errors are minimized. The order of the images may change as you pan around, and typically you will not see the edges between images.
ArcGIS Pro includes various tools (like Add Selected Images) that allow you to load multiple images covering the same areas to be displayed; this enables the accuracy of the ortho images to be quickly checked.
Footprints
Each image is clipped to its footprint. The footprints by default are generated based on the initial orientation and available DTM, and based on the location of the fiducial marks. If either of these changes, update the footprints using the Build Footprints tool. For imagery that is orthorectified on-the-fly, it is recommended that you use the by geometry option, which uses the relation between the images and ground to determine the extent. The tool can also be used to shrink the existing footprints. Footprints can be manually edited if there are areas of the image that are not to be seen.
Overviews
Overviews are low resolution versions of the orthomosaic generated for display at small scale. By default, the system will fill the current view extent using a maximum of 20 images. This can result in some imagery missing from the display unless overview images are used. Overviews can be generated using the Build Overviews tool.
Overviews can be generated at any pixel size. Typically a pixel size that is about 10 times the average low pixel size provides an overview that is generated very quickly and provides sufficient resolution to enable fast pan and zoom at all scales.
If you have changed the block adjustment, the overviews should be regenerated.
Color Balance
The Color Balance option in the Ortho Mapping Products Wizard or Color Balancing Mosaic Dataset geoprocessing tool can ensure that there is less difference between images to improve interpretation. Color balancing, when defined on a mosaic dataset, is applied on-the-fly as the images are accessed.
The color balancing process does not modify the overviews, so after performing color balancing, check the image at larger scales to confirm the effects and then generate new overviews to see the global effects. You may need to try different parameters to get the best results.
Seamlines
Seamlines act similarly to footprints in that they define the extent of the displayable image, but seamlines are generated to minimize the disparity between the images by determining suitable irregular shapes. Seamlines are used when the sort order (mosaic method) is set to Seamline.
When using seamlines, the blending between the images can also be defined to further hide the image differences (although when using blending, some ghosting may occur if images do not align perfectly). Blending is performed when Resolve Overlap is set to blend.
The Generate Seamlines option in the Ortho Mapping Products Wizard or Build Seamlines geoprocessing tool can be used to determine the best placement. Perform color balancing prior to performing seamline generation. Reducing the overlap between image footprints can also ensure the best part of each image is used. Seamlines can also be manually edited if required.