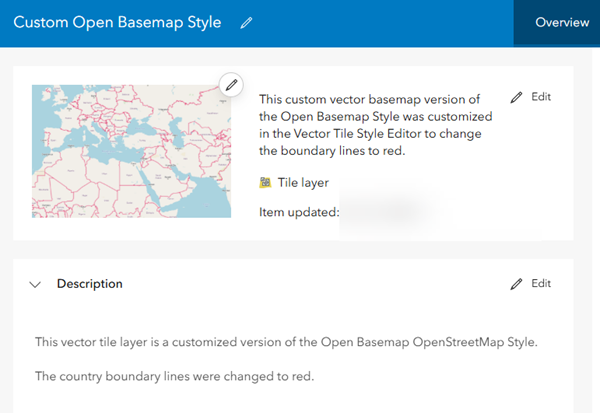
With ArcGIS Data Appliance: Open Vector Basemaps, you can modify and customize the map style. You can customize the map by changing the hex color codes of map features or labels, removing feature classes, changing fonts (face, size, and color), or making other edits. For more information, see the New ways of customizing Esri Vector Basemaps blog article on the ArcGIS Blog website.
Customization requires changes to the map style's resources\styles\root.json file. There are two main ways to create a map for customization: use the ArcGIS Vector Tile Style Editor, or copy a style downloaded from My Esri or from the USB flash drive. Then you can edit the custom style map item to include a new thumbnail and update the item's information for your custom style.
ArcGIS Vector Tile Style Editor
You can customize vector map styles through an app in Map Viewer.
In Map Viewer, access the
Vector Tile Style Editor button from the app launcher
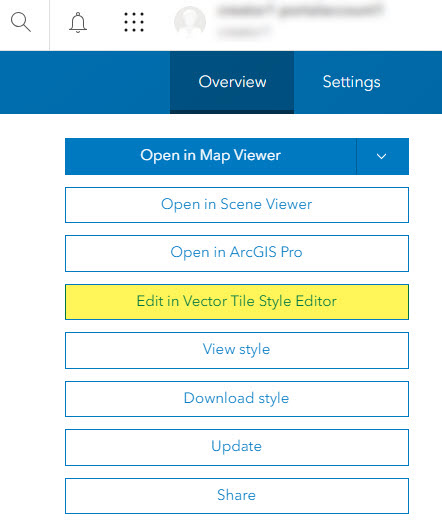
 or from the Edit in Vector Tile Style Editor button on a tile layer item page.

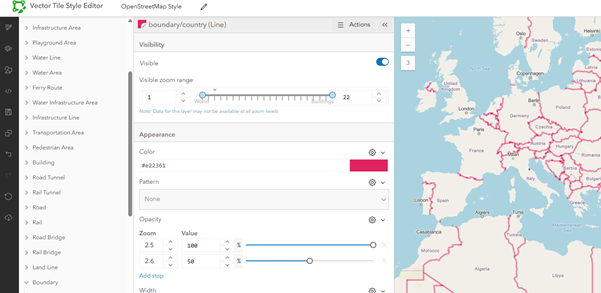
Styling options include the Quick Edit tool, in which layers are customized across groups of features, and the Layer Style Editor list for individual feature style controls. Colors, line weights, font faces, and sprite symbology are examples of the style changes that can be applied to your custom map item.
Information about using the ArcGIS Vector Tile Style Editor to create a custom basemap style is available on the Esri Developer website.
Copy a style downloaded from My Esri or from the USB flash drive and rename the map style directory
To copy a root.json style downloaded from My Esri or from the USB flash drive, complete the following steps:
- On your local computer, create a directory called CustomStyles at the same directory level as the GCS and WMA directories.

- Copy a style downloaded from My Esri or from the USB flash drive and rename the map style directory; for example, copy the openstreetmap directory into a new directory and change the name to customopenbasemapstyle.
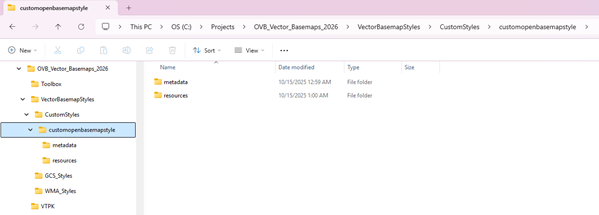
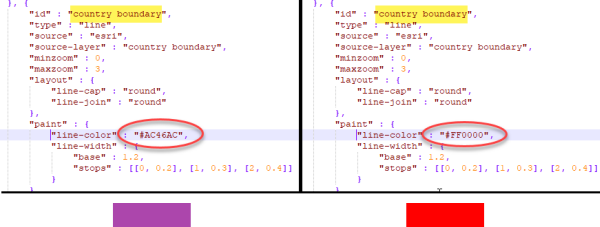
- In the new customopenbasemapstyle directory, open the resources\styles\root.json file (for example, CustomStyles\customopenbasemapstyle\resources\styles\root.json) in a text editor such as Adobe Brackets or Notepad++, edit the map code, and save the file.An example of a style edit in the root.json file is changing the country boundary in purple (#AC46AC) to red (#FF0000).
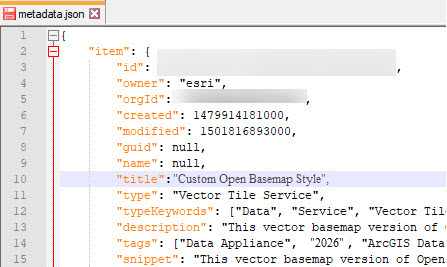
- In the new customopenbasemapstyle directory, open the metadata\metadata.json file (for example, CustomStyles\customopenbasemapstyle\metadata\metadata.json) in a text editor such as Adobe Brackets or Notepad++; edit "title":, replacing "OpenStreetMap Style" with a new map title (for example, "Custom Open Basemap Style"); and save the file.
- Validate the JSON using JSONLint or a similar JSON validation tool.
- Perform the publish tile layers (map styles) steps, this time pointing to the new directory containing your custom style.
The new style is created in your Enterprise portal under My Content. Following the naming conventions in steps 1 through 4 produces a new item in your portal named Custom Open Basemap Style.
Edit the custom style map item in your portal
On the map item page of your custom map style, you can update the summary, description, tags, and thumbnail to better describe the new map you styled.
It is recommended that you apply Delete Protection to your custom style map item on the item's Settings tab.
