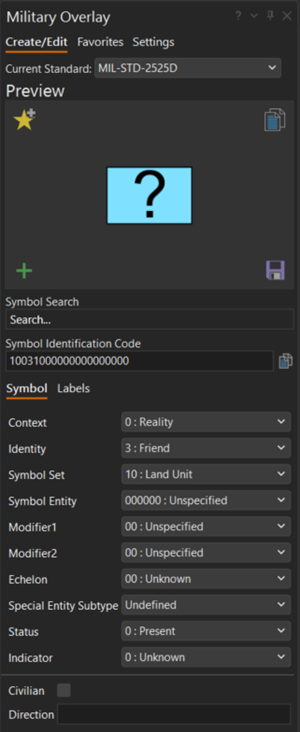
Military Overlay creates and manages symbolized features supporting military planning and operations and command and control systems. The symbols are built from symbology standards that support interoperability in joint militaries where information is distributed and disseminated across service, organizational, and echelon boundaries. Symbols created are from the MIL-STD-2525 and APP-6 family of standards.
The symbols created represent units, equipment, installations, activities, and meteorological events. Two types of symbols are created with Military Overlay: unit symbols and tactical graphic symbols. Unit symbols are icon-based symbols representing units, equipment, and installations and are comprised of a frame, colored fill with an icon, and modifiers and amplifiers surrounding the frame. Tactical graphic symbols represent actions, tasks, and graphic control measures, such as avenues of approach, landing zones, and check points. Both of these symbol types are constructed with an alphanumeric or numeric Symbol Identification Code (SIDC). The SIDC used to represent each unique combination of base symbol and graphic modifiers varies depending on the military symbology standard on which it is based.
Caution:
Backward compatibility problems may occur when using feature layers created using ArcGIS AllSource 1.3 Military Overlay. To fix backward compatibility issues that may occur when dealing with symbols created in ArcGIS AllSource 1.3, navigate to and delete the file <System Drive>\Users\<username>\AppData\Local\ESRI\ArcGISAllSource\MilitaryOverlaySettings.mssf
The following are the current supported military symbology standards:
- MIL-STD-2525D (This is the default.)
- MIL-STD-2525D w/CHANGE 1
- MIL-STD-2525C
- APP-6(E)
- APP-6(D)
- APP-6(B)
The following sections and linked topics describe how Military Overlay is used to create military symbols and place them on a map as features, modify existing symbols, create favorites, and export the symbols for use in other projects or by colleagues.
Create military symbols
Depending on the goal, the general process for creating features with Military Overlay is as follows:
- Open Military Overlay.
- Set the symbology standard.
- Search for the base symbol.
- Customize the symbol by adding text modifiers and graphic modifiers.
- Add the symbol to the map as a feature.
- Save edits.
The following sections and the links to related topics explain each step in further detail.
Open Military Overlay
Creating, modifying and managing symbols happens in Military Overlay.
To open Military Overlay, complete the following steps:
- On the Map tab, in the Features group, click Edit
 .
. - On the Edit tab, click Military Overlay
 in the Features group
The Military Overlay pane appears with the Create/Edit tab active.

Set the symbology standard
Before creating symbols on the map, first set the military symbology standard to use. This determines the reference set for the SIDC.
To set the symbology standard, complete the following steps:
- Open Military Overlay.
- Click the Create/Edit tab.
- From the Current Standard drop-down menu, select the military symbology standard.
- MIL-STD-2525D (default)
- MIL-STD-2525DC1
- MIL-STD-2525C
- APP-6(E)
- APP-6(D)
- APP-6(B)
Once the standard is set, all symbols and SIDCs created in Military Overlay use this standard.
Note:
If the Current Standard option is changed in a project, a new feature class is created in the target geodatabase. This is to separate the symbols created with different standards since the SIDCs will not match.
Set the target geodatabase
By default, the features created with the Military Overlay are placed in the project default geodatabase.
To set the target geodatabase, complete the following steps:
- Open the Military Overlay pane.
- Click the Settings tab.
- Click Browse
 .
.Select Geodatabase appears.
- Browse to and select the target geodatabase.
- Click OK.
- Click Apply.