Using ArcGIS Server Manager, you can publish a service definition file (.sd) as a service. The service definition is uploaded to the server as part of the publishing process. You don't have to copy it to the server first.
To publish a service definition using ArcGIS Server Manager, follow these steps for each service you want to create:
- Open ArcGIS Server Manager and sign in.
- Click Services > Manage Services > Publish Service.
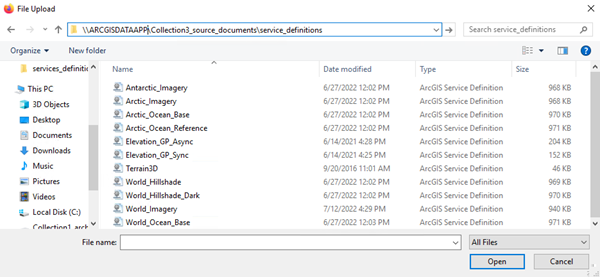
- Browse to CollectionX_source_documents > service_definitions on the ArcGIS Data Appliance data collection, for example, \\ARCGISDATAAPP\CollectionX_source_documents\service_definitions, where CollectionX is the number or letters of the ArcGIS Data Appliance collection for your product option.
Note:
If you plan to publish to ArcGIS Server 11.0, you should use the service definitions located in the service_definitions_11 folder. Also, for Terrain3D on ArcGIS Server 11.0, a service definition file is no longer used, but alternative publishing steps are provided at the end of this topic.
ArcGIS Data Appliance 2023 service definitions include services as follows:
Map services
- Antarctic_Imagery.sd
- Arctic_Imagery.sd
- Arctic_Ocean_Base.sd
- Arctic_Ocean_Reference.sd
- World_Hillshade.sd
- World_Hillshade_Dark.sd
- World_Imagery.sd
- World_Ocean_Base.sd
Note:
Map services are on the following collections depending on your product option: Collection1 (World Basic), Collection2 (World Standard), Collection3 (World Advanced), Collection4 (North America Standard), or Collection5 (North America Advanced). World Basic and North America collections do not include the Antarctic or Arctic services.
Note:
If you want to view the Citations for the World Imagery map service, you must Configure ArcGIS Server to use the source documents directories before you publish World_Imagery.sd. This process is not necessary for the World_Imagery service included with World Basic (on Collection1).
- Terrain3D.sd
Note:
If you plan to publish the Terrain3D service, you must have the ArcGIS Image Server installed.
Note:
Image services are on the following collections depending on your product option: Collection1 (World Basic), Collection2 (World Standard), Collection3 (World Advanced), Collection4 (North America Standard), or Collection5 (North America Advanced).
Note:
For Terrain3D on ArcGIS Server 11.0, a service definition file is no longer used, but alternative publishing steps are provided at the end of this topic.
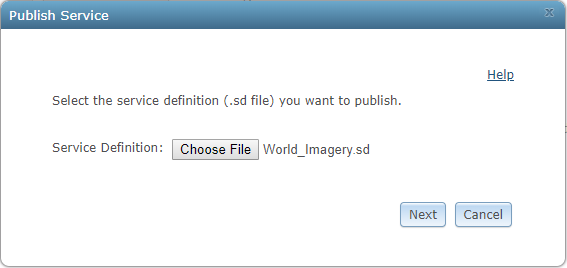
- Select the service definition you want to publish, for example, World_Imagery.sd, and click Open.
- Click Next.
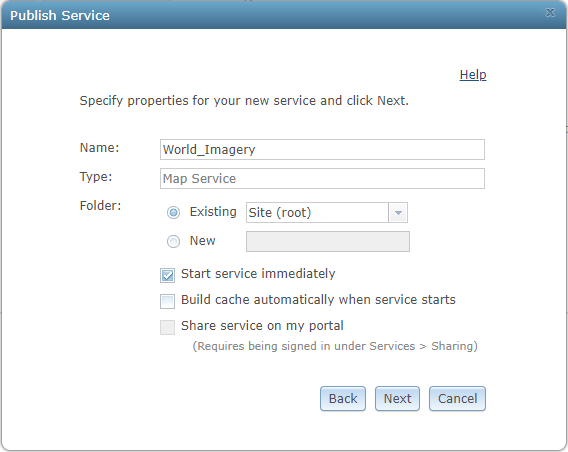
- If Build cache automatically when service starts is checked, uncheck it.
Note:
It is recommended that all your service names match the names of the service definition file; you should not change a service name to a different name.
- Optionally, choose the GIS server cluster that will host the published service definition.
To learn more, see Upgrade a multiple-cluster site for Windows.
- Click Next.
- Optionally, choose to enable or disable capabilities for your service definition.
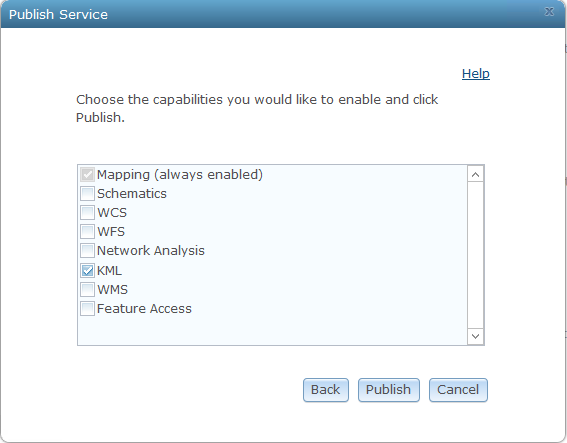
- Click Publish to publish the service definition as a service.
The new service appears in the list of available services.

The publishing process uses the first directory in the server's list of cache directories. You need to change it to the ArcGIS Data Appliance cache directory that was previously created.
- Click the Stop button
 to stop the service.
 - Click the Edit button
 to edit the service properties.
 - Click Caching, and change the cache directory setting to reference the ArcGIS Data Appliance collection, for
example, \\ARCGISDATAAPP\CollectionX_cache, where X is the number of the collection.

- Click Save to save your changes, and click the Start button
 to restart the service.
 - Repeat this process for any other map services you want to publish.
Update the cache directory for Terrain3D.sd
If the Terrain3D.sd image service returns the message Please wait while we check for pre-existing tiles in the selected directory…, and if the message window does not close within 10 minutes, close ArcGIS Server Manager and perform the following steps to update the cache directory for Terrain3D:
- Sign in to the ArcGIS Server Administrator Directory using the URL http://<server name>:6080/arcgis/admin.
- Click services to view the available services under the root folder.
- Click Terrain3D, scroll to the bottom of the page, and click Edit.
- In the Service Properties text area, update the following properties:
- Update the cacheDir property to \\\\<ARCGISDATAAPP>\\CollectionX_cache, where CollectionX is the collection where Terrain3D is located: Collection1 (World Basic), Collection2 (World Standard), Collection3 (World Advanced), Collection4 (North America Standard), or Collection5 (North America Advanced).
- Update the isCached property to true.
- Update the minScale property to 0.
- Update the maxScale property to 0.
- Click Save Edits to save and restart the service.
- Open ArcGIS Server Manager and sign in.
- Click Services > Manage Services.
- Click the Edit button
 for the Terrain3D service.
 - Click Caching to confirm the caching directory is pointing to \\\\<ARCGISDATAAPP>\\CollectionX_cache.
- Proceed to step 14 in the previous section.
For more information about ArcGIS Server 11.0, see Sharing a service with your ArcGIS organization using Manager in the ArcGIS Server 11.0 help under Publishing services and Share services with your ArcGIS organization.
For more information about ArcGIS Server 10.9.x, see Sharing a service with your ArcGIS organization using Manager in the ArcGIS Server 10.9 help under Publishing services and Share services with your ArcGIS organization.
For more information about ArcGIS Server 10.8.x, see Sharing a service with your ArcGIS organization using Server Manager in the ArcGIS Server 10.8 help under Publishing services and Share services with your ArcGIS organization.
Publish Terrain3D on ArcGIS Server 11.0
To publish the Terrain3D service on ArcGIS Server 11.0, complete the workflows below.
Repair the paths for the mosaic dataset
When ArcGIS Data Appliance is deployed in your network, the paths to the image files are changed, and the source mosaic dataset needs to be repaired so that the new paths are used. You can find the mosaic dataset for publishing Terrain3D in the following file geodatabase:
\\<server-ip>\CollectionX_source_documents\Terrain3D_11\MD\WorldElevation3D.gdb
The <server-ip> value is the network IP or server name of the data appliance, and CollectionX is the collection where the Terrain3D service is located: Collection1 (World Basic), Collection2 (World Standard), Collection3 (World Advanced), Collection4 (North America Standard), or Collection5 (North America Advanced). You need ArcGIS Desktop Standard or Advanced to perform this task.
Complete the following steps to repair the paths for the mosaic dataset located under \\<server-ip>\CollectionX_source_documents\Terrain3D_11\MD\WorldElevation3D.gdb to your machine's full path:
- Click Open to open the Catalog window in ArcMap and browse to \\<server-ip>\CollectionX_source_documents\data\WorldElevation\scripts\, where <server-ip> is the network IP or server name of the data appliance, and CollectionX is the collection where the Terrain3D service is located.
- In the Catalog Tree window, expand WorldElevation.tbx and double-click the Repair mosaic dataset
paths tool.
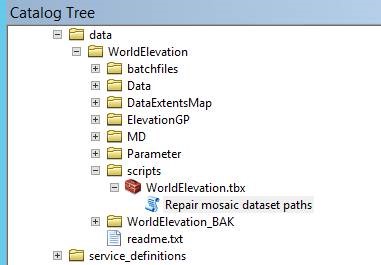
The Repair mosaic dataset paths dialog box appears.
- In the GDB Full Path field, insert the UNC path, for example, \\<server-ip>\CollectionX_source_documents\Terrain3D_11\MD\WorldElevation3D.gdb,
where <server-ip> is the network IP or server name of the
data appliance, and CollectionX is the collection where the Terrain3D service is located.
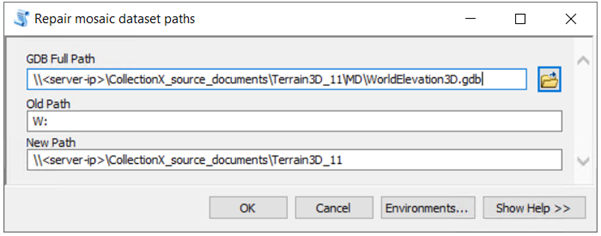
- In the Old Path field, insert W:. For the New Path, insert the UNC path, for example, \\<server-ip>\CollectionX_source_documents\Terrain3D_11, where <server-ip> is the network IP or server name of the data appliance, and CollectionX is the collection where the Terrain3D service is located.
- Click OK to apply the changes.
The tool repairs paths for all the mosaic datasets in WorldElevation3D.gdb.
- In a text editor, browse to .\Terrain3D_11\JSON and open Terrain3D.ImageServer.json.
- Find and replace \\\\server-ip\\CollectionX_cache with \\\\user-server-ip\\CollectionX_cache, where user-server-ip is the network IP or server name of the data appliance, and CollectionX is the collection where the Terrain3D image service is located.
- Find and replace \\\\server-ip\\CollectionX_source_documents with \\\\user-server-ip\\CollectionX_source_documents, where user-server-ip is the network IP or server name of the data appliance, and CollectionX is the collection where the Terrain3D image service is located.
Note:
Ensure that the paths contain double backslashes (\\\\).
- Save the changes.
Register data stores
Complete the following steps to register the data stores for Terrain3D:
- Sign in to ArcGIS Server using the ArcGIS Data Appliance data account with administrator privileges.
- Start Server Manager and sign in using your Primary Site Administrator account.
- Click the Site tab.
- From the Server Configuration tab, click Data Stores.
- Click the Register drop-down arrow and choose Folder.
- Provide a value for the Name parameter, for example, Terrain3D.
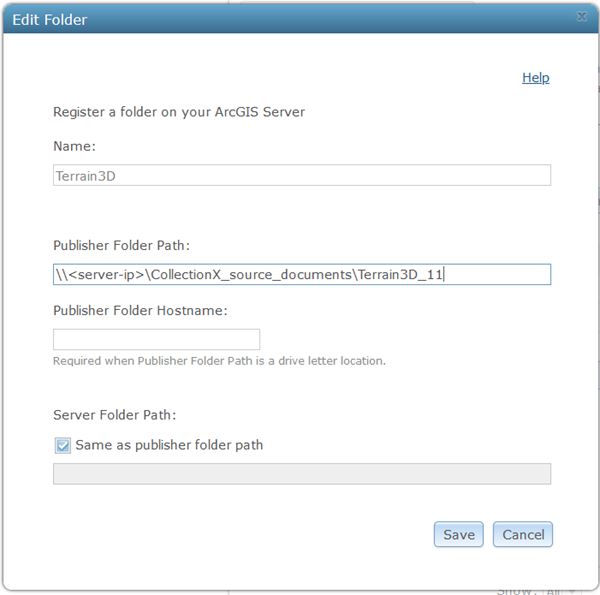
- For Publisher Folder Path, use \\<server-ip>\CollectionX_source_documents\Terrain3D_11, where <server-ip> is the network IP or server name of the data appliance, and CollectionX is the collection where the Terrain3D image service is located.
You do not need to specify a name for Publisher Folder Hostname or Server Folder Path.
- Click Create to register the directory.
Publish the .json file using ArcGIS REST admin
Follow the steps below to publish the \Terrain3D\JSON\Terrain3D.ImageServer.json file using ArcGIS REST admin.
- Sign in to the ArcGIS Server Administrator Directory using the URL https://<server name>:6443/arcgis/admin.
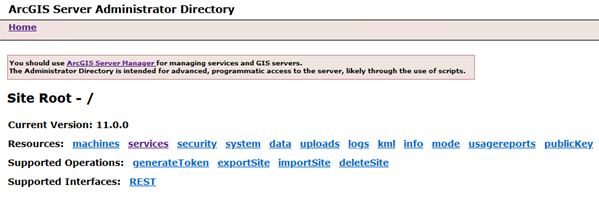
- Click services to view the available services under the root folder.
- Click CreateService.
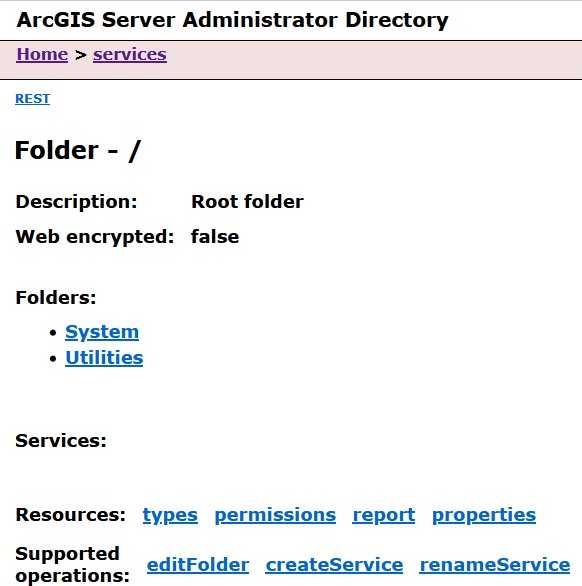
The Create Service page appears.
- Copy and paste the contents of Terrain3D.ImageServer.json into the Service (in JSON format) field.
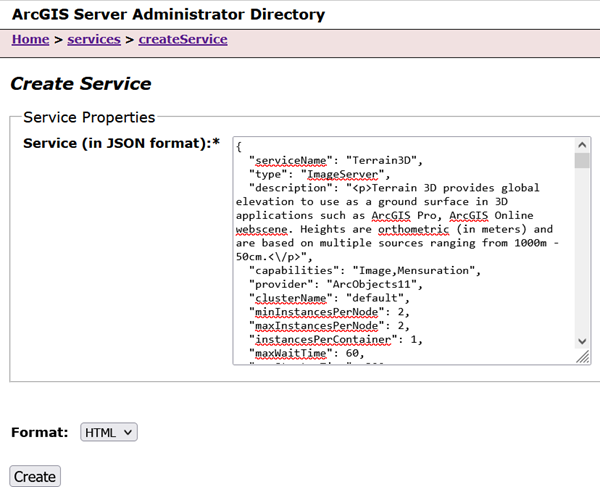
- Click Create to complete the publishing of the Terrain3D service.
The Terrain 3D service is ready to use.