The following sections describe how to use the StreetMap Premium locators in ArcGIS Pro and ArcGIS Enterprise. GCS_WGS_1984 is the coordinate system for all StreetMap Premium locators. See the ArcGIS Pro help topic Geocode with StreetMap Premium locators in ArcGIS Pro for more detailed information about the locators.
Use the locators in ArcGIS Pro
The locators are included with each StreetMap Premium release or the separate Locator Update releases on My Esri. Sign in to your My Esri account to download the appropriate 7-zip file or files to your hard disk and unzip the file or files. You can then browse for the locator or locators on disk, add the locator or locators to ArcGIS Pro, and begin using the ArcGIS Pro geocoding functionality.
Note:
If you notice that a locator is unavailable or there is a red exclamation point next to the locator name in ArcGIS Pro, click the Project tab, then click Licensing. Review the Esri Extensions list to see if your regional StreetMap Premium extension is active. If the StreetMap Premium extension is unavailable, check with your ArcGIS license administrator or contact Esri Customer Service.
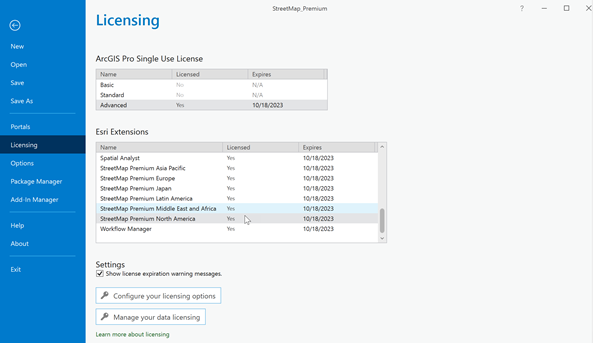
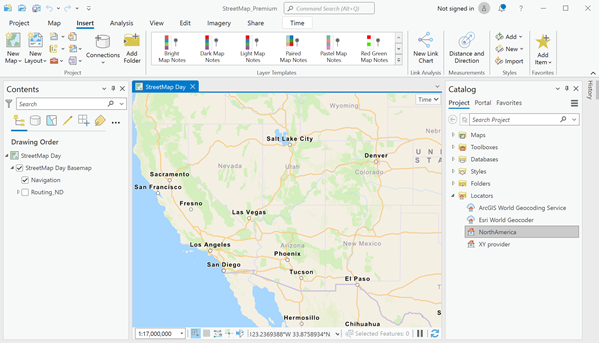
To add the locator to your ArcGIS Pro project (.aprx) through the Catalog pane, under Locators, right-click Add Locator. You can then use any of the geocoding functionality such as What's here? (right-click in the map), the Address Inspector, the Locate tool, or the Geocode Addresses or Reverse Geocode geoprocessing tools.

Use the locators in ArcGIS Enterprise
To use the locators in ArcGIS Enterprise (server and portal), you must have a StreetMap Premium extension for both ArcGIS Pro (discussed above) and ArcGIS Enterprise. If the StreetMap Premium extensions are unavailable, check with your ArcGIS license administrator or contact Esri Customer Service.
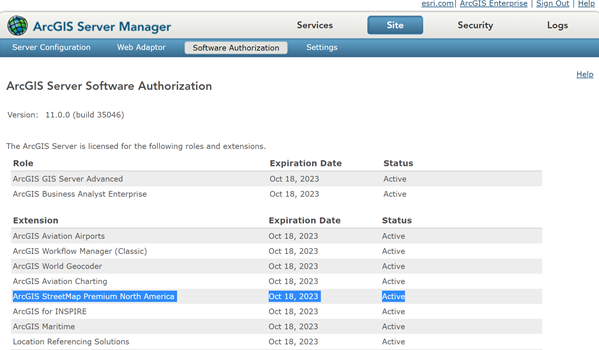
Use the Software Authorization for Server Wizard to install the StreetMap Premium extension for Enterprise. To check that your StreetMap Premium extension for Enterprise is installed, open ArcGIS Server Manager > Site > Software Authorization.
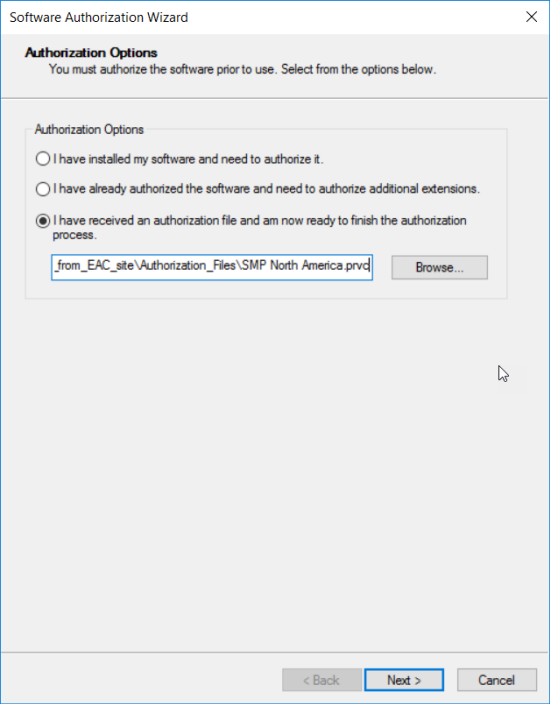
Note:
After you copy the locators to a folder on your system, use the operating system to share the folder and give your server administrative access rights and full control to the folder.
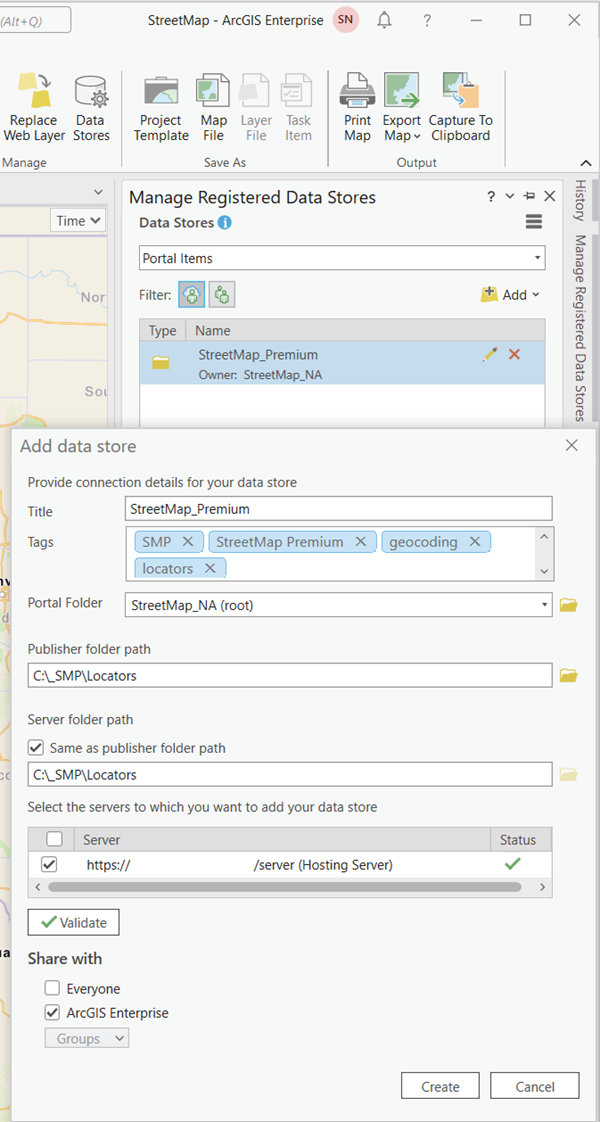
For Enterprise Administrator or Publisher roles, register the folder where you downloaded the locators with your server using the Share tab > Data Stores icon in ArcGIS Pro. Use the Validate button to confirm your server has access (green check mark) to the folder location. You may also use ArcGIS Server Manager to register the folder where you downloaded the locators with your server by going to Site > Data Stores > Database > Folder. On the Manage Registered Data Stores pane, select Add > Folder. On the Add data store dialog box, fill in the title, tags (optional), and the ArcGIS Enterprise portal folder for the data store. Next, enter the Publisher and Server folder pathnames and your servers where you want to add the data store. If you are already signed in to your Enterprise Portal through ArcGIS Pro, check the box next to your hosting server name and use the Validate button to confirm your server has access (green check mark) to the folder location. Finally, create your data store. If you skip creating a data store, ArcGIS Pro will attempt to copy the locator to your server before publishing, increasing the time required for publishing. See the ArcGIS Pro help topic manage registered data stores for additional information.
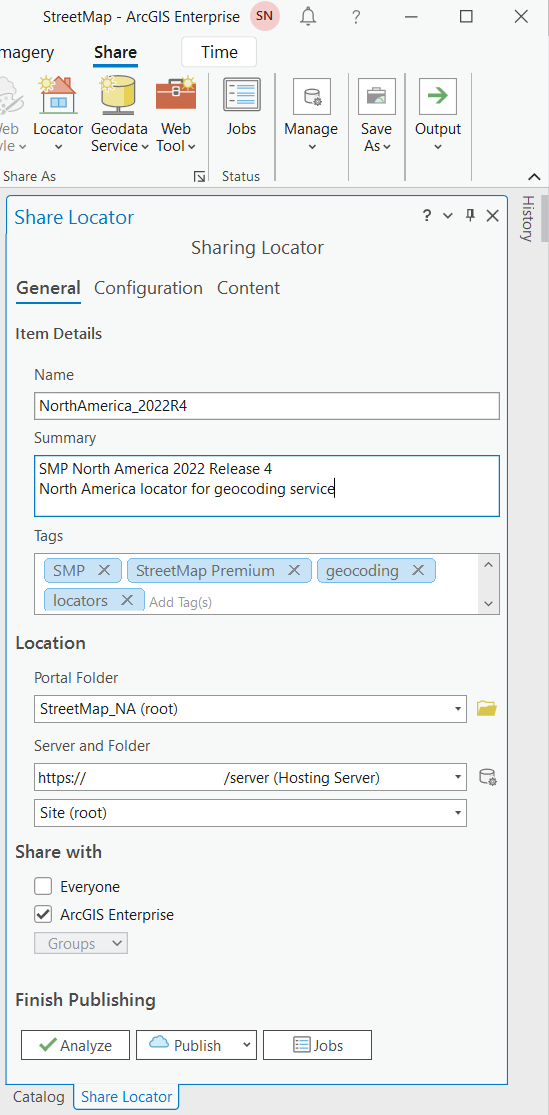
After adding your locator to ArcGIS Pro through the Catalog pane > Locators, you can publish the locator to your Enterprise. Right-click the locator name in the Catalog pane > Share as Locator or under the Share tab > Locator icon, select the locator you just added to ArcGIS Pro. On the Share Locator dialog box, fill in the required inputs. Also review the Configuration and Content sections to change any default settings. Use the Analyze button to check for any potential errors. If there are no errors or warnings found, finish sharing the locator to your Enterprise with the Publish button.
After publishing, you or others in your organization can search for the geocoding service under Catalog > Portal > My Content/My Groups/My Organization/ArcGIS Enterprise. Right-click the geocoding service, select Add To Project and begin geocoding.
Note:
Geocoding services are designated with a cloud above the locator icon. If no cloud is present, the locator has just been added to ArcGIS Pro from a local disk and is not shared with your organization.
Optimize performance for geocoding services published from the locators
Use these guidelines to optimize the performance of geocoding services published from the StreetMap Premium locators. Performance refers to the number of records processed per hour when batch geocoding. The guidelines apply to both the machine running the service and the locators themselves, and fall into four categories: storage, memory, CPU, and multithreading.
Storage
Geocoding reads a lot of data from storage, so quick-read times are very important for performance. It is important that the locator is stored on a fast storage device such as an SSD (solid state drive).
When publishing a locator to a server, the data should be copied to the appropriate location on the server prior to publishing. That location should then be registered as a data store for the server so that the locator is not copied to a different location on the machine during publishing. See the ArcGIS help pages for more information on how to manage registered data stores.
Memory
Geocoding performance greatly depends on the amount of memory available on the machine. Although geocoding does read the data from disk, this data is then stored in memory for even faster access during the geocoding process, so it is important that the machine has a sufficient amount of random access memory (RAM).
Because the locators can be read entirely into RAM, and because each locator consumes a specific amount of memory while the service is running, the recommended RAM required for each locator varies. In general, the recommended amount of RAM can be calculated using the following formula:
- S + (I x M) + 2 GB
Where:
- S = The size of the locator on disk.
- I = The number of instances running (usually eight on a standard server machine).
- M = The maximum memory used by each instance while service is in use (check Windows Task Manager for maximum memory use per ArcSOC.exe). M should never be less than 512 MB (0.512 GB), regardless of the amount of memory being used.
- 2 GB is added to provide sufficient memory for system-related usage.
Esri's testing has shown that the USA locator with a size of 12.87 GB and running eight (8) instances, has a maximum memory usage of about 1.54 GB per instance. Therefore, 27.19 GB of RAM is recommended:
- 12.87 GB + (8 x 1.54 GB) + 2 GB = 27.19 GB
Here are testing results for some other countries and regions. If you are using another locator, you can estimate the recommended amount of RAM by comparing the size of your locator against the examples below. For example, the France (FRA) locator with a size of 2.66 GB requires around 16 GB of RAM.
| Country or Region | Locator size (GB)* | Max memory (in use) (GB) | Recommended RAM (GB) |
|---|---|---|---|
Europe | 16.65 | 1.94 | 34.17 |
USA | 12.87 | 1.54 | 27.19 |
Latin America | 3.36 | 1.52 | 17.52 |
Brazil (BRA) | 1.77 | 1.09 | 12.49 |
Canada (CAN) | 1.57 | 0.615 | 8.49 |
Germany (DEU) | 1.43 | 0.544 | 7.78 |
South Africa (ZAF) | 0.41 | 0.582 | 7.07 |
Norway (NOR) | 0.36 | 0.512 | 6.46 |
Iceland (ISL) | 0.04 | 0.512 | 6.14 |
A machine with 32 GB of RAM should be sufficient for any locator except Europe, which would require 64 GB for optimal performance. For locators smaller than 2 GB in size, 16 GB of RAM should suffice.
CPU
The geocoding process is very central processing unit (CPU)-intensive, so the type of CPU on the server machine can significantly affect performance. Consider fast CPUs when choosing the machine for geocoding.
In addition to CPU performance, the number of CPUs on the machine is also important. Physical CPUs on the machine are what should be considered, not the "logical processors" that are seen in the Windows Task Manager. Although geocoding can utilize these "logical processors", performance will not continue to scale linearly once the number of processes exceeds the number of physical CPUs. Therefore, the number of physical processors should equal the number of ArcGIS server object containers (SOC).
Finally, ArcGIS Server has properties for Minimum number of instances and Maximum number of instances for the service. For geocoding, the minimum should always equal the maximum so there is no lag starting an instance when it is needed.
Multithreading
Geocoding can be parallelized, that is run across parallel processors, to get even more performance. This can be done in the locator or through the client.
Multithreading in the locator
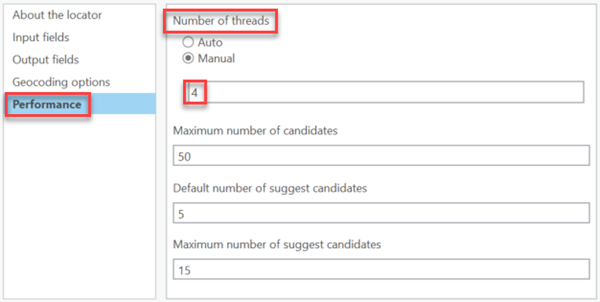
The locators have the number of threads set to 4 by default because it has been determined to be an optimal configuration for Server. You can manually set the number of threads on the Locator Properties dialog box on the Performance tab. Under Number of threads, select the Manual option and enter the number.
Multithreading the client
In addition to the multithreading that occurs within the locator, the client-side process that passes in geocoding requests can also be parallelized to submit multiple requests to the server at the same time when batch geocoding. A table can be broken into chunks, then each chunk is submitted to the server simultaneously. The results are stitched back together as they are returned.
This is handled by two properties: maxBatchSize and suggestedBatchSize, which are typically set at 1000 and 150, respectively, and can be accessed using the tools described below. When configuring these properties, it is important to make sure that errors and time-outs are handled properly. This can be done by splitting batch sizes in half until no more errors are returned.
The Geocode Addresses geoprocessing tool will automatically handle time-outs in the client, but it does not split the job into multiple requests for parallelizing the geocoding job. More about this tool can be found in Geocode Addresses (Geocoding) in the ArcGIS Pro help.
Geocode Locations From Table and Geocode File are both tools that can be used to parallelize your geocoding using Portal if the utility service is configured to do this. More about how to do this can be found in Best practices for batch geocoding in the portal in the Portal for ArcGIS help.