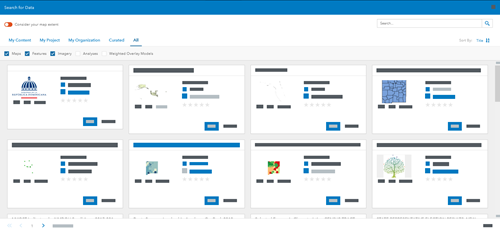
The ArcGIS GeoPlanner Add Data tool allows you to discover data and add it to a map. All data is either published or added as an item in your ArcGIS organization. Data items that are uploaded, exported, or generated by analysis tools are automatically added to your ArcGIS organization.
- Open a project in GeoPlanner.
- Click the Explore tab.
- Click Add Data.
The Search for Data dialog box appears.

Tip:
The Explore tab only supports 2D views. To add 3D layers to the map, click Contents
 to open the Contents pane and click Add Data
  in the Data Layers section.
 - Optionally, use one of the tabs on the Search for Data dialog box to filter the data items:
- My Content—Access data that you own from your ArcGIS organization.
- My Project—Access data from the open project.
- My Organization—Access all data available to you from your ArcGIS organization.
- Curated—Access data from ArcGIS Living Atlas of the World.
- All—Access all available data.

- Optionally, filter the data items using the following check boxes:
- Maps
- Features
- Imagery
- Analyses
- Weighted Overlay Models

- Optionally, provide a keyword in the Search text box and click the Search button
 or press Enter to search for data items that match your search criteria and the chosen filters.
Tip:
You can also restrict the search results to the map extent by clicking the Consider your map extent toggle button.
- Optionally, choose one of the following options to sort the data items by category:
- Relevance
- Title
- Owner
- Rating
- Views
- Date
- Find the data item you want to add and click Add.
The data item is added to the map and appears in the Contents pane.