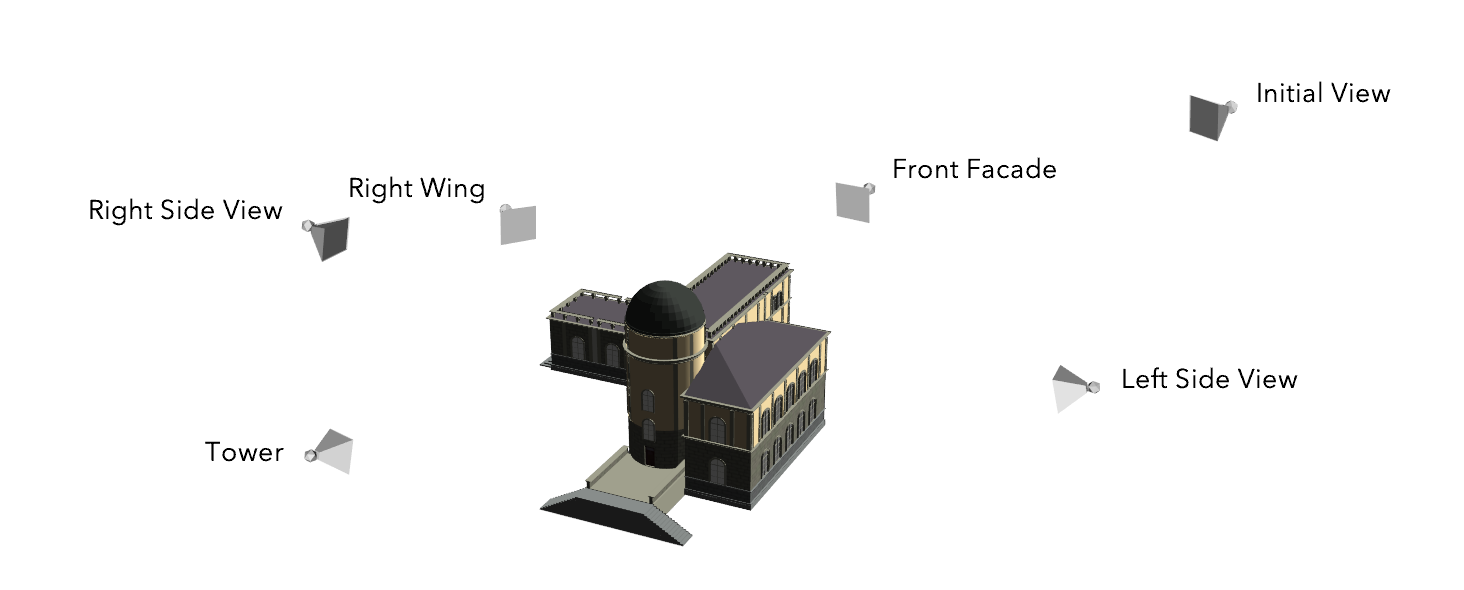
A specific camera configuration can be saved as a bookmark. Bookmarks are accessible from the Bookmarks menu  . The home bookmark can also be activated by pressing H.
Create a bookmark
Bookmarks belong to the camera from which they were created and can only be applied to that camera.
To create a bookmark, do the following:
- Adjust the camera as desired for the bookmark.
- Click the Bookmarks menu
 .
. - Click New Bookmark.The first 10 bookmarks are mapped to the numeric keypad and can be activated by pressing the corresponding key on the numeric keypad.
- Choose a name and confirm.
Edit a bookmark
You can edit a bookmark in the following ways:
- Click the Bookmarks menu
 and click Edit Bookmarks.
 - Click a Bookmark gizmo in the Viewport window
 to open Bookmarks
  in the Inspector window
  .
. - Click Edit > Preferences > General > Viewport > Bookmarks.
In the Bookmarks menu, you can create bookmarks, change the order of the bookmarks in the list, rename bookmarks, and update the camera properties such as two-point perspective correction.
A bookmark has the same settings as a camera.
Tip:
- Bookmarks can be selected and transformed directly in the Viewport window
 using the Move, Scale, and Rotate tools.
 - Press Ctrl+[Numpad] to create a bookmark or update the current bookmark to the corresponding number entered.
Bookmarks visibility
Turn on or off visibility of Bookmark gizmos in the View Settings menu  . With Bookmark gizmos visible, you can see the bookmark position and camera orientation in the Viewport for each bookmark.

Tip:
Turn on bookmarks visibility when creating a CityEngine scene that will be exported to 360 VR Experience.
Create clipping planes
The near and far clipping planes are virtual planes perpendicular to the camera's view axis and help determine which parts of a scene are visible. Objects closer to the camera than the near plane or farther away than the far plane are not rendered. You can create clipping planes using Bookmarks  .
.
To create clipping planes, do the following:
- Click one of the Bookmark gizmos
 to open Bookmarks
  in the Inspector window
  .
. - Turn on the Custom Clipping Planes toggle button.
This sets the near and far clipping planes based on the values of the near and far clipping distances. Otherwise, the clipping planes are automatically set so that the whole scene is visible.
- Set the Near Plane Distance and Far Plane Distance values.
- Near Plane Distance is the distance in meters between the camera and the near clipping plane. Objects located between the camera and the near clipping plane are not rendered.
- Far Plane Distance is the distance in meters between the camera and the far clipping plane. Objects located behind the far clipping plane are not rendered.
- Click Bookmarks
 to see a preview of the clipping plane in the Inspector window
  .
. - To apply the bookmark with the set clipping planes to the Viewport window
 , click the bookmark in the Bookmarks menu
  .
.To reset the scene in the Viewport window
 , click the View Settings menu
  and choose Reset clipping planes.