The Set Origin Vertex command  makes the selected vertex the first vertex in the sequence of vertices that form a polygon boundary (or part). This command is available when you right-click a polygon vertex while editing feature vertices or creating a polygon feature with vertex editing enabled.
To edit an existing polygon feature and change the origin vertex, complete the following steps:
- If necessary, enable editing.
Note:
By default, editing tools are always enabled, and ArcGIS AllSource automatically starts and stops edit sessions as you create or modify data. Alternatively, edit session options can be configured to enable and disable editing manually.
- Add your data and configure settings for editing.
Confirm that the feature layer you are editing is editable, the coordinate system assigned to the active map is suitable for the type of edits you're performing, and snapping is configured to help you work efficiently and accurately.
- On the ribbon Edit tab, click Modify
 in the Features group.
 - Click Edit Vertices
 in the Modify Features pane.
To find the tool, expand Reshape, or type Vertices in the Search text box.
- Click the Change the selection tool
 in the tool pane and select a polyline or polygon feature.
If you select more than one feature, reselect the feature. Alternatively, click the feature in the pane selection view to flash it in the map, right-click and click Only Select This
 .
. Note:
If Map Topology is enabled, click the Features tab to show the feature selection tool.
The Features and Edges tabs are not required to complete this workflow. These tabs are available only when map topology or a geodatabase topology is enabled so that you can switch between editing feature vertices and topological edges and nodes.

The selected feature appears highlighted in the map with vertex handles. By default, project settings symbolize the first vertex green and the last vertex red.
- Hover over the vertex you want to set as the origin vertex.
- When the pointer changes to the directional cursor
 , right-click and click Set Origin Vertex
  .
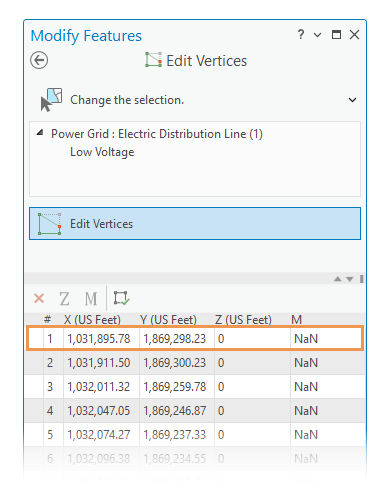
.The selected vertex changes to the origin vertex and appears in the top row in the geometry properties table for the selected polygon feature or part. The order of vertices is preserved and updates accordingly. If the selected feature is a multipart polygon, only the vertices for the selected part update.

- On the ribbon Edit tab, click Save
 in the Manage Edits group.
Dive-in:
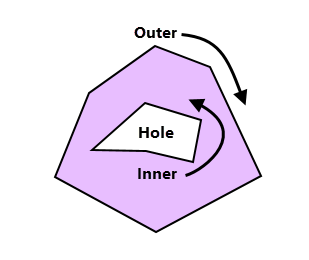
A polygon feature is defined by one or more closed boundaries (or parts) that are organized as one or more outer boundaries and zero or more inner boundaries. Each boundary consists of a contiguous set of line segments with the same vertex defining the start and end.
An outer boundary is oriented clockwise while an inner boundary is oriented counterclockwise. If a polygon has an inner boundary, the region created by the boundary displays as a hole. Similarly, if a hole contains a boundary, the region displays as an island.

Stepping through an outer boundary from the first vertex to the last vertex, the area to the right is referred to as the interior of a polygon and the area to the left is referred to as the exterior.