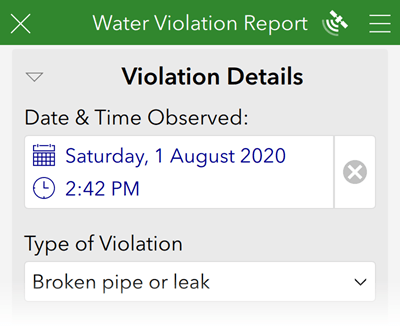
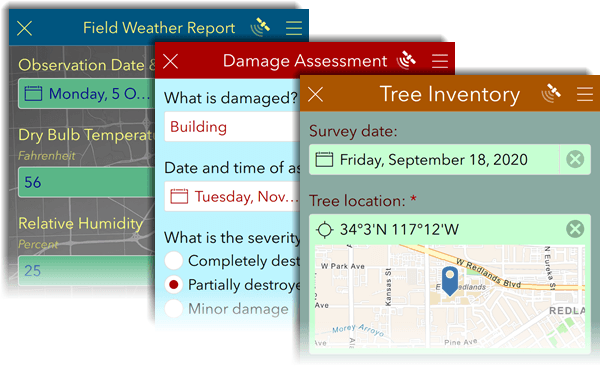
Survey123 Connect provides tools to configure the presentation of a survey, allowing it to stand out to users. You can change the survey's information presented in the gallery, the title present when you've opened the survey, and the colors and styling of the survey to make it visually distinct. You can also insert media into the survey and add HTML formatting.
Change thumbnail, title, description, and tags
The thumbnail and survey name are important to visually differentiate surveys in the Survey123 field app gallery. This is particularly important if you're creating multiple surveys for your own use or if field crews download more than one survey.

To change the thumbnail and other properties of a survey item, complete the following steps:
- Open a survey in Survey123 Connect.
- Click the Details tab.
- Click the thumbnail image to browse to an image file. For best results, use images that are 600x400 pixels.
- Optionally, provide text for the item title, summary, and description of the survey.
Changes made here will be reflected in the survey gallery and also in the survey's form item in your ArcGIS organization once the survey is published.
Caution:
Survey123 Connect requires all image files used for thumbnails to have a lowercase file extension. Uppercase file extensions are not recognized by Survey123 Connect, and these thumbnails won't be published with the survey.
The thumbnail may not display correctly if its file name contains spaces, symbols, or special characters.
To add formatting, links, or other rich text elements to the survey description, it is recommended that you use the description editor for the form item in your ArcGIS organization. When editing any form item properties in your ArcGIS organization, you must download the survey in Survey123 Connect again to see the changes on the Details tab.
Set the survey title
The survey title appears when you open the survey from the gallery. It can provide a more detailed description of the survey. The survey title is not the same as the survey name, which is displayed in the gallery.

You can set the survey title by entering the value in the form_title column of the settings worksheet.

Alternatively, you can define your survey's title by including a note question in your survey named generated_note_form_title. This method allows you to provide translations for the title and include values from the survey response in the title using the ${question_name} syntax. For more information, see Customize form elements.
Add media to a survey
Adding media to surveys can be helpful in many ways. It's not just a matter of making surveys pleasing to the eye; images or audio in the survey can help users make determinations when filling in information. Providing images in surveys can assist with making visual identifications or estimations.
To be included in a survey, image and audio files must be saved in the survey's media folder.
You can add images to any question by including the exact file name of the image file (including the file extension) in the media::image column of the survey worksheet. Supported file types include BMP, GIF, JPC, JPE, JPEG, JPF, JPG, and PNG. For GIF images, animation is supported in the Survey123 web app only. The Survey123 field app also supports TIF and TIFF images.
You can add audio to any question by including the exact file name of the audio file (including the file extension) in the media::audio column of the survey worksheet. Supported file types include MP3 and WAV. Additional audio formats are supported on certain platforms. For example, playback of M4A files is supported on iOS. When audio is included in a survey, a speaker button is active on the form. Select this button to play the audio file.
Note:
Survey123 is case sensitive. Ensure that all references to file names and their extensions use the same case as the actual files. For example, Tree.JPG is not the same as tree.jpg, and if referenced like this, the image does not display in the survey.
Images for choices in multiple choice questions are not supported by the Survey123 web app when using the minimal or autocomplete appearance.
Use a note question to display an image or play an audio clip that is not associated with a question.
Add media to a note

To add an image to a survey, complete the following steps:
- Preview a survey in Survey123 Connect.
- On the toolbar at the bottom, open the Media tab.
- Click Open media folder, and add an image file.
This file will appear on the Media tab.
- In the survey worksheet, add a note question and type the file name of the image in the media::image column.
Media names are case sensitive.
The image is presented in a note in the survey. Select the image to open it in full-screen view. Select the Back button in the upper left corner to return to the survey.
Add media to choice lists
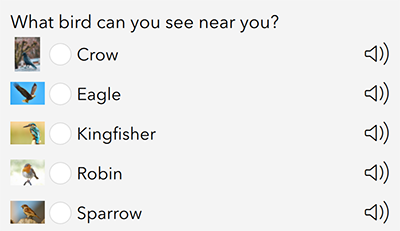
You can also add images and audio to the choices for select one and select multiple questions to provide more information to users about each choice.

To add media to the choices for select one and select multiple questions, complete the following steps:
- Preview a survey in Survey123 Connect.
- On the toolbar at the bottom, open the Media tab.
- Click Open media folder, and add image and audio files.
These files will appear on the Media tab.
- In the choices worksheet, add a choice to the choice list and type the file name of the image for the choice in the media::image column.
Media names are case sensitive.
- Type the file name of the audio file for the choice in the media::audio column.
- Repeat steps 4 and 5 for the other choices in the list.
Images and audio clips are presented alongside each choice for select one and select multiple questions that use that choice list.
Style settings
Style settings allow you to control the colors of various elements in the survey. The Style panel is located on the right of the Form tab.

You can customize text and background colors for the survey header, body, input fields, and footer. Click the palette button to choose a color, or provide the hexadecimal color code or HTML color name in the field provided. The contrast button above the text color inputs provides an indication of readability. Click the button to see the contrast ratio between the text and background colors; a ratio below 4.5 is not recommended, as indicated by a red contrast button.
You can also use an image as the background of the survey. The image file you select as the background image will be copied to the media subfolder in the survey project folder.
Group, page, and repeat colors
You can set the colors for groups, pages, and repeats independently of the overall survey style by adding the backgroundColor and borderColor parameters to the body::esri:style column. Colors can be specified by standard HTML color names or hex color codes. You can provide these as a constant or as a reference to a question. Multiple parameters are separated by a space, for example:
backgroundColor=LightCyan borderColor=#483D8B
Note:
The backgroundColor and borderColor parameters are not supported in the Survey123 web app.
Grid style groups do not support borderColor.
HTML formatting
You can use HTML formatting in question labels and hints, as well as the labels in choice lists. Applying formatting to this text can help draw attention to important information. Supported HTML formatting is as follows:
| Tag | Attribute |
|---|---|
a | href, style |
abbr | title |
audio¹ | autoplay, controls, loop, muted, preload |
b, strong, i, em, u, ul, ol, li, tbody, br, hr | |
dd, dl, dt | style |
div¹ | style, align |
figcaption | style |
figure | style |
font | size, color, style |
h1, h2, h3, h4, h5, h6 | style |
img | src, width, height, border, alt, style |
p | style |
source¹ | media, src, type |
span | style |
sub | style |
sup | style |
table | width, height, cellpadding, cellspacing, border, style |
| td, th | height, width, valign, align, colspan, rowspan, nowrap, style |
tr | height, valign, align, style |
video¹ | autoplay, controls, height, loop, muted, poster, preload, width |
¹Only supported in the Survey123 web app.
Note:
Links in choice labels don't function in the Survey123 web app in the following situations:
- When the appearance set in Survey123 Connect is minimal or autocomplete
- When using the rank question type in Survey123 Connect
- When using the Dropdown or Ranking question types in the Survey123 web designer
By default, a hyperlink created with HTML formatting opened in the Survey123 web app will open the destination in the same tab as the survey. To open this link in a new tab instead, add target="_blank" to the a href tag, for example:
<a href="https://www.esri.com" target="_blank">Link to Esri website</a>
HTML formatting will not display in the following areas of the web form:
- Required and constraint messages
- Choice labels from either an external select or external choice question
- Choice labels if the choice order is set to randomize
Thank you screen
A thank you screen appears when data is submitted by the user in the Survey123 web app. You can edit this screen on the Options tab of the web designer and use rich text editing, including links and images.
Note:
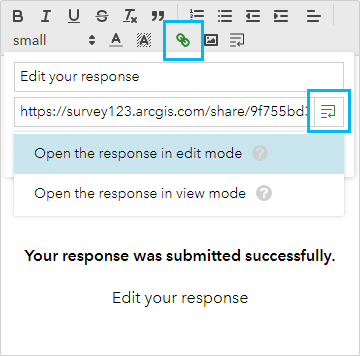
For surveys designed in Survey123 Connect, you can edit the thank you screen on the Design > Options tab for the survey in the Survey123 website. To save the changes, click Publish and confirm.You can add a link to the thank you screen that will reopen the survey response that was just submitted, in either edit mode or view mode. These built-in links use a dynamic globalId parameter to open the response and allow the user to edit and resubmit it or view it in a read-only state. Click the Link button in the thank you screen editor to add a link. Click the Use a survey link button to add a formatted URL for editing or viewing the survey response.

You can allow users to submit a new response, either by providing a link in the thank you screen that users can click to reload the survey or by reloading the survey automatically after a specified delay. Alternatively, you can automatically redirect to a nominated URL. The default delay is 3 seconds. If the delay is set to 0, the thank you screen is not shown when the survey is complete and the redirect occurs immediately once the survey is completed. URL redirection is ignored when a survey is embedded using an iframe.
The autoReload URL parameter takes precedence over the delay set in the Survey123 web designer.
For surveys designed in Survey123 Connect, you can also customize the content for the thank you screen using a special note question in the XLSForm. For more information, see Customize form elements.