Processes provide you with design-ready layers, allowing you to more efficiently design maps. The Processes window can be accessed from the Compilation window.

Processes are actions that run on the map layers in Adobe Illustrator to modify the downloaded artwork. You can run processes to apply custom libraries, add a legend and geodesic scale bar with scale text to the map, and join line paths together. To save time, you can also set applicable processes to run automatically when you sync the map. To run a process manually on a map that has already been downloaded, ensure that the map on which you want to run the processes is the active tab in Illustrator.
Note:
To run the Map Scale process, your Elements layer must be unlocked and set to visible. If you deleted the Elements layer, a new one is created when you run the process.
Use custom Illustrator libraries
The Symbols, Brushes, and Swatches processes allow you to replace default map symbology with custom styles and symbols from your Adobe Illustrator libraries.
Tip:
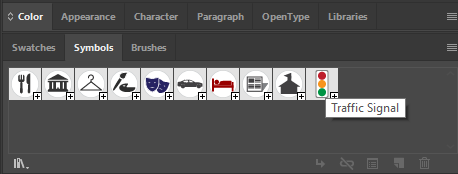
ArcGIS Maps for Adobe Creative Cloud provides additional symbols, brushes, and swatch libraries with mapping-focused designs. They are located in Illustrator's libraries menus under ArcGIS Maps.
Note:
The Custom Swatch process does not support pattern swatches. Apply pattern swatches in the downloaded map using Adobe Illustrator instead.
There is one process for each Illustrator library type: symbols, swatches, and brushes. You can run each corresponding process automatically during a map sync or on an Illustrator file after syncing. The setup steps for these two approaches vary slightly.
Replace map symbology during sync
- In the Contents pane, rename the layer that contains the symbols you want to replace. Use the exact same name as the symbol, brush, or swatch item from your Illustrator library. This name is case sensitive.
- In the Processes window, select the library type you'll use to replace map symbology: Symbols, Brushes, or Swatches.
- Click Set Path. Browse to and select the Illustrator library file.
- Check the Run on Sync box and close the Processes window.
When you're ready to sync your map, the default map symbology will be replaced accordingly.
Caution:
If you enable Run on Sync for a process, that process will always try to run when you sync maps (until you disable it).
Replace map symbology on a downloaded file
- In the Illustrator Layers panel, rename the layer that contains the symbols you want to replace. Use the exact same name as the symbol, brush, or swatch item from your Illustrator library. This name is case sensitive.
- In the Processes window, select the library type you'll use to replace map symbology: Symbols, Brushes, or Swatches.
- Click Set Path. Browse to and select the Illustrator library file.
- Click Replace to run the process.
The map symbology in the Illustrator file is replaced with your library item.
Example
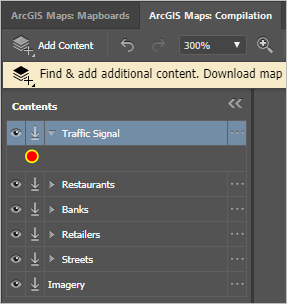
In this example, you've created a mapboard and added content to the map in the Compilation window. You already have an Illustrator library saved and set the path in the Processes window to replace the appearance of points in a layer named traffic signals. You enabled Run on Sync.
Note:
Use the Symbols process for point data, Brushes for linear data (such as roads), and Swatches for closed path polygon data.
You linked to a symbols library that contains a symbol named Traffic Signal.

To replace the simple point in the traffic signals layer, you renamed the corresponding layer to use the same name as the symbol. The matching Traffic Signal name allows all the points in this layer to be replaced with your custom symbol.

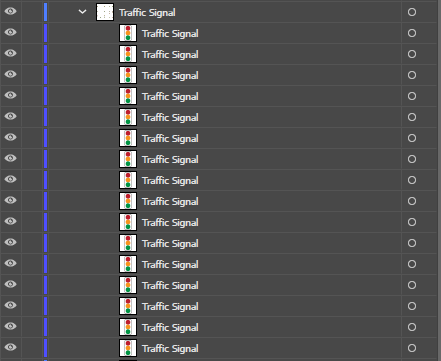
Finally, after downloading the map with the Symbols process set to run on sync, your custom Traffic Signal symbol replaced the simple points in the artwork layers, as shown in this example Illustrator Layers panel.

Join Lines
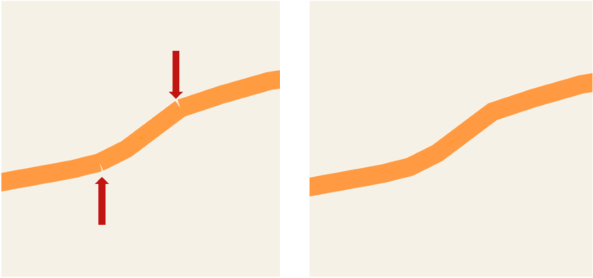
Use the Join Lines process to concatenate selected open paths in Illustrator files created with the extension. The operation joins paths at their touching endpoints within a distance of 0.005 points.

Note:
To join paths, you must first release any compound paths in Illustrator by selecting them and clicking the Compound Path > Release option from the Object menu.
- In Adobe Illustrator, select the paths to be joined in your downloaded map.
Tip:
When joining several lines, start with 100 or fewer paths at a time to see how your computer performs, and then work your way up with larger batches. To join larger amounts of paths, split the process up into batches.
- Return to the Compilation window, open the Processes window and click the Join Lines tab.
- Click Join Lines to run the process.
In the Layers panel of Illustrator, a new layer containing the newly joined paths is created above the original layer. This new layer has the same name as the layer containing the original paths, with the term Join appended to the name. The original layer is not removed.
If you run the Join Lines process on paths selected from multiple layers, the new layer appears above the topmost selected layer using that layer’s name with Join appended.